Excel/CSV Import
Introduction
To conveniently import data from other systems into edjufy, you can use our universal Excel/CSV Import interface. If we offer a specific interface for your master data system, we definitely recommend using the respective specific importer.
Excel Import Templates
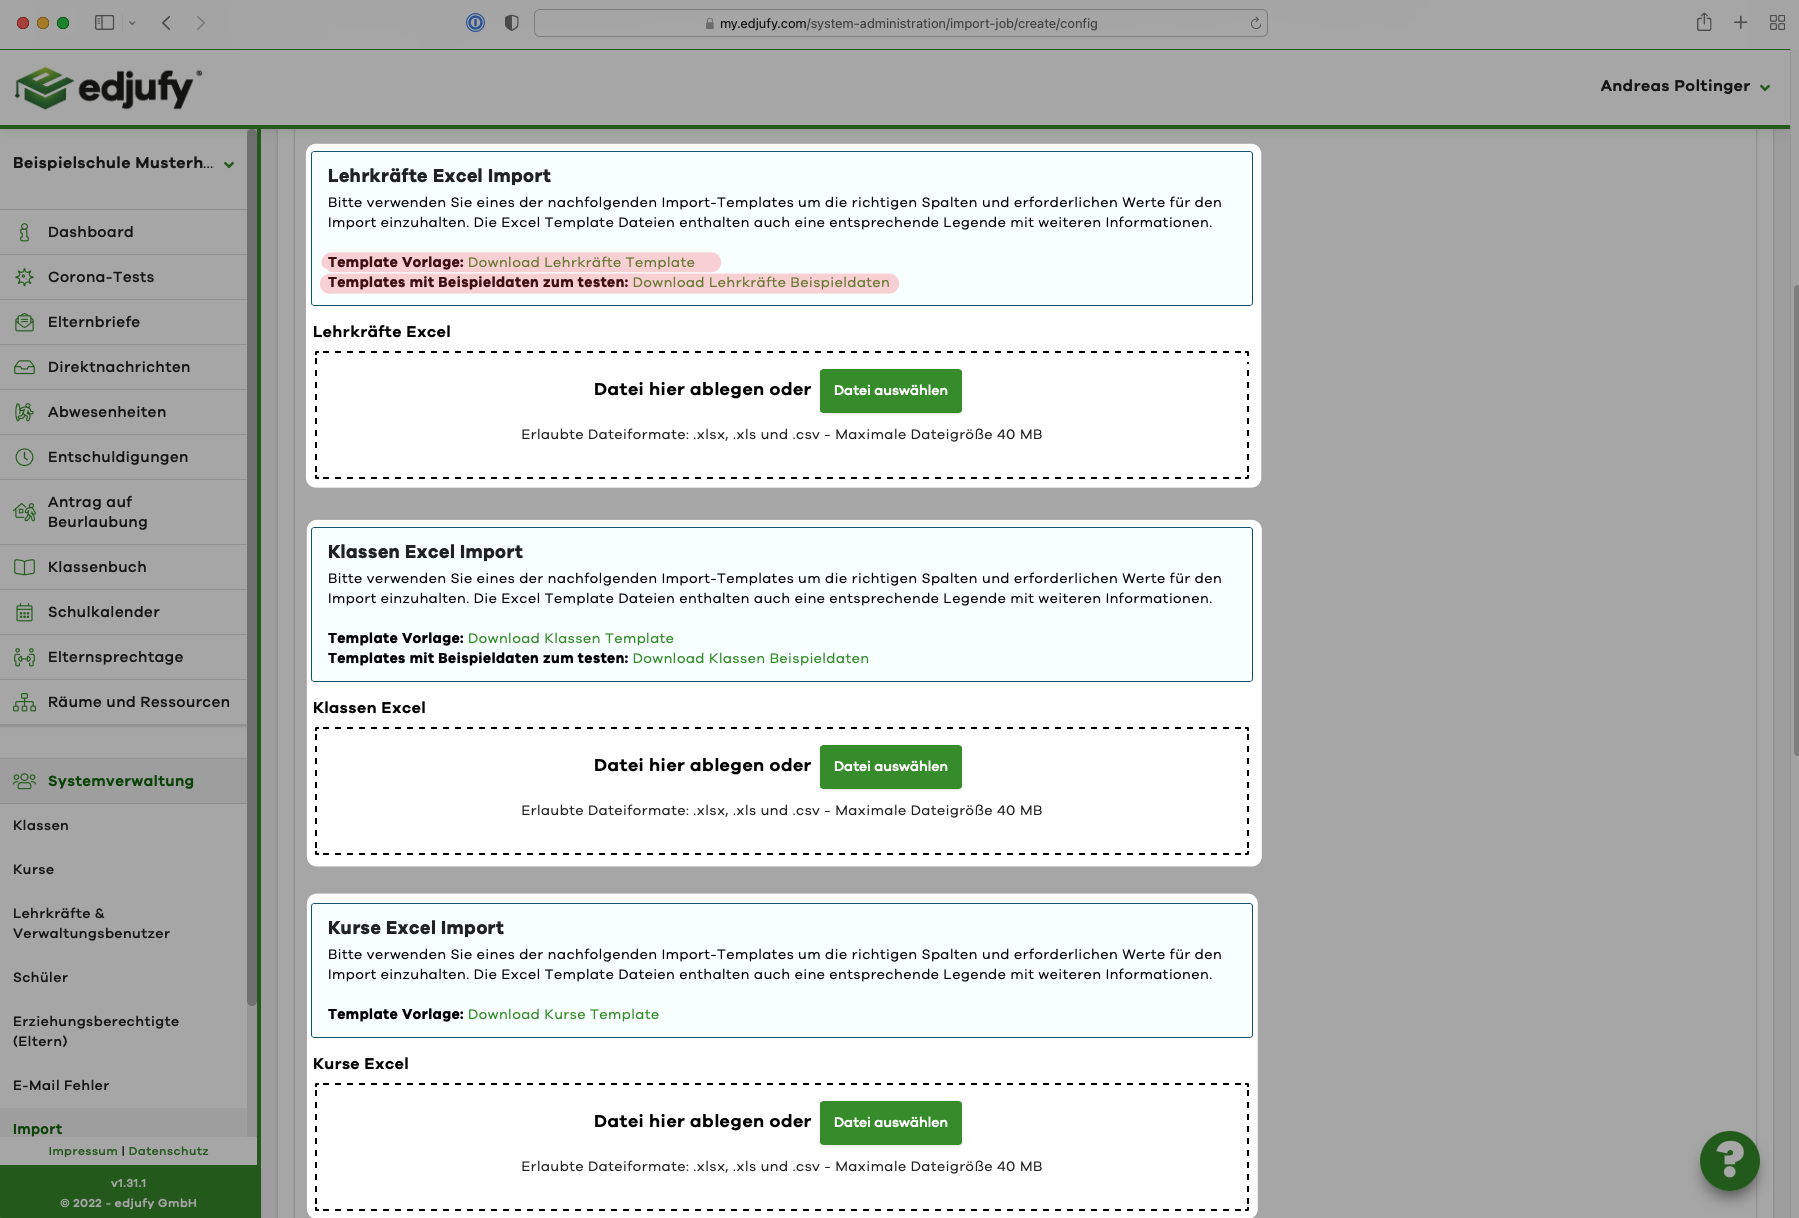
Since the naming of the individual columns of your import file is essential, we strongly recommend using the templates we provide. These templates contain all required columns with the correct naming as well as a short legend with information about the individual columns.
The corresponding templates can be downloaded in the most current version on the import page.
Import into edjufy
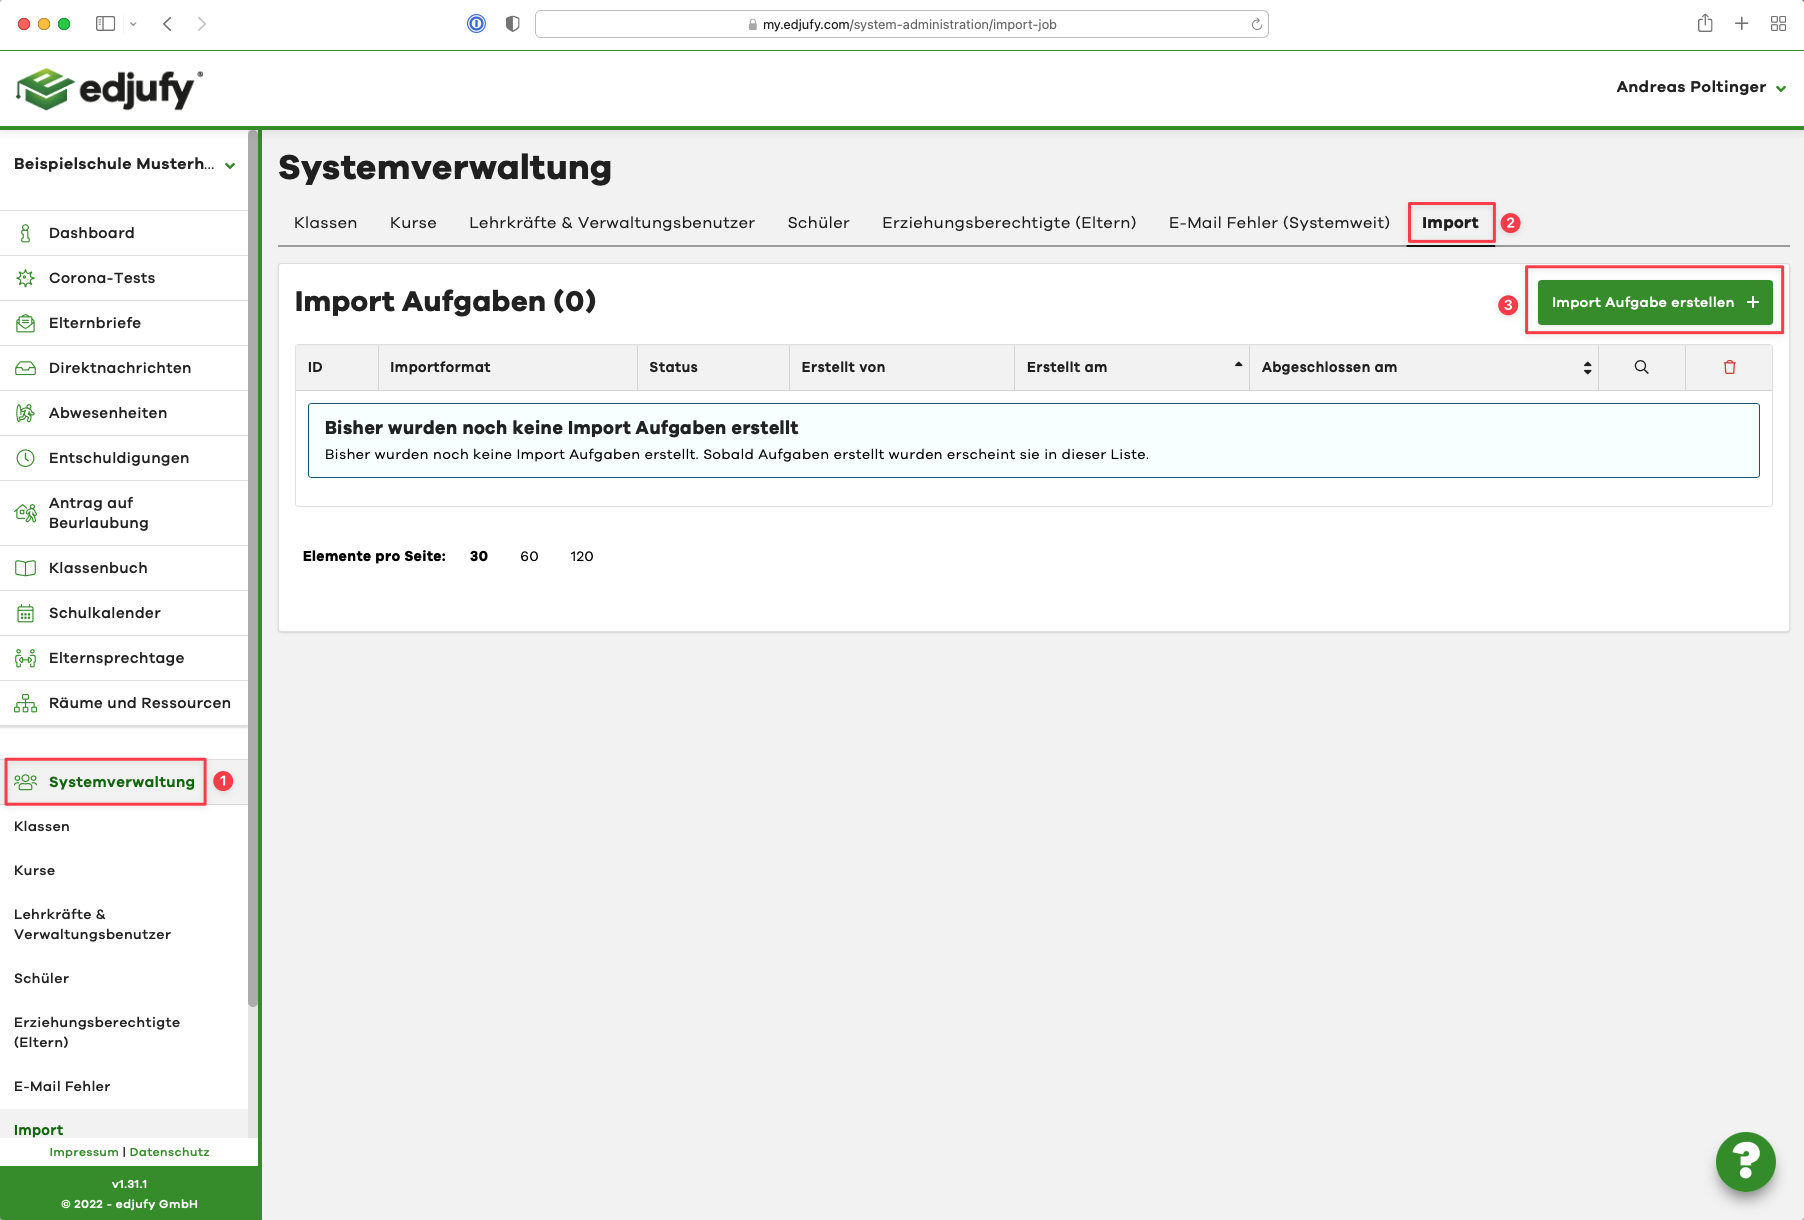
Open the edjufy Import dialog (2) in the System Administration (1). In this list, you can see all created "import jobs". For a new import, click on the Create Import Task + button (3).
Please select the import format Excel / CSV.
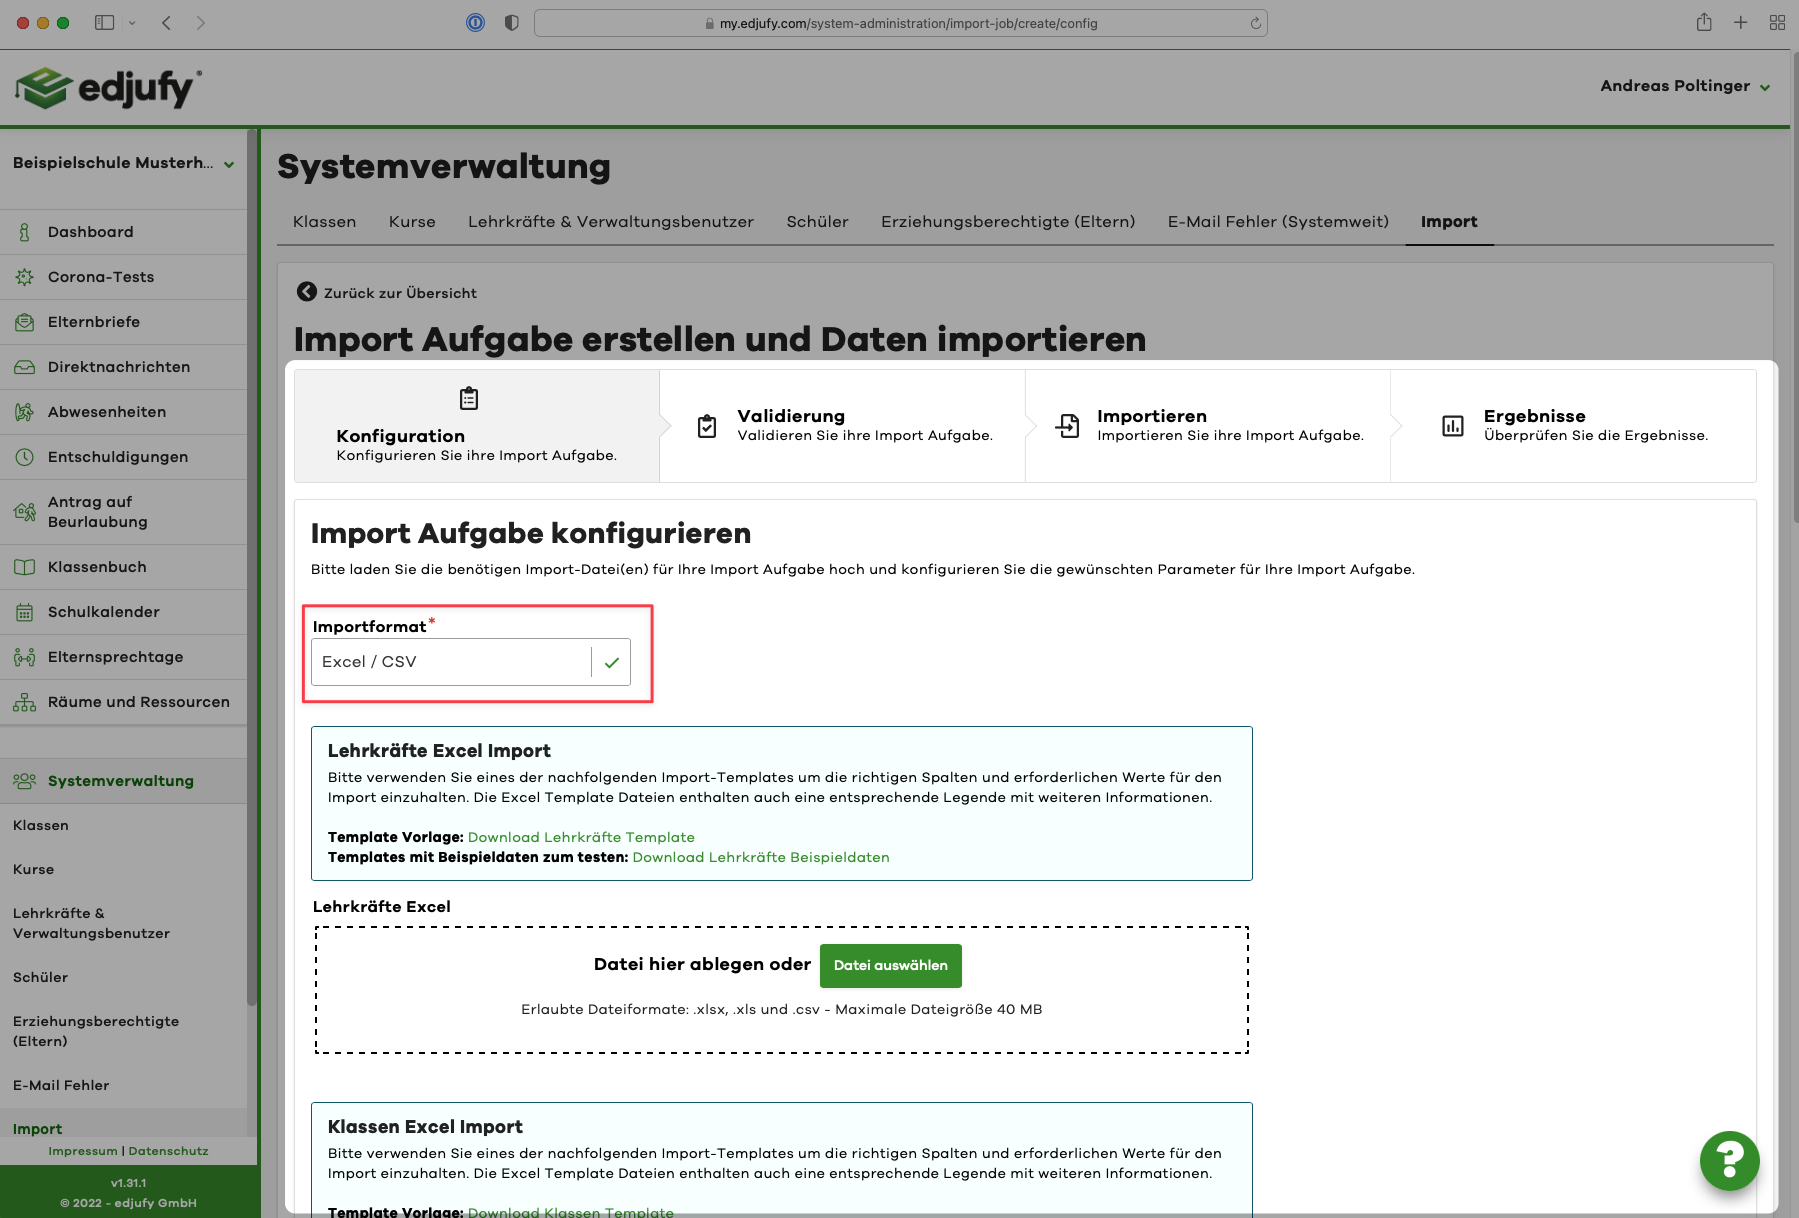
For each data type (Teachers, Pupils, School Classes, ...) there is a separate upload area where you can upload your file. Additionally, we offer you a template file and in some cases sample data for testing for each upload area / data type.
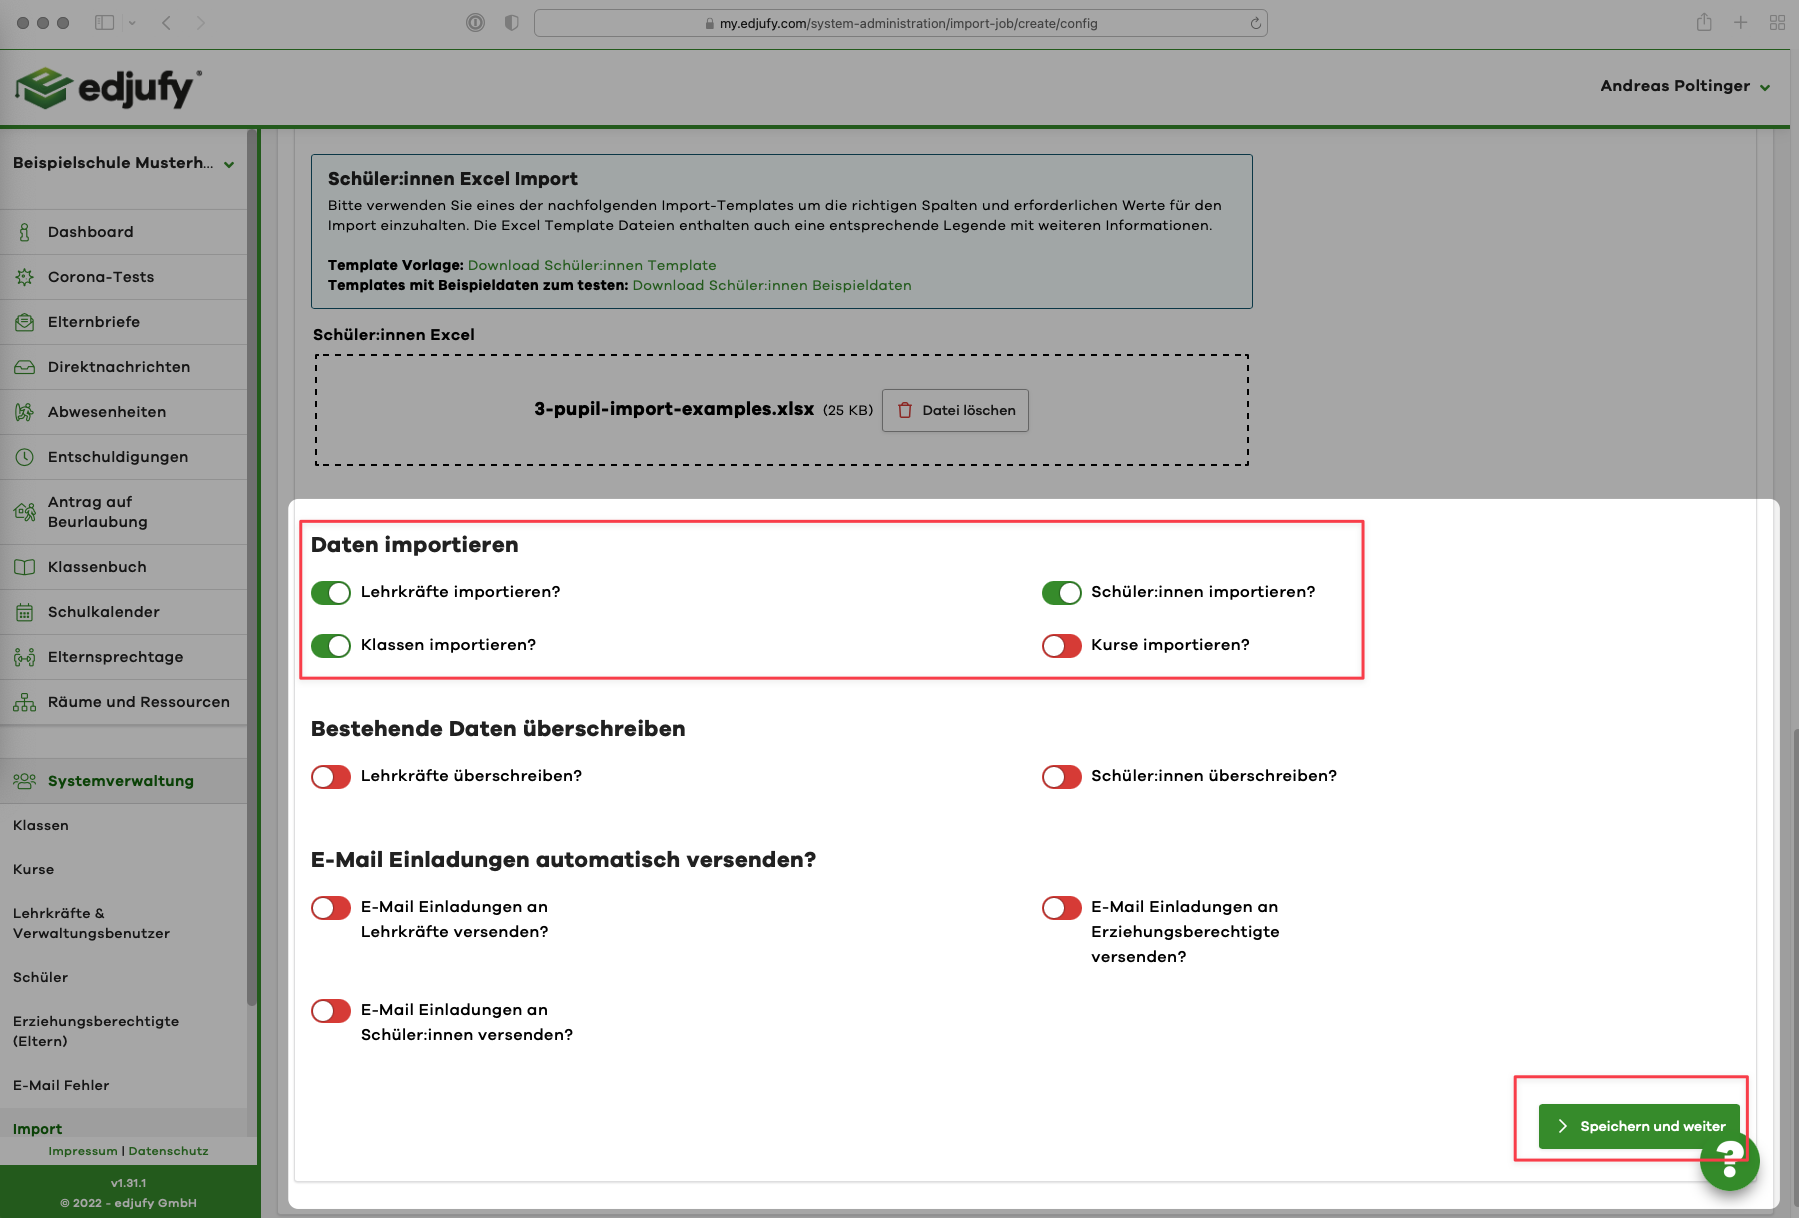
Then select the records you want to import or overwrite and click on the Save and Continue button to proceed to the next step.
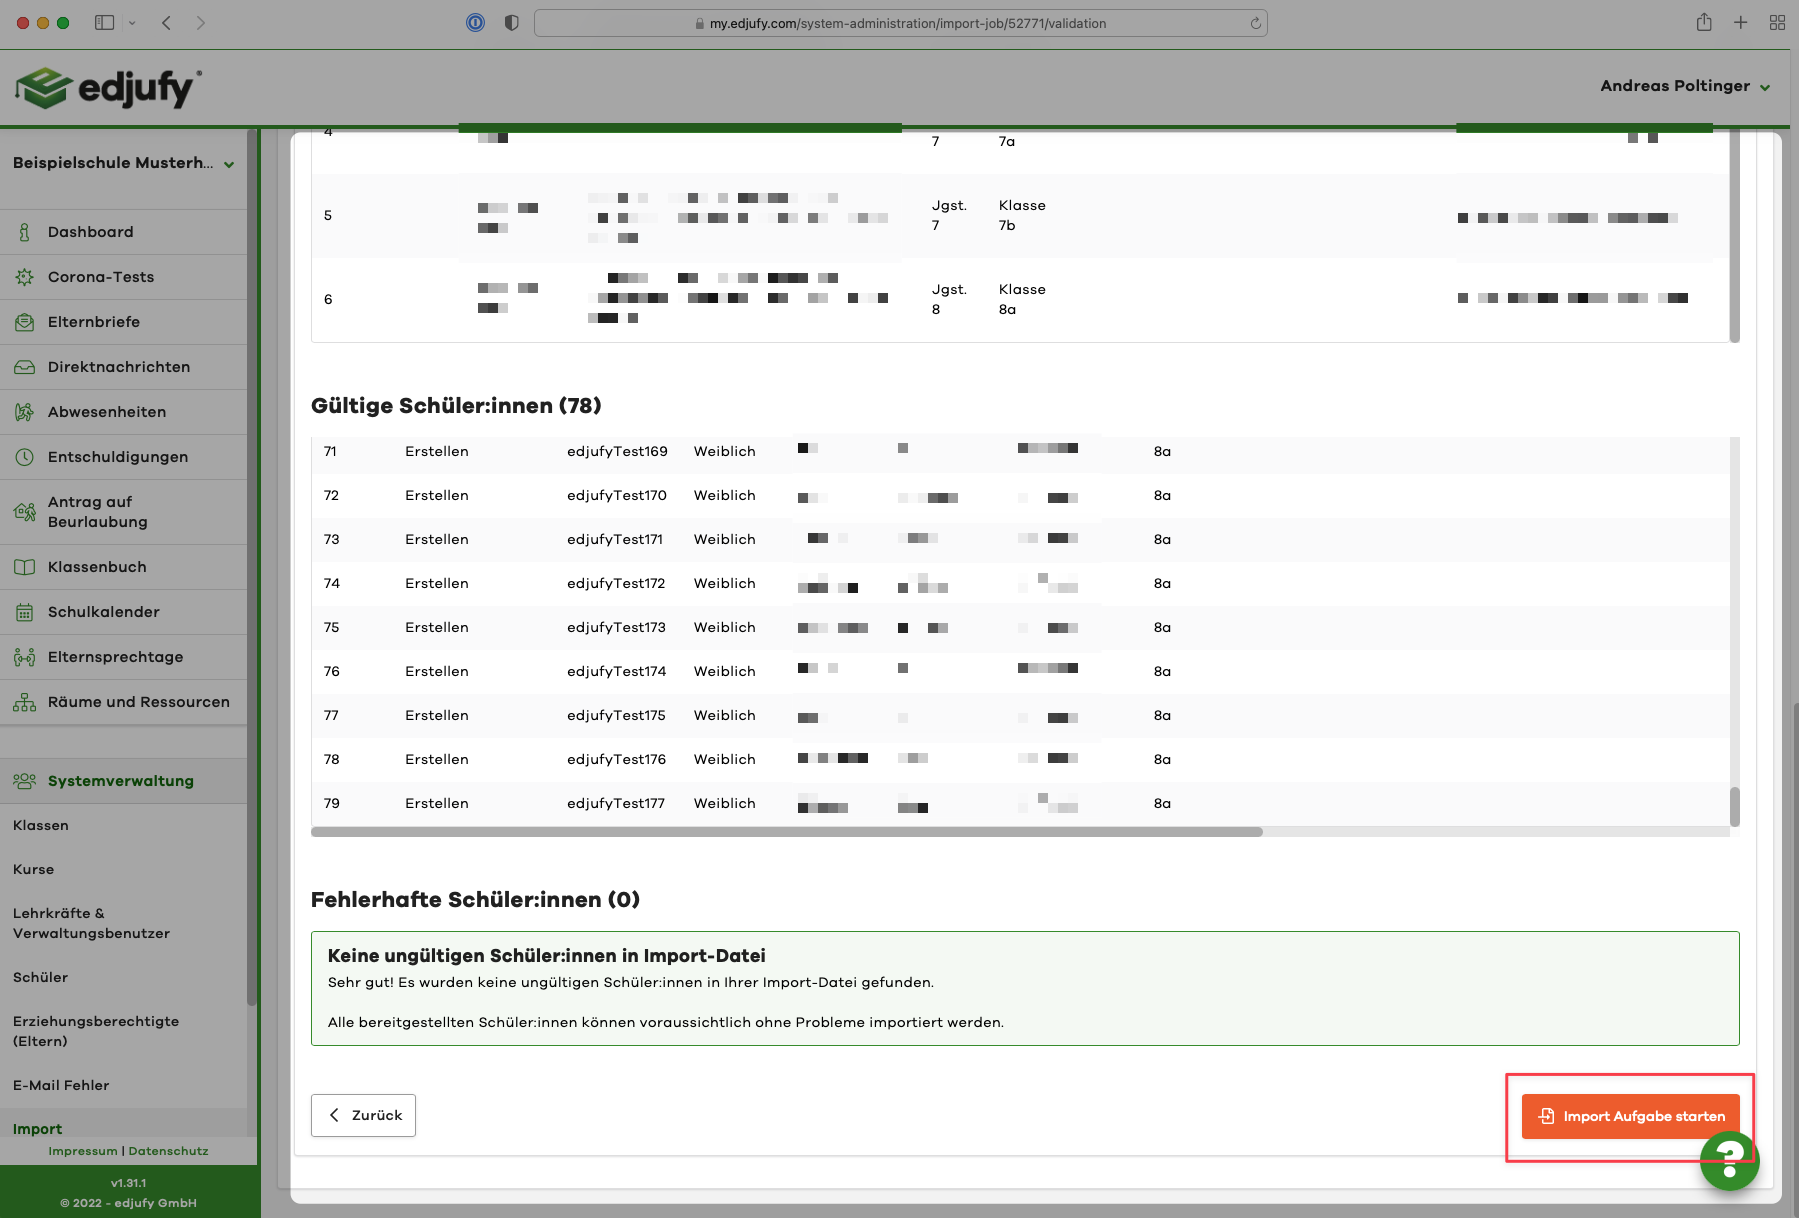
edjufy then performs a validation and provides a summary of the import. Please briefly review this summary and then start the import using the Start Import Task button.

Special Cases During Import
Grade Levels
There is a special feature when using the import for creating grade levels. The grade levels do not need to be created via a separate import file here. The system automatically creates the required grade levels based on the import file for school classes. This means that all grade levels used in the school classes import file are automatically created.
This is also the reason why there is no separate import for grade levels.
Linking Class Teachers
To link the required class teacher (teacher) with the corresponding school class when importing school classes, you must enter the email address of the teacher in the corresponding column of the school classes import file.
An automatic assignment of the teacher as the class teacher of the corresponding school class then takes place via this email address.
Overwrite Existing Records
With the option "Overwrite existing records?" available during import, you have the option to update, for example, already existing pupils in the system.
To assign a pupil for updating, we use the field "School Internal ID" or the column "schoolInternalId". If this value is not available, a combination of first name, last name, and date of birth is used.