Transfer Data from DaNiS (Lower Saxony) to edjufy
Introduction
To conveniently import the data required for edjufy from DaNiS into edjufy, please use our pre-made DaNiS reports. In the following instructions, we explain how to use our DaNiS reports for exporting teachers and pupils.
Import edjufy Reports into DaNiS
Please download the current version of the edjufy DaNiS reports:
DaNiS Report for Teachers: Download DaNiS Teacher Report (edjufy-Lehrer-v1.fr3)
DaNiS Report for Pupils: Download DaNiS Pupil Report (edjufy-Schueler-v1.fr3)
After downloading both edjufy reports for DaNiS, you can import them into DaNiS.
Import Reports into DaNiS
To import both reports into DaNiS, proceed as follows:
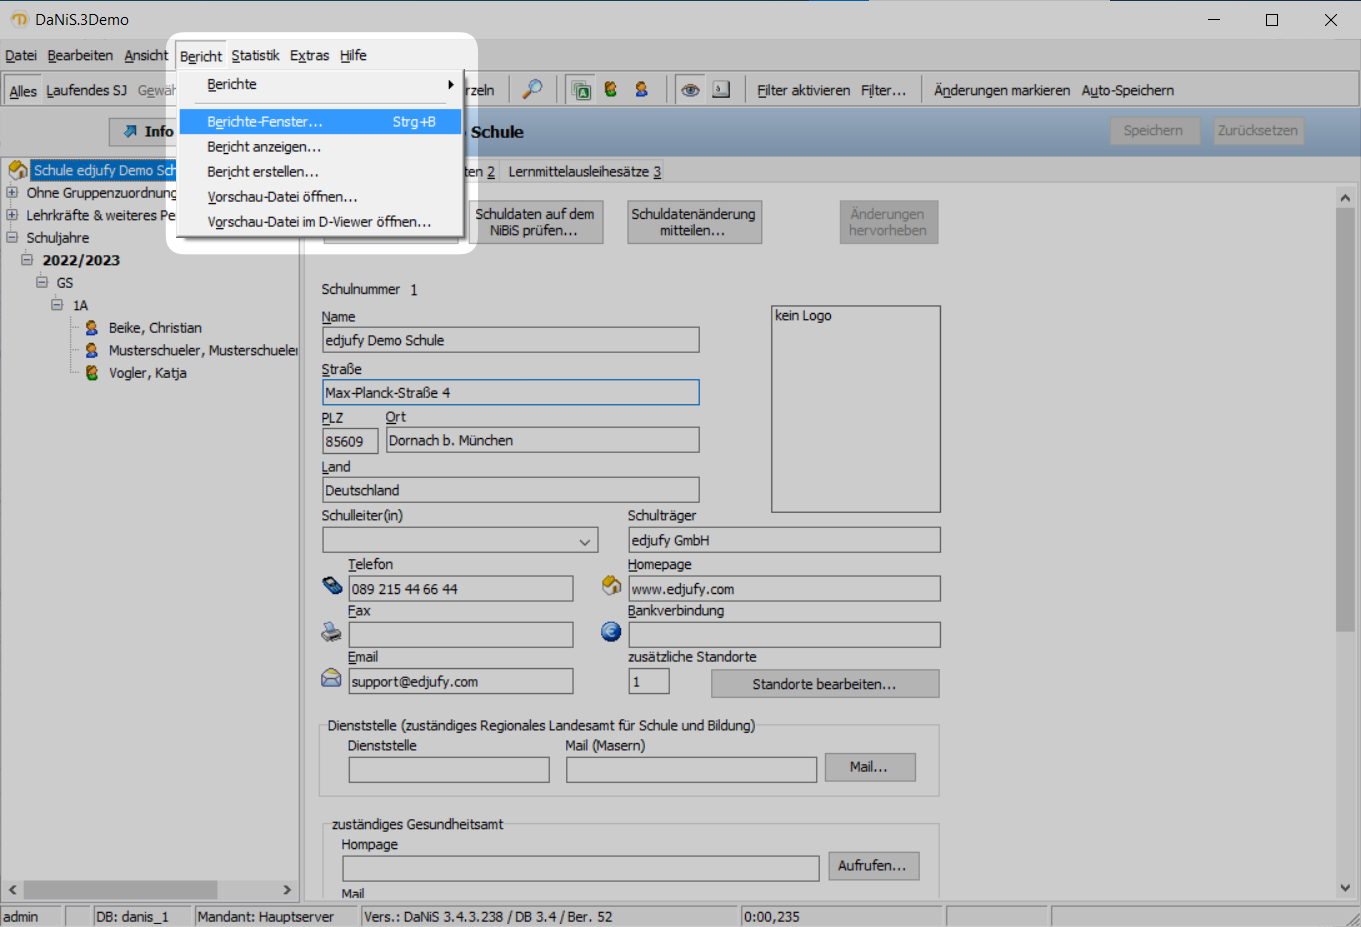
- Select the option Report Window in the Report menu or press
Ctrl + B.
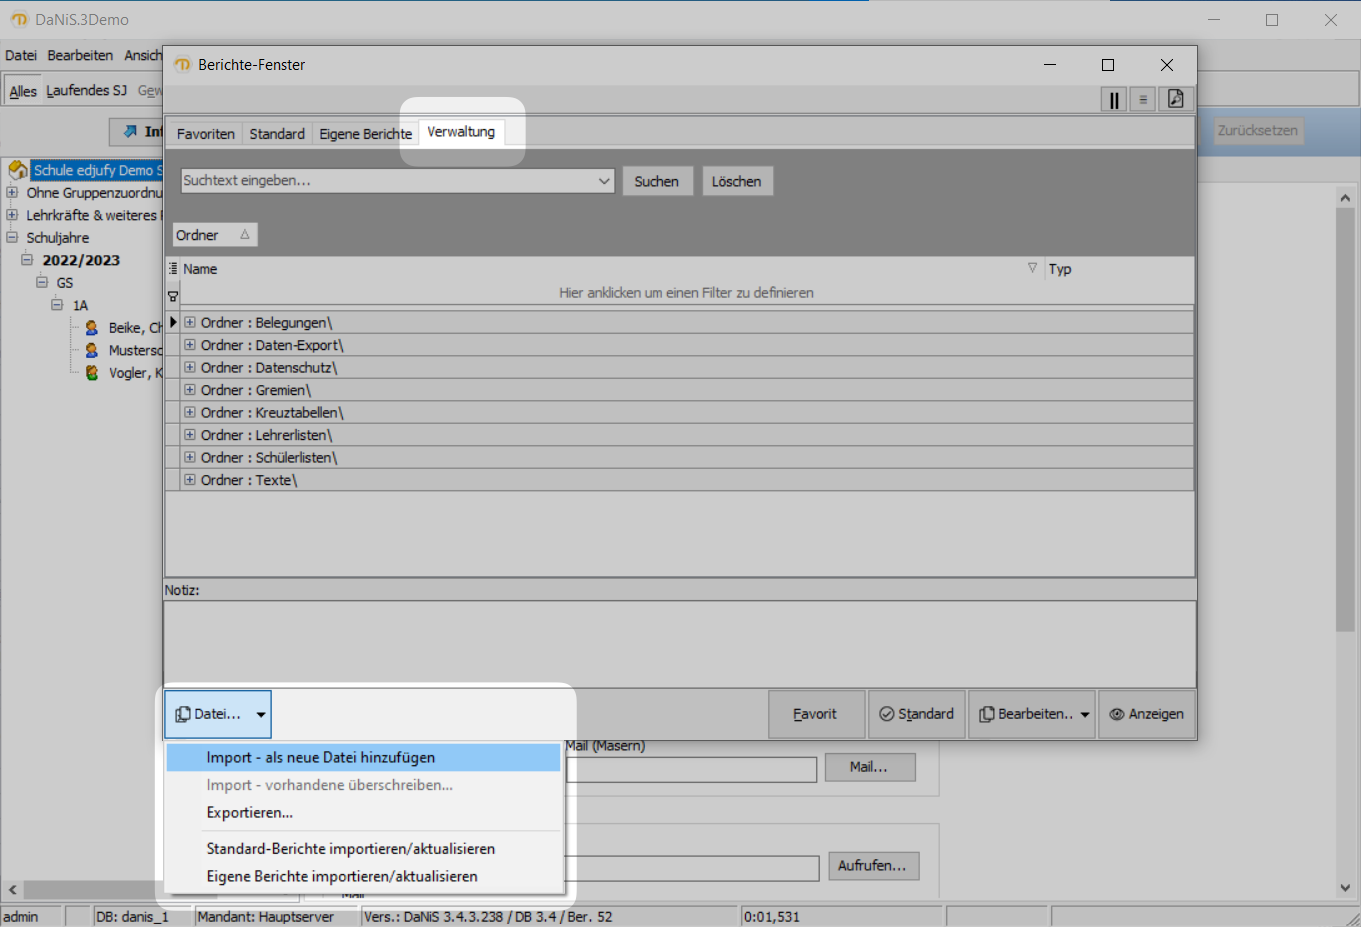
- Open the Administration tab in the report window and select the option Import - add as new file under File... in the lower left.
Then select the previously downloaded fileedjufy-Lehrer-v1.fr3in the Explorer and confirm with Open.
Repeat this step for the fileedjufy-Schueler-v1.fr3.
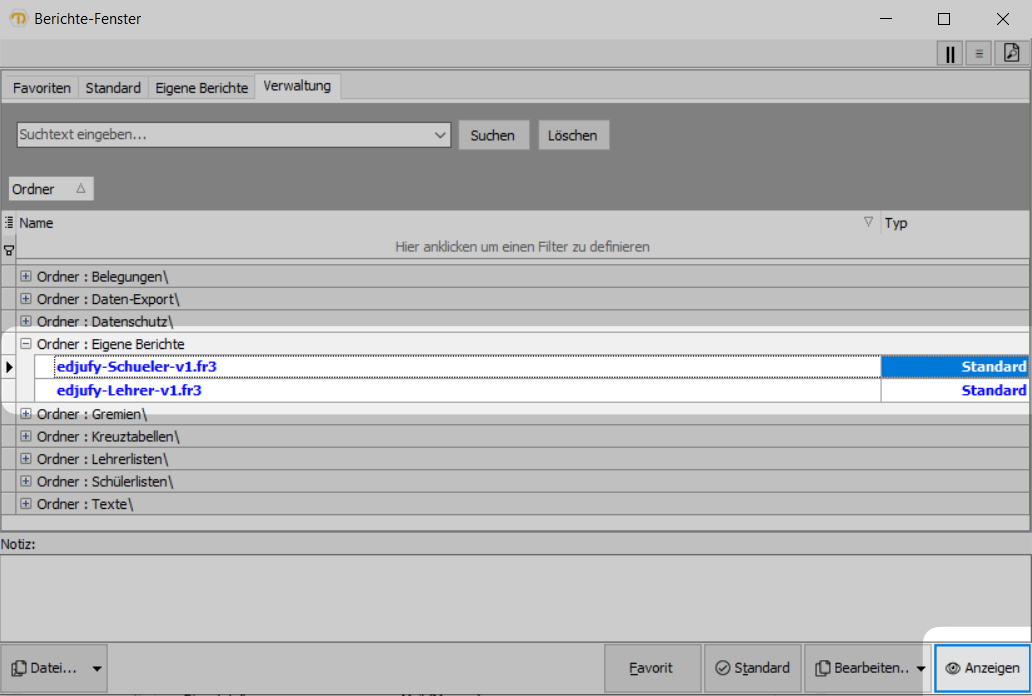
- Both reports should now be listed under Custom Reports.
To begin exporting the data, select the desired report and click on Display in the lower right.
Export Teachers and Pupils
Export Teachers
-
Select the report
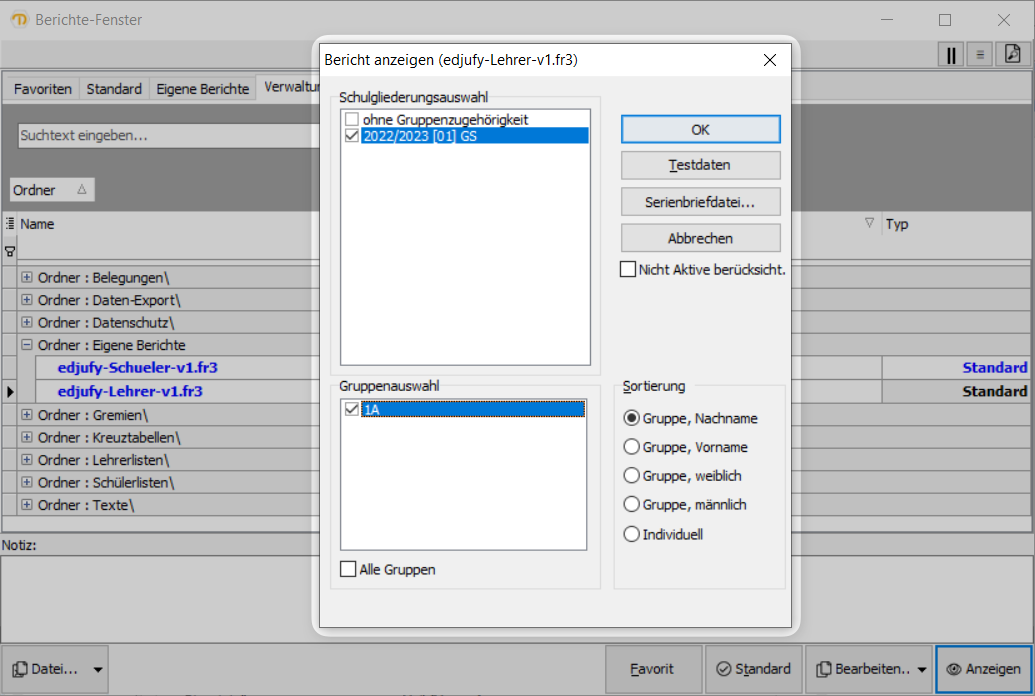
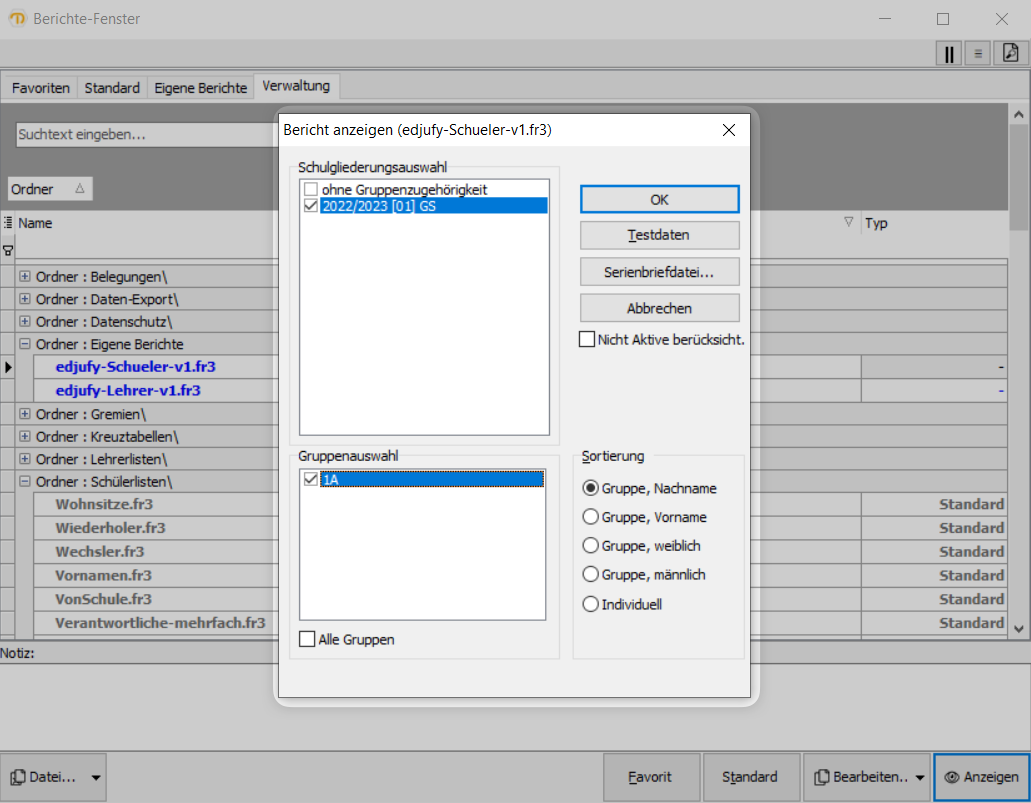
edjufy-Lehrer-v1in the report window and click on Display in the lower right. -
Then select your school and the school classes (groups) to be exported in the Display Report window.
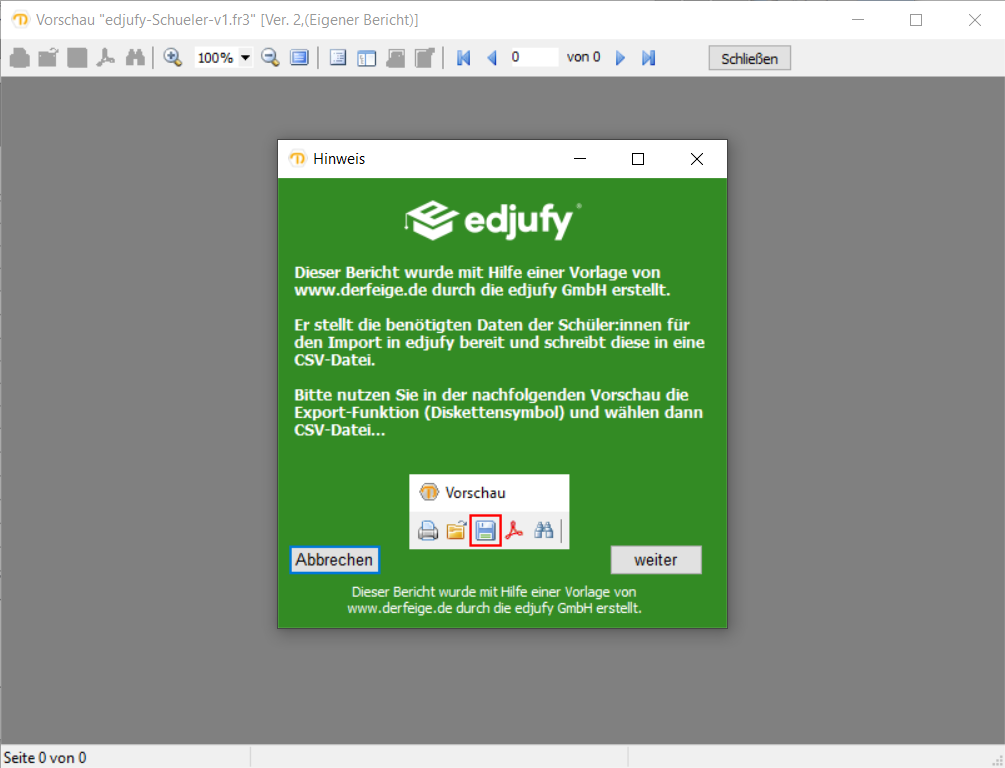
- In the next step, a brief information window about our report appears.
Click on Next to continue.
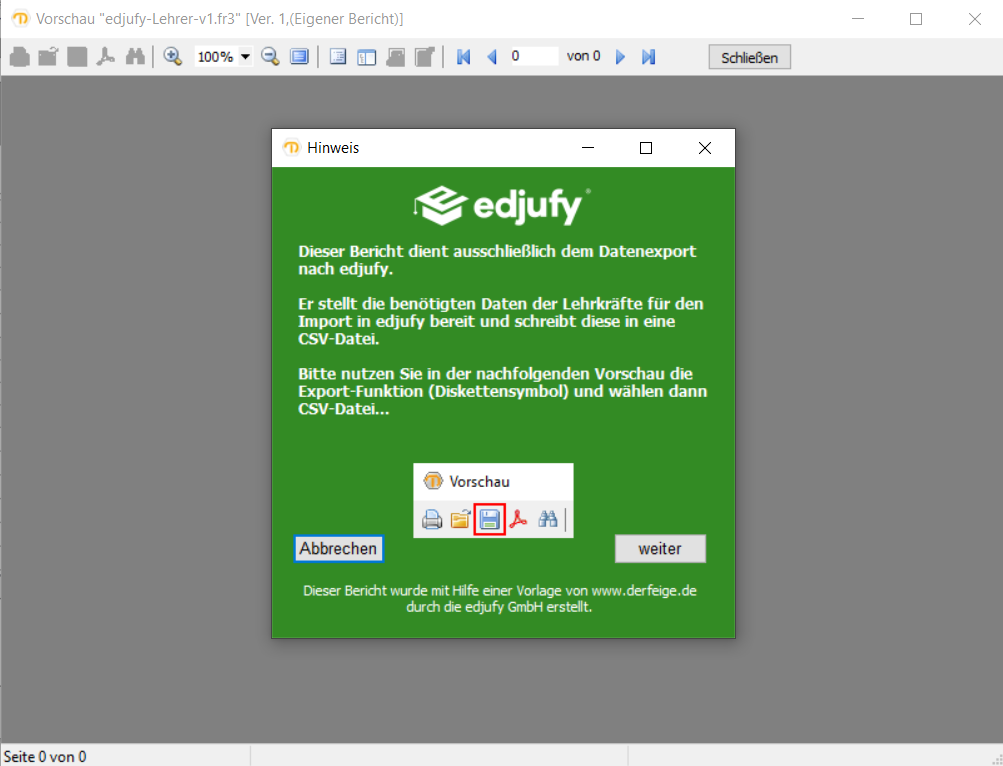
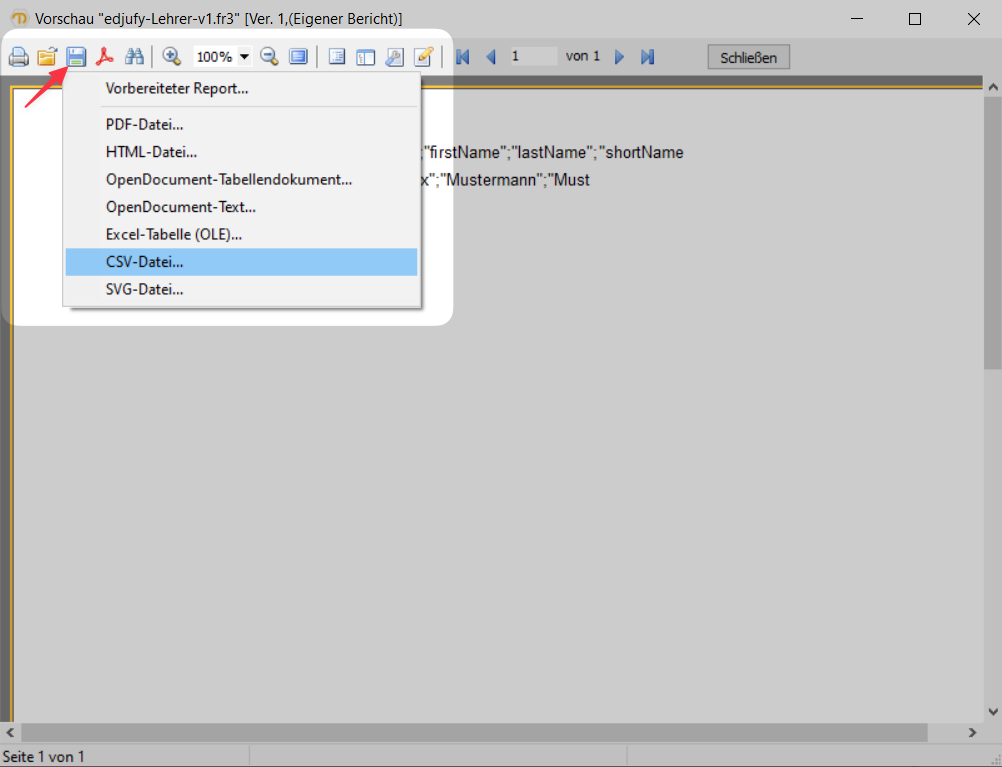
- We are now in the report preview and can check the data.
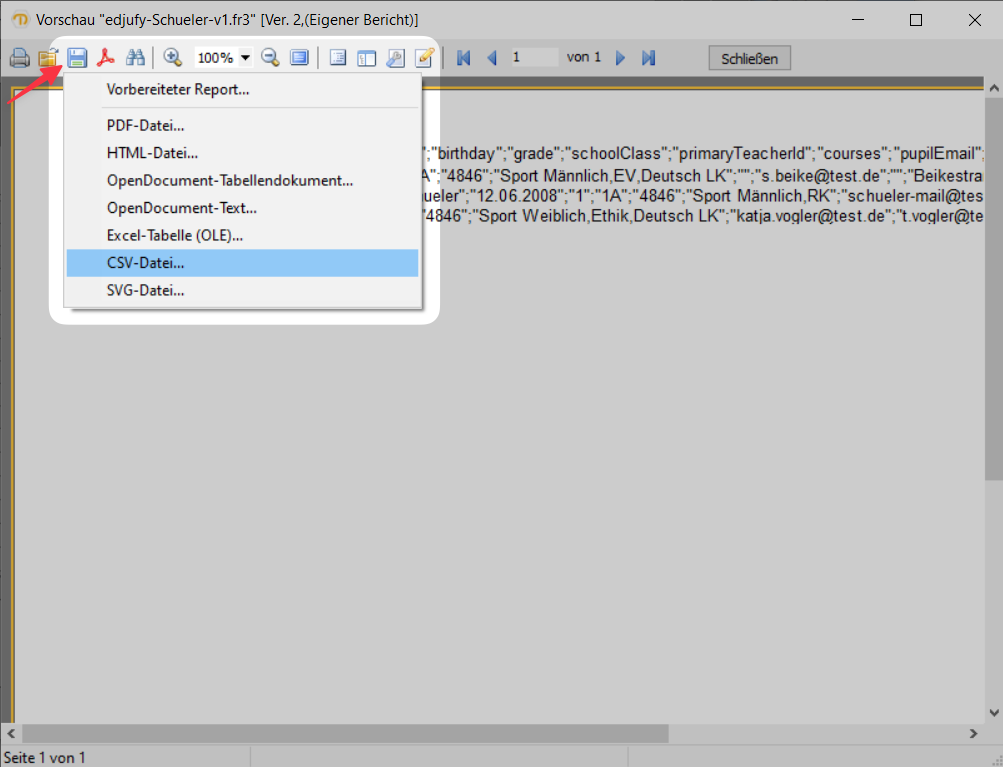
To export the data, please click on the Disk Symbol and select the option CSV File....
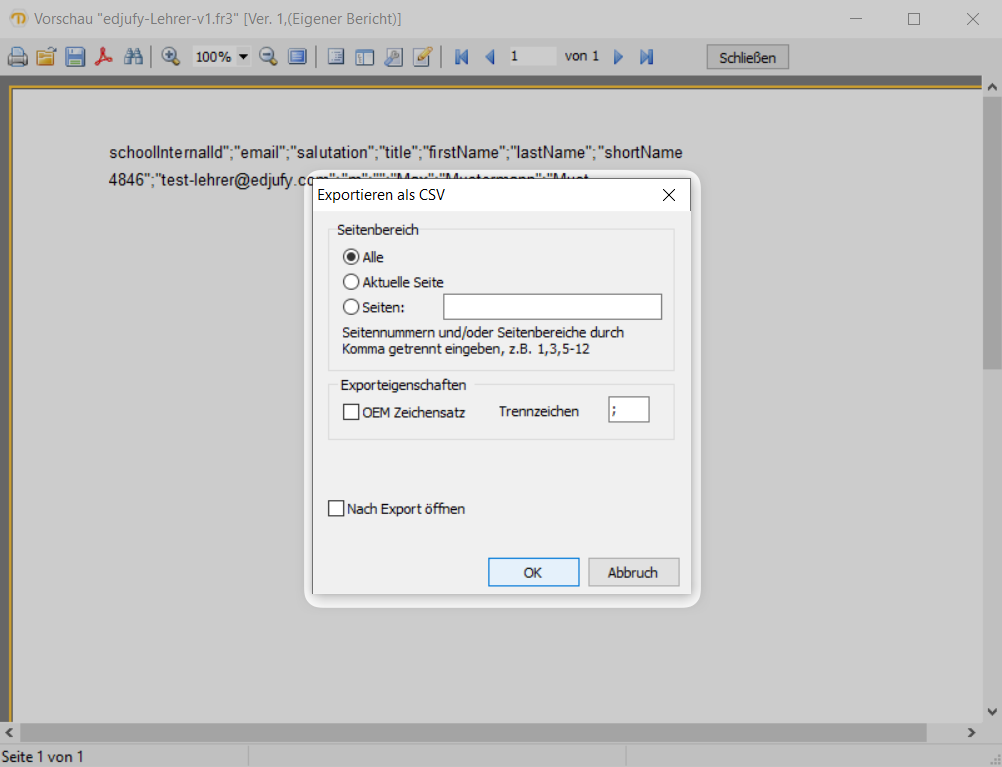
- Now confirm the export with OK in the export dialog.
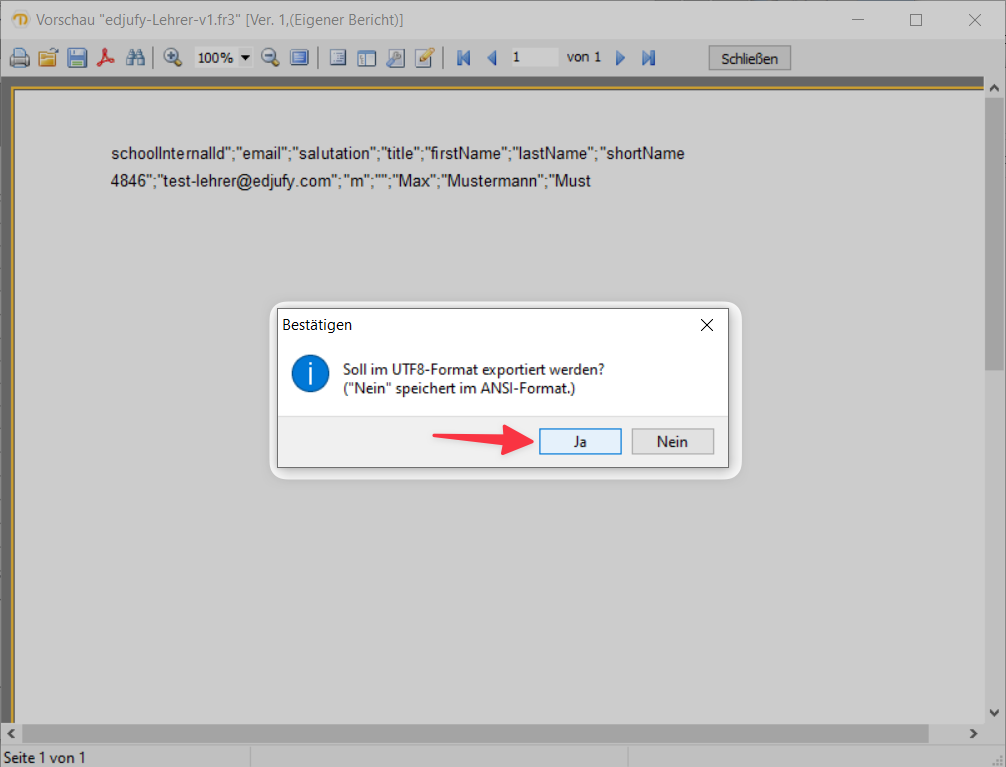
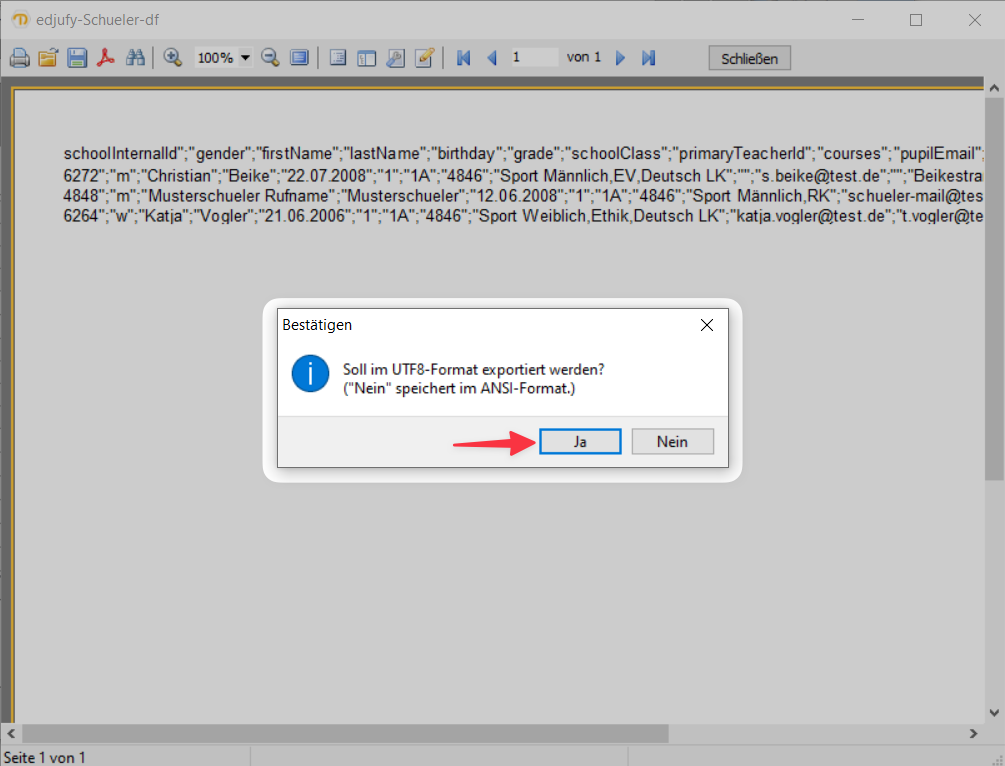
- In the last step, it is important that you confirm the export in UTF8 format.
Then select the desired storage location for your export file and confirm with Save.
The export of teachers is now complete and you can import the file named edjufy-Lehrer-v1.csv into edjufy.
Export Pupils
-
Select the report
edjufy-Schueler-v1in the report window and click on Display in the lower right. -
Then select your school and the school classes (groups) to be exported in the Display Report window.
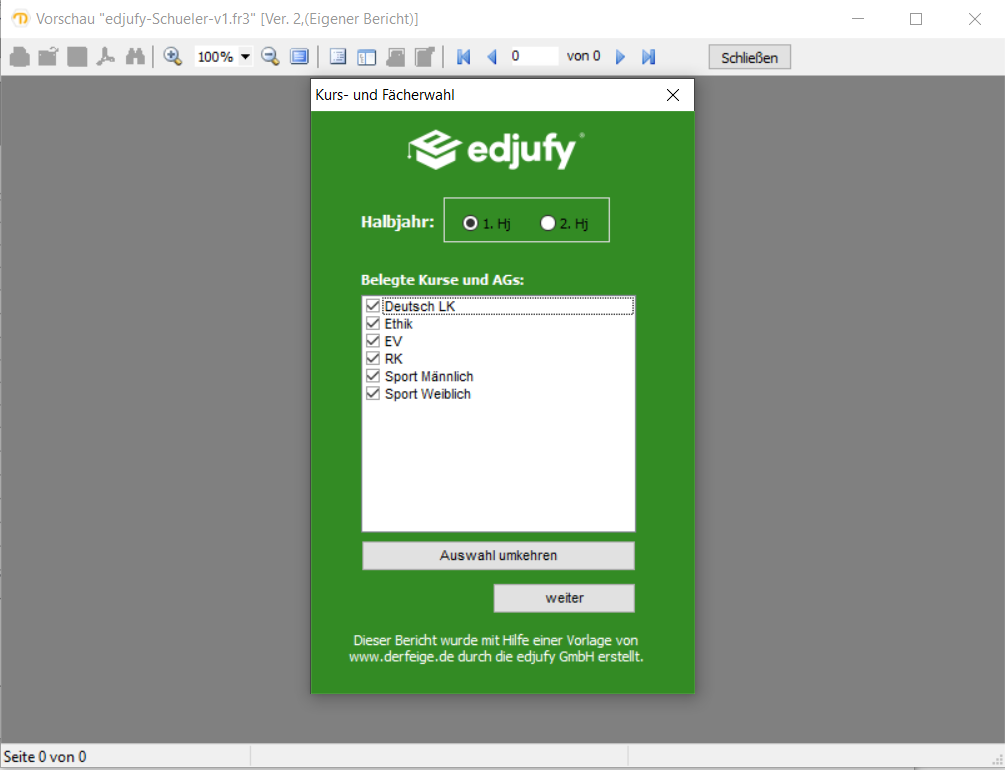
- In the next step, you have the option to select the desired courses for the export.
It is recommended that you select all courses. Then click on Next to continue.
- In the next step, a brief information window about our report appears.
Click on Next to continue.
- We are now in the report preview and can check the data.
To export the data, please click on the Disk Symbol and select the option CSV File....
- Now confirm the export with OK in the export dialog.

- In the last step, it is important that you confirm the export in UTF8 format.
Then select the desired storage location for your export file and confirm with Save.
The export of pupils is now complete and you can import the file named edjufy-Schueler-v1.csv into edjufy.
Import Data into edjufy
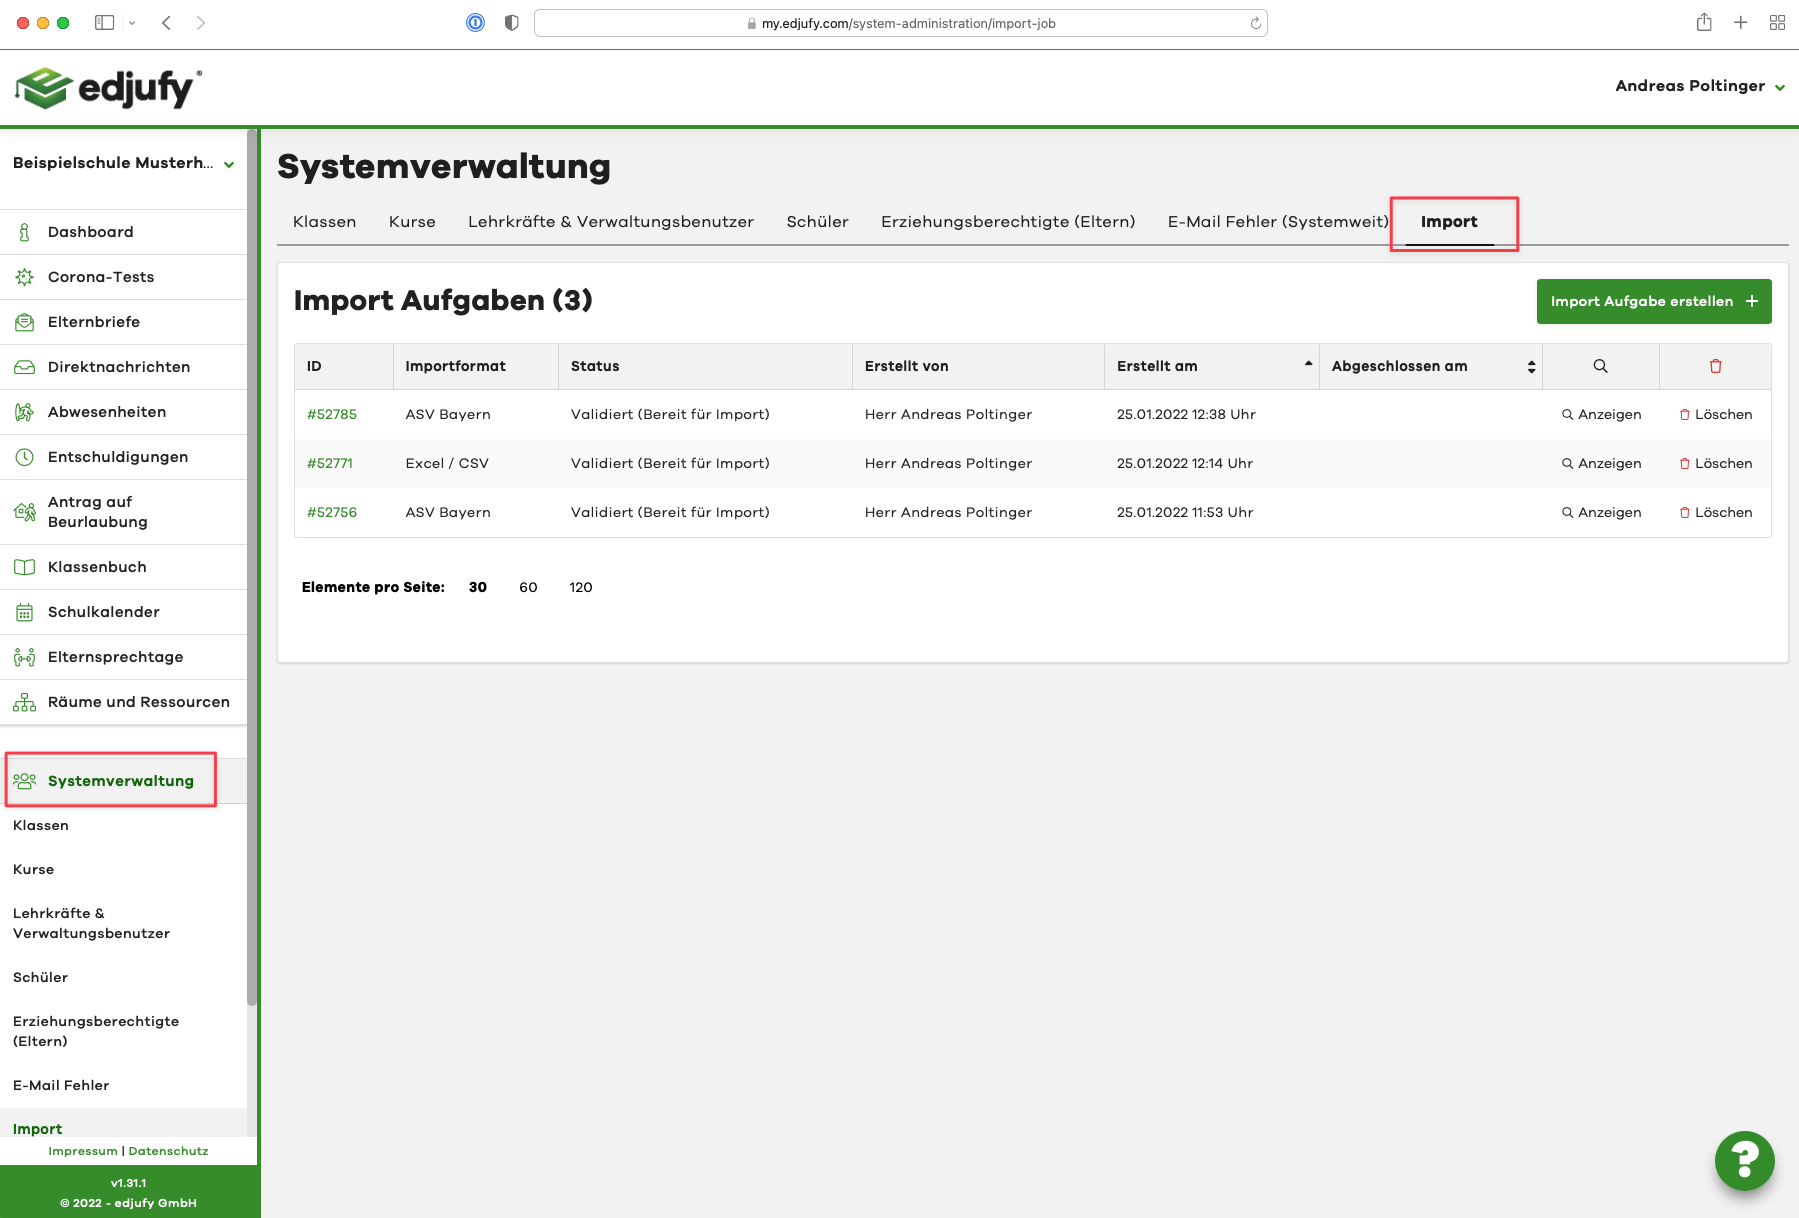
Open the Import tab in the System Administration.
In this list, you can see all previously created import tasks.
To create a new import task, please click on the Create Import Task button in the upper right corner.
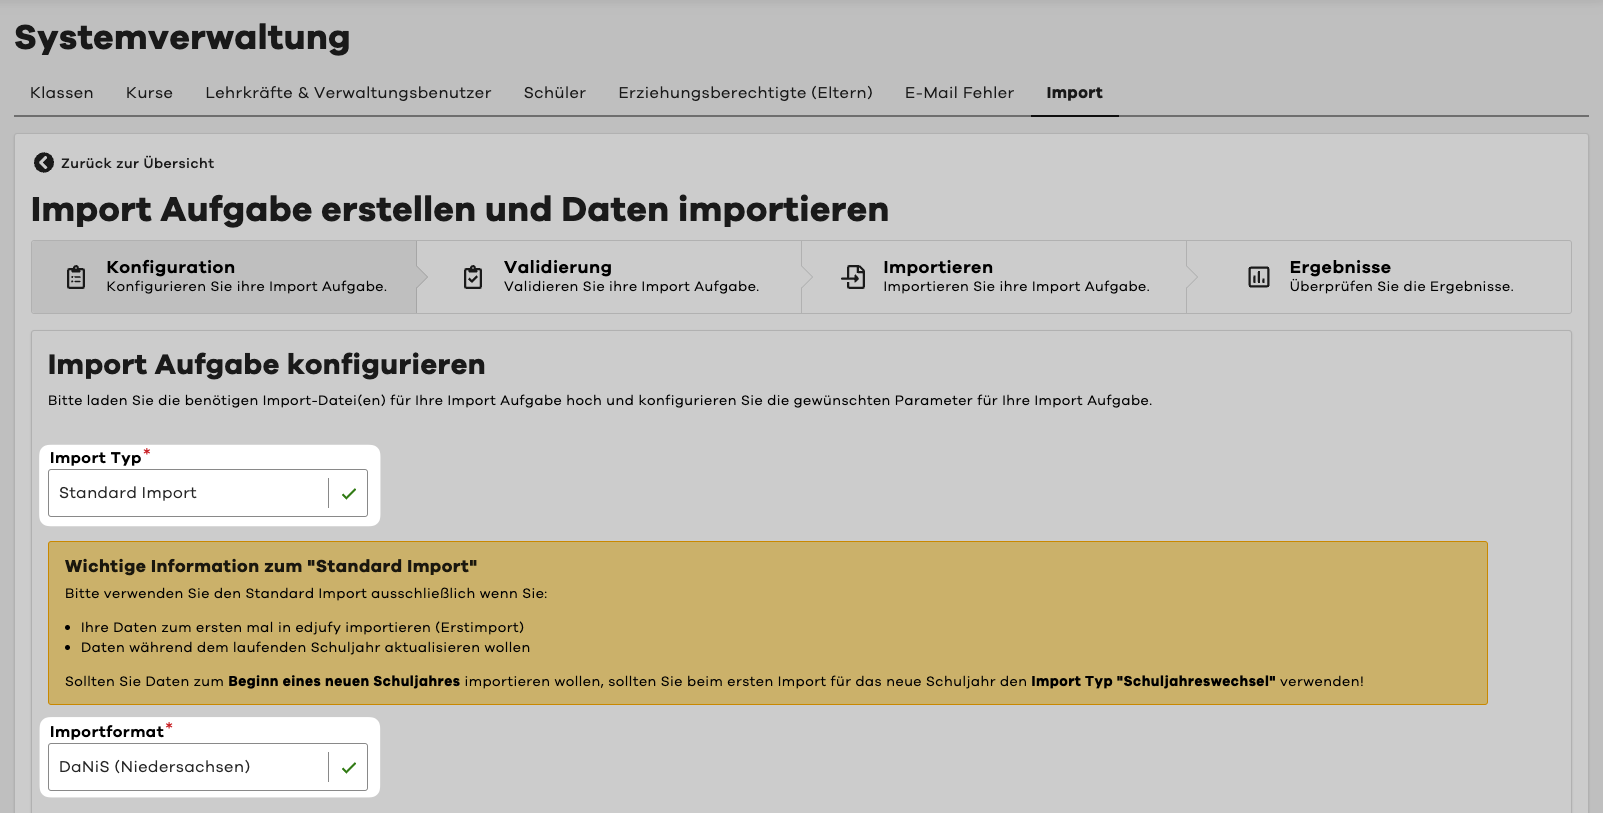
- Now select the desired Import Type.
If you want to import data into edjufy for the first time or update the data during the current school year, please select the option Standard Import.
Then please set the Import Format to DaNiS (Lower Saxony).
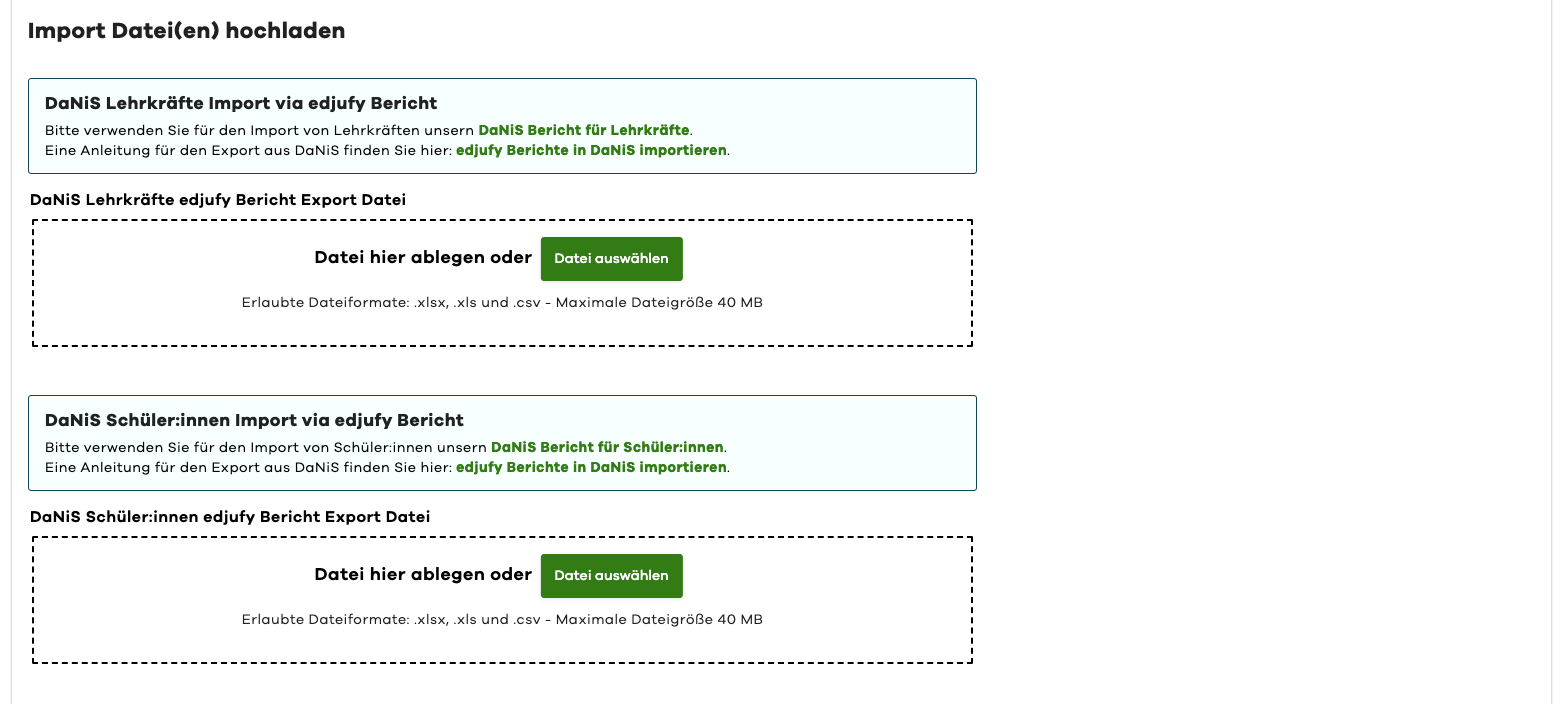
- Next, please upload the previously exported data from DaNiS into edjufy.
Please make sure to upload the data with the correct assignment.
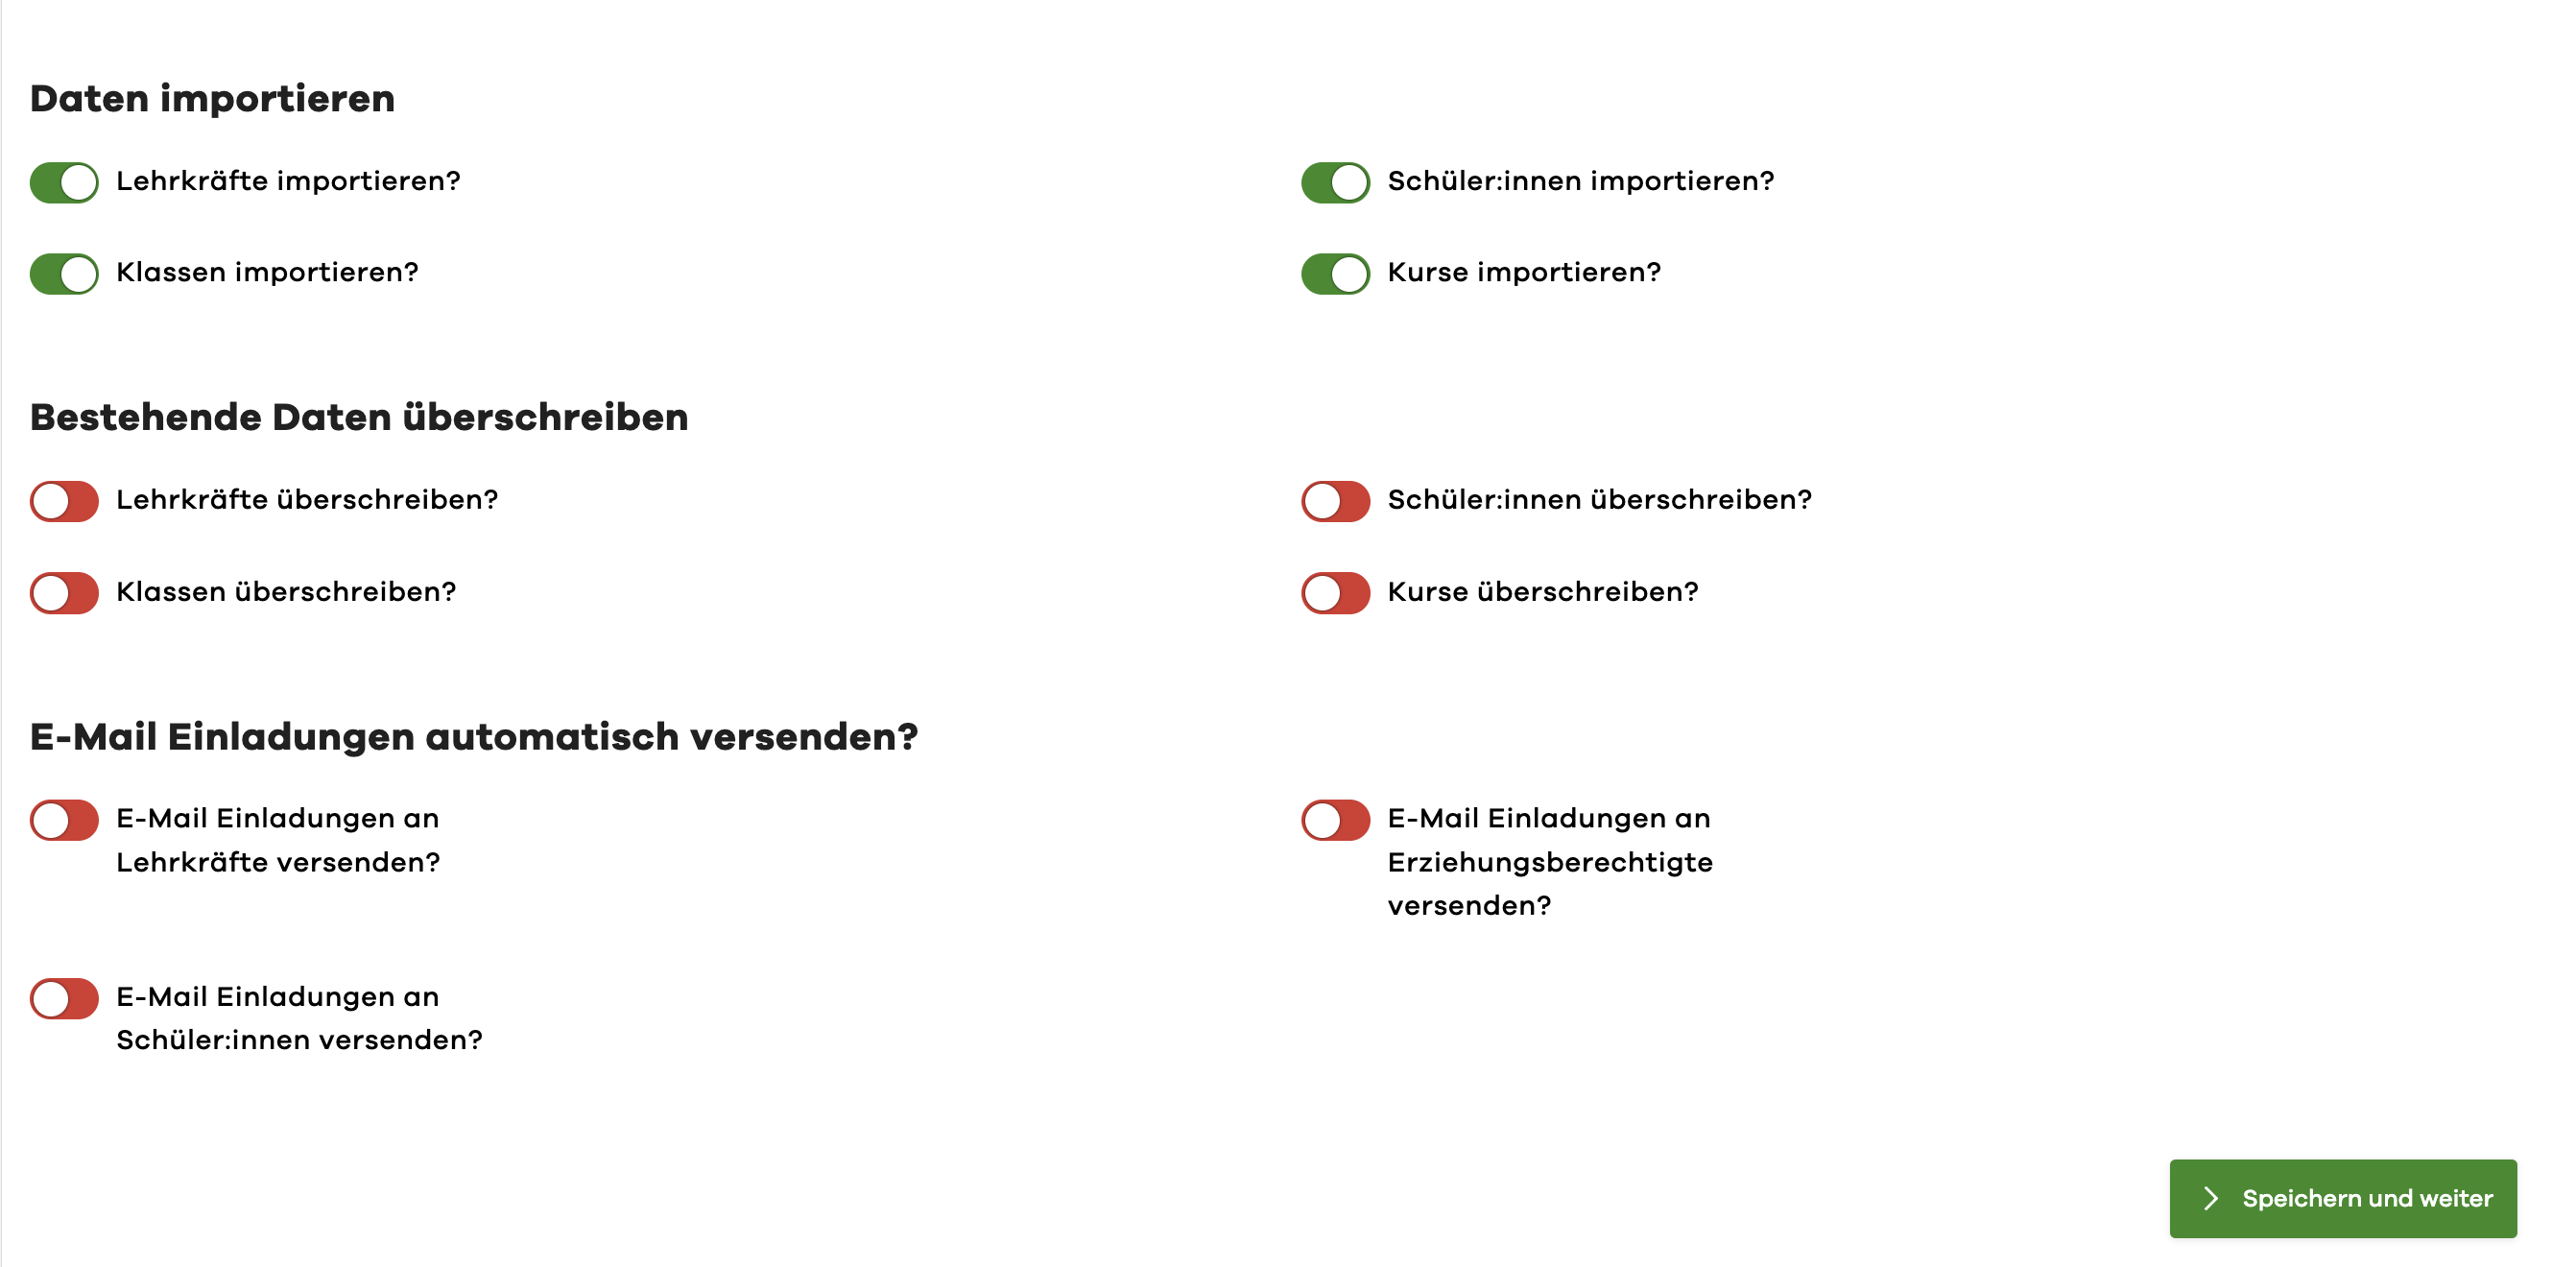
- Now please select which data should be imported.
For the Standard Import, we recommend selecting all options.
If you want to overwrite existing data or send invitations to edjufy directly after the import, you can also configure this here.
Validate Import Task
-
Click on the Save and Continue button in the import task you just created to begin validating the data.
-
edjufy now checks the data for errors and displays them to you.
If you find errors in your files, you should correct the data in DaNiS and export again.
You can return to the first step via the Back button in the lower right corner and upload the data again. -
If your validation was successful, you can start the import task.
Click on the Start Import Task button at the bottom of the page.
Data Import
After you have started the import task, the import is performed.
This may take a few minutes depending on the amount of data.
Evaluate Import Result
Once the import task is complete, you can view the result in the last step.