Create Absence
Introduction
An absence can be created in edjufy via various methods.
The recommended method depends on the user type.
For Office and Administration
To create a single absence for a pupil, please follow the instructions in the section Create Single Absence.
To record multiple absences simultaneously, please follow the instructions in the section Absences Recording View.
For Teachers
To create a single absence for a pupil, please follow the instructions in the section Create Single Absence.
To record multiple absences in a class simultaneously, please follow the instructions in the section Recording Absences in the Digital Class Register.
If your school does not yet use the digital class register, please follow the instructions in the section Attendance Check.
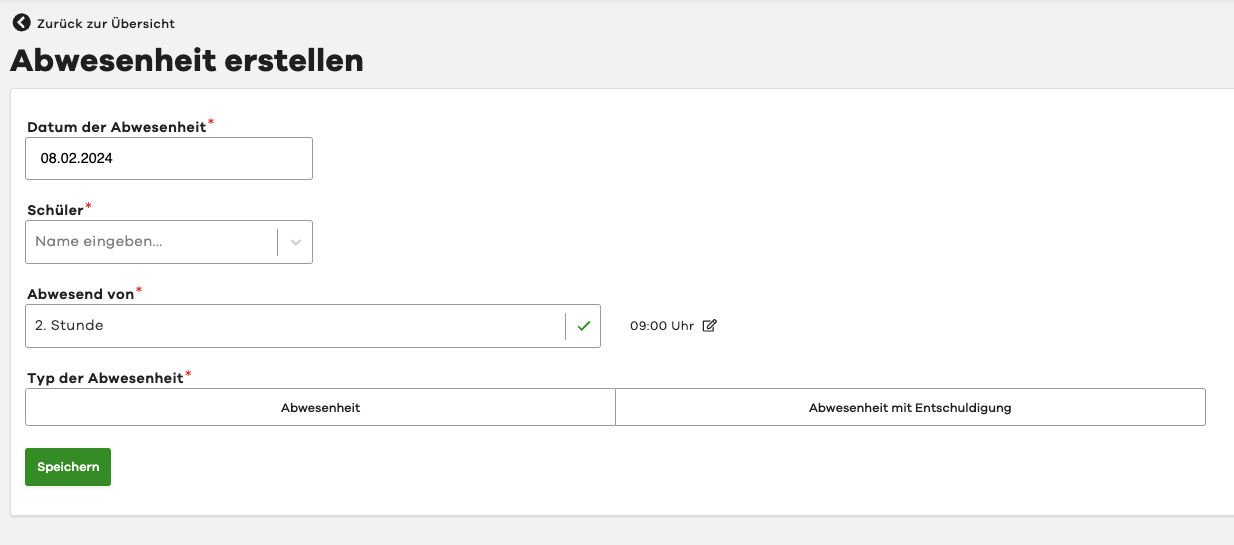
Create Single Absence
To create a single absence for a pupil, proceed as follows:
- Navigate to the Absences module.
- Select the Create Absence button in the top right.
- Fill out the displayed form.
- Optionally select the option "Absence with Excuse" to create a matching excuse at the same time.
This should be the exception rather than the rule. - Finally, click Save.
The absence will now be created.
Existing excuses will be automatically assigned to the absence.
You will be redirected directly to the detail view of the absence.
There you can perform further actions and review the absence.
Absences Recording View
To record multiple absences simultaneously via the recording view, proceed as follows:
- Navigate to the Absences module.
- Switch to the Recording tab.
- Select the desired class and then the desired pupil.
Alternatively, you can also use the pupil search.
You will now see the recording view for the pupil with an overview of existing absences and excuses.
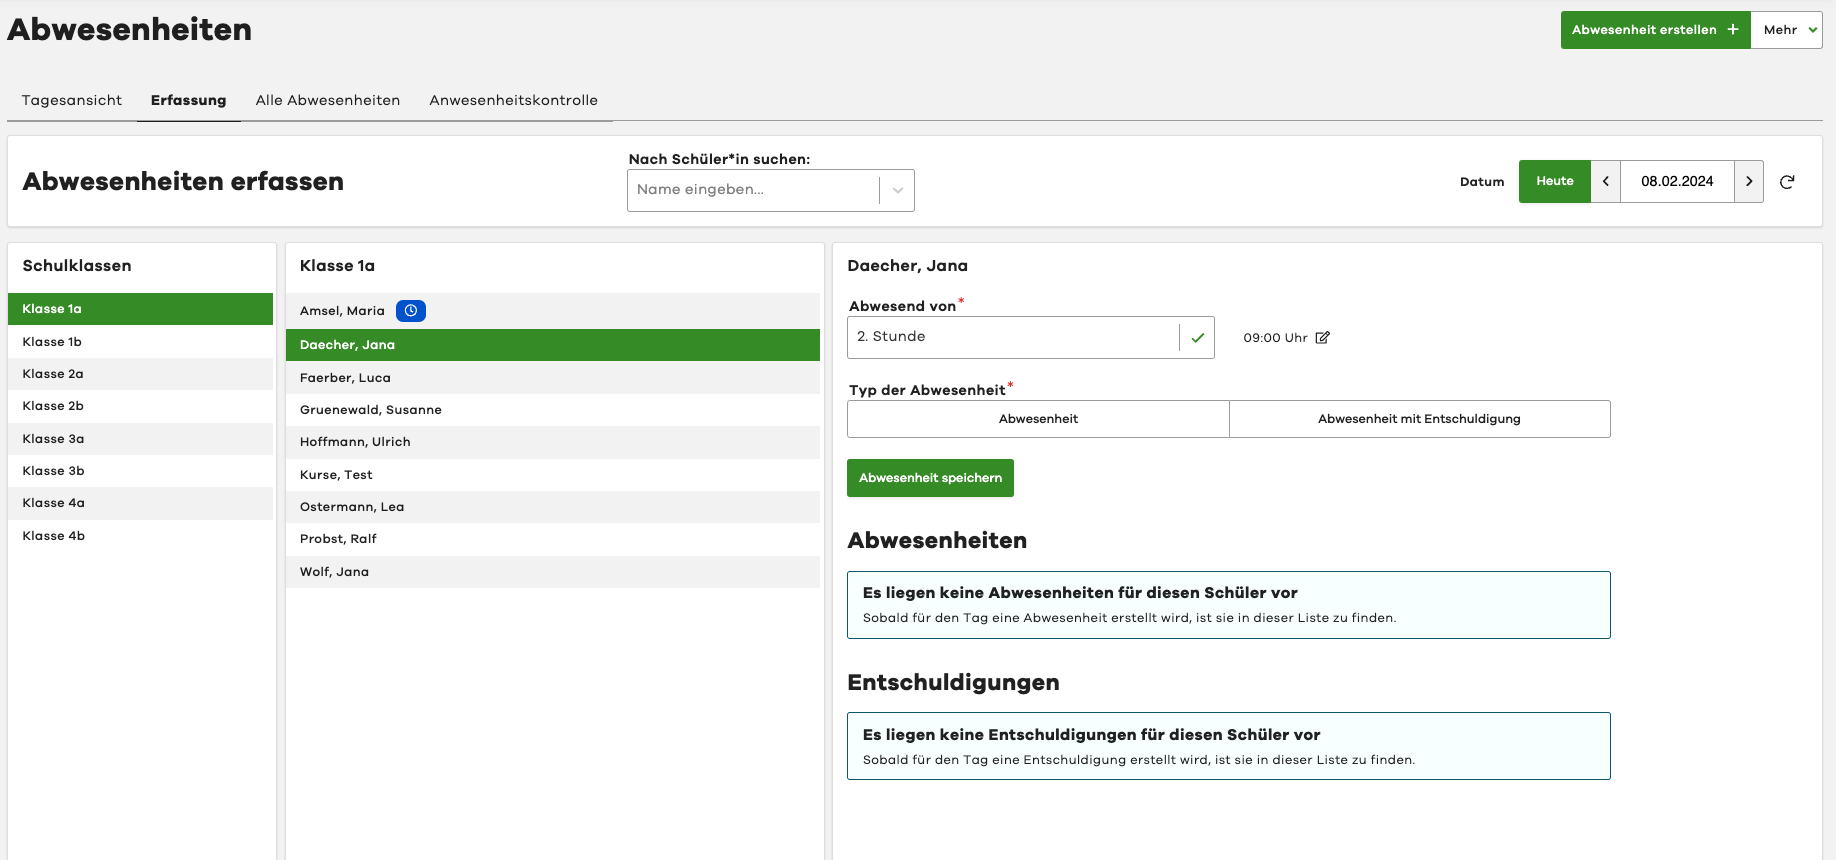
Select the start time and the type of absence.
Then click Save Absence.
Here too, you can optionally create a matching excuse for the absence directly.
Recording Absences in the Digital Class Register
To record multiple absences in a class via the digital class register simultaneously, proceed as follows:
- Navigate to the Class Register module.
- Select the desired class/course.
- Create a new class register entry (see Create Class Register Entry).
- In the dialog, select the option Perform Attendance Check.
- Select all absent and late pupils.
For late arrivals, you can also directly create a matching excuse of the "Late" type. - Create the class register entry.
The system will now automatically create absences for the selected pupils.
The system automatically uses the date and lesson period from the class register entry for the absences.
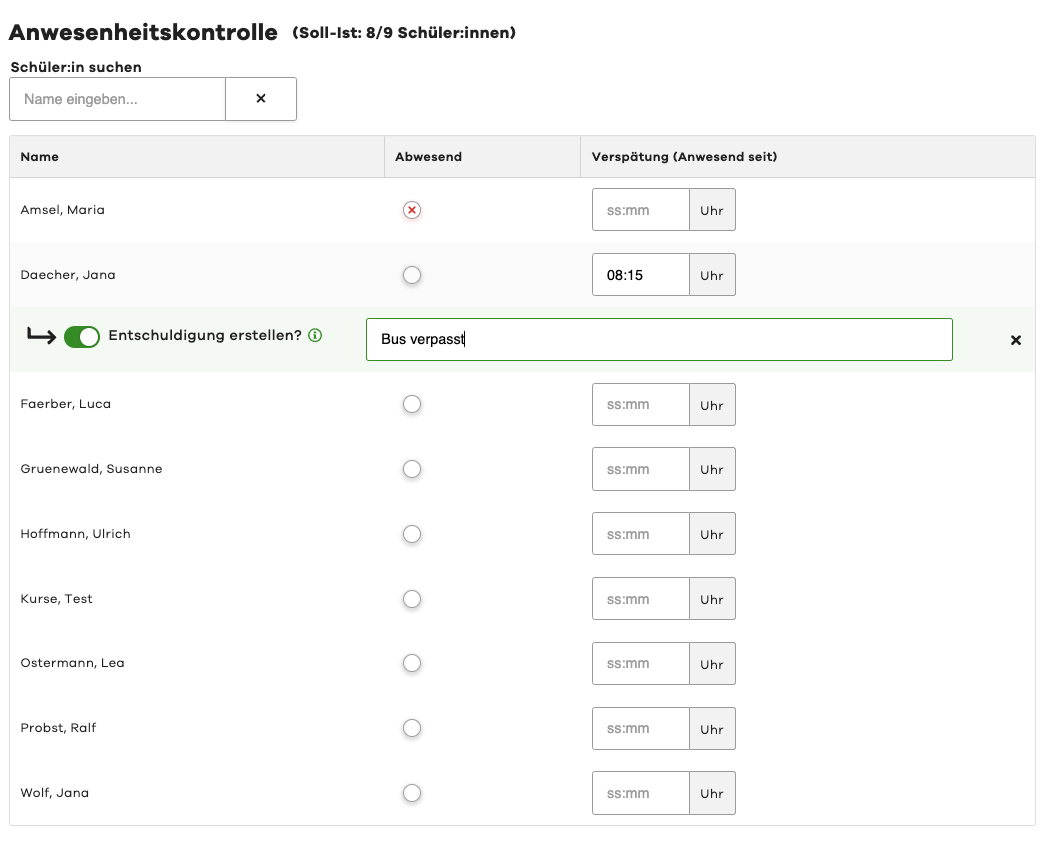
Attendance Check
As an alternative to the integrated attendance check in the digital class register, you can also use the attendance check in the Absences module.
Proceed as follows:
- Navigate to the Absences module.
- Switch to the Attendance Check tab.
- Select the desired class or course.
- Select all absent and late pupils.
For late arrivals, you can also directly create a matching excuse of the "Late" type. - Finally, click Save.
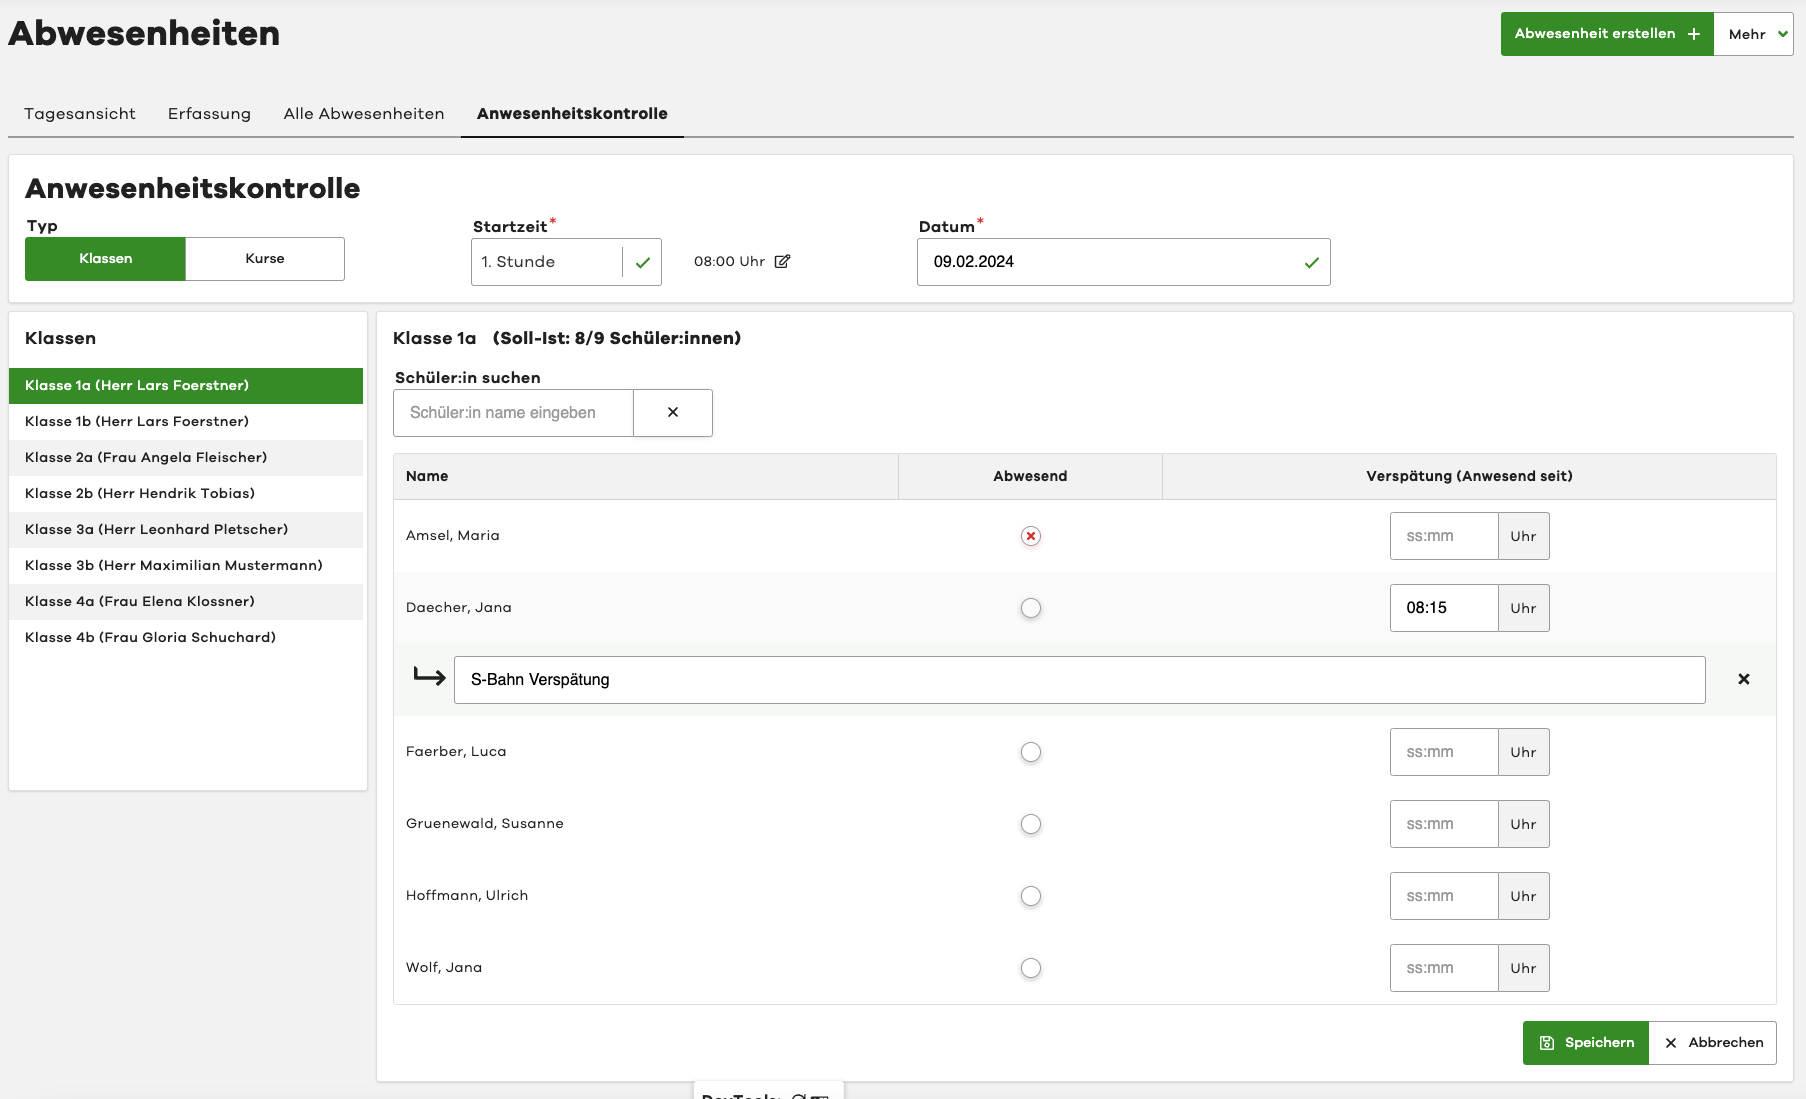
The system will now automatically create absences for the selected pupils.
The system automatically sets the current date and lesson period.
However, you can manually adjust the date and lesson period.