Lesson Log Overview
Login and Module Selection
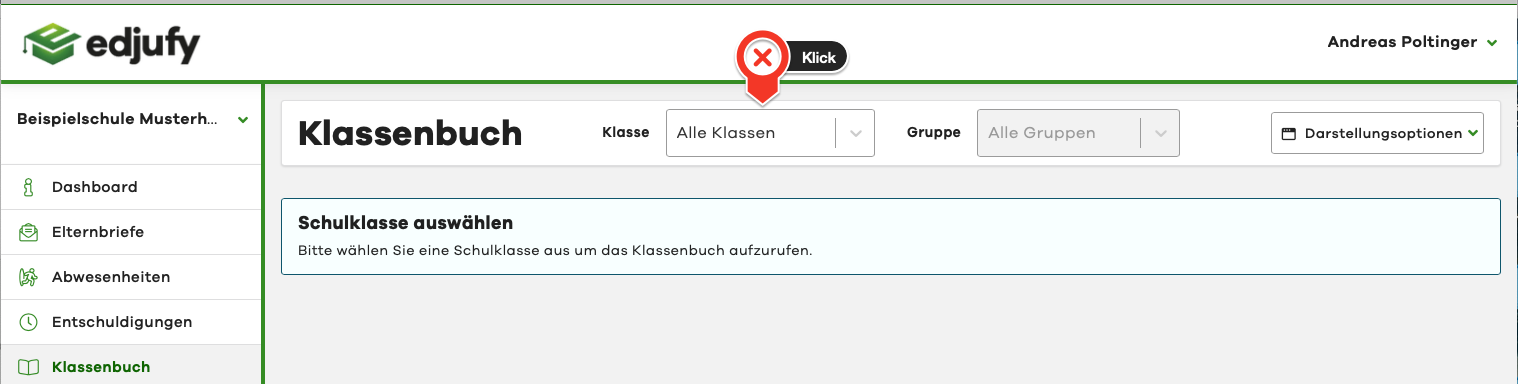
To access the Lesson Log, simply log in to edjufy with your personal credentials. To log in, please open the following URL in your browser: https://my.edjufy.com and select the menu item "Lesson Log" from the menu bar on the left side.
Selecting a Lesson Log
Now select the desired class in the Lesson Log module. If the selected class is divided into different class groups, you can also select the group after choosing the class.
Structure of the Lesson Log
The following view is the Lesson Log overview. It shows you the Lesson Log entries created so far and additional information, and is divided into the following areas:
- Lesson Log Selection
- Control Area
- Documentation Area
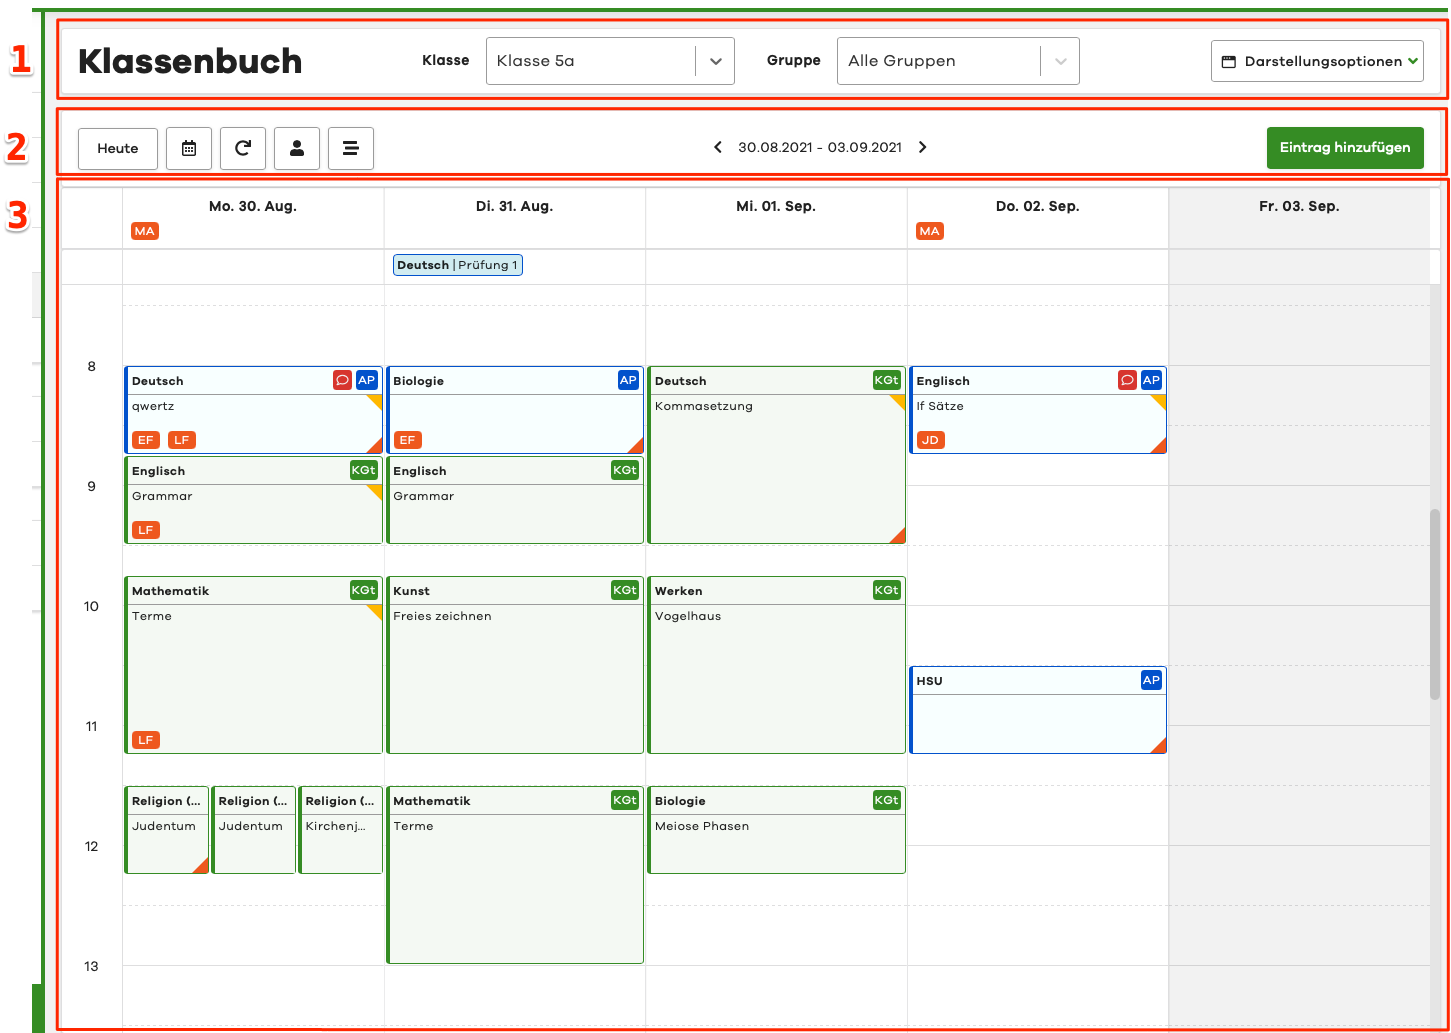
These areas are explained in more detail below.
Selection Area
In the Lesson Log selection at the top, you can quickly and easily switch between different classes/groups. If you have also selected a group for a class, only the lessons for that group will be displayed.
Via the Display Options button, you can configure your personal Lesson Log view.

Control Area
The control area provides you with a variety of functionalities.

- The Today button jumps the view to the current day/week
- By clicking on the calendar icon, you can jump to a specific week
- The Refresh button reloads your Lesson Log view
- Lesson Log entries by teacher opens a dialog showing all entries from a specific teacher
- Lesson Log entries by subject opens a dialog showing all entries for a specific subject
- Using the arrows, you can switch between different weeks/days
- The date range shows you the currently displayed period. By clicking on the date range, you can select a desired period similar to No. 2
- One of two ways to create an entry is the Add Entry button in the upper right corner. Another is described below.

Documentation Area
The third and final area is the documentation area. It shows you all information about a class.
Active Absences
General
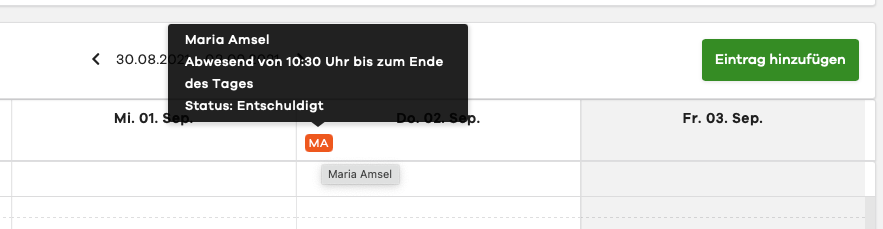
In the first Lesson Log row, the digital Lesson Log shows you all active (all-day) absences. The initials of the respective pupil are displayed in an orange rectangle.

Quick Overview via Mouse Hover
To get a quick overview of the details of an absence, simply move your mouse pointer over the pupil's initials.
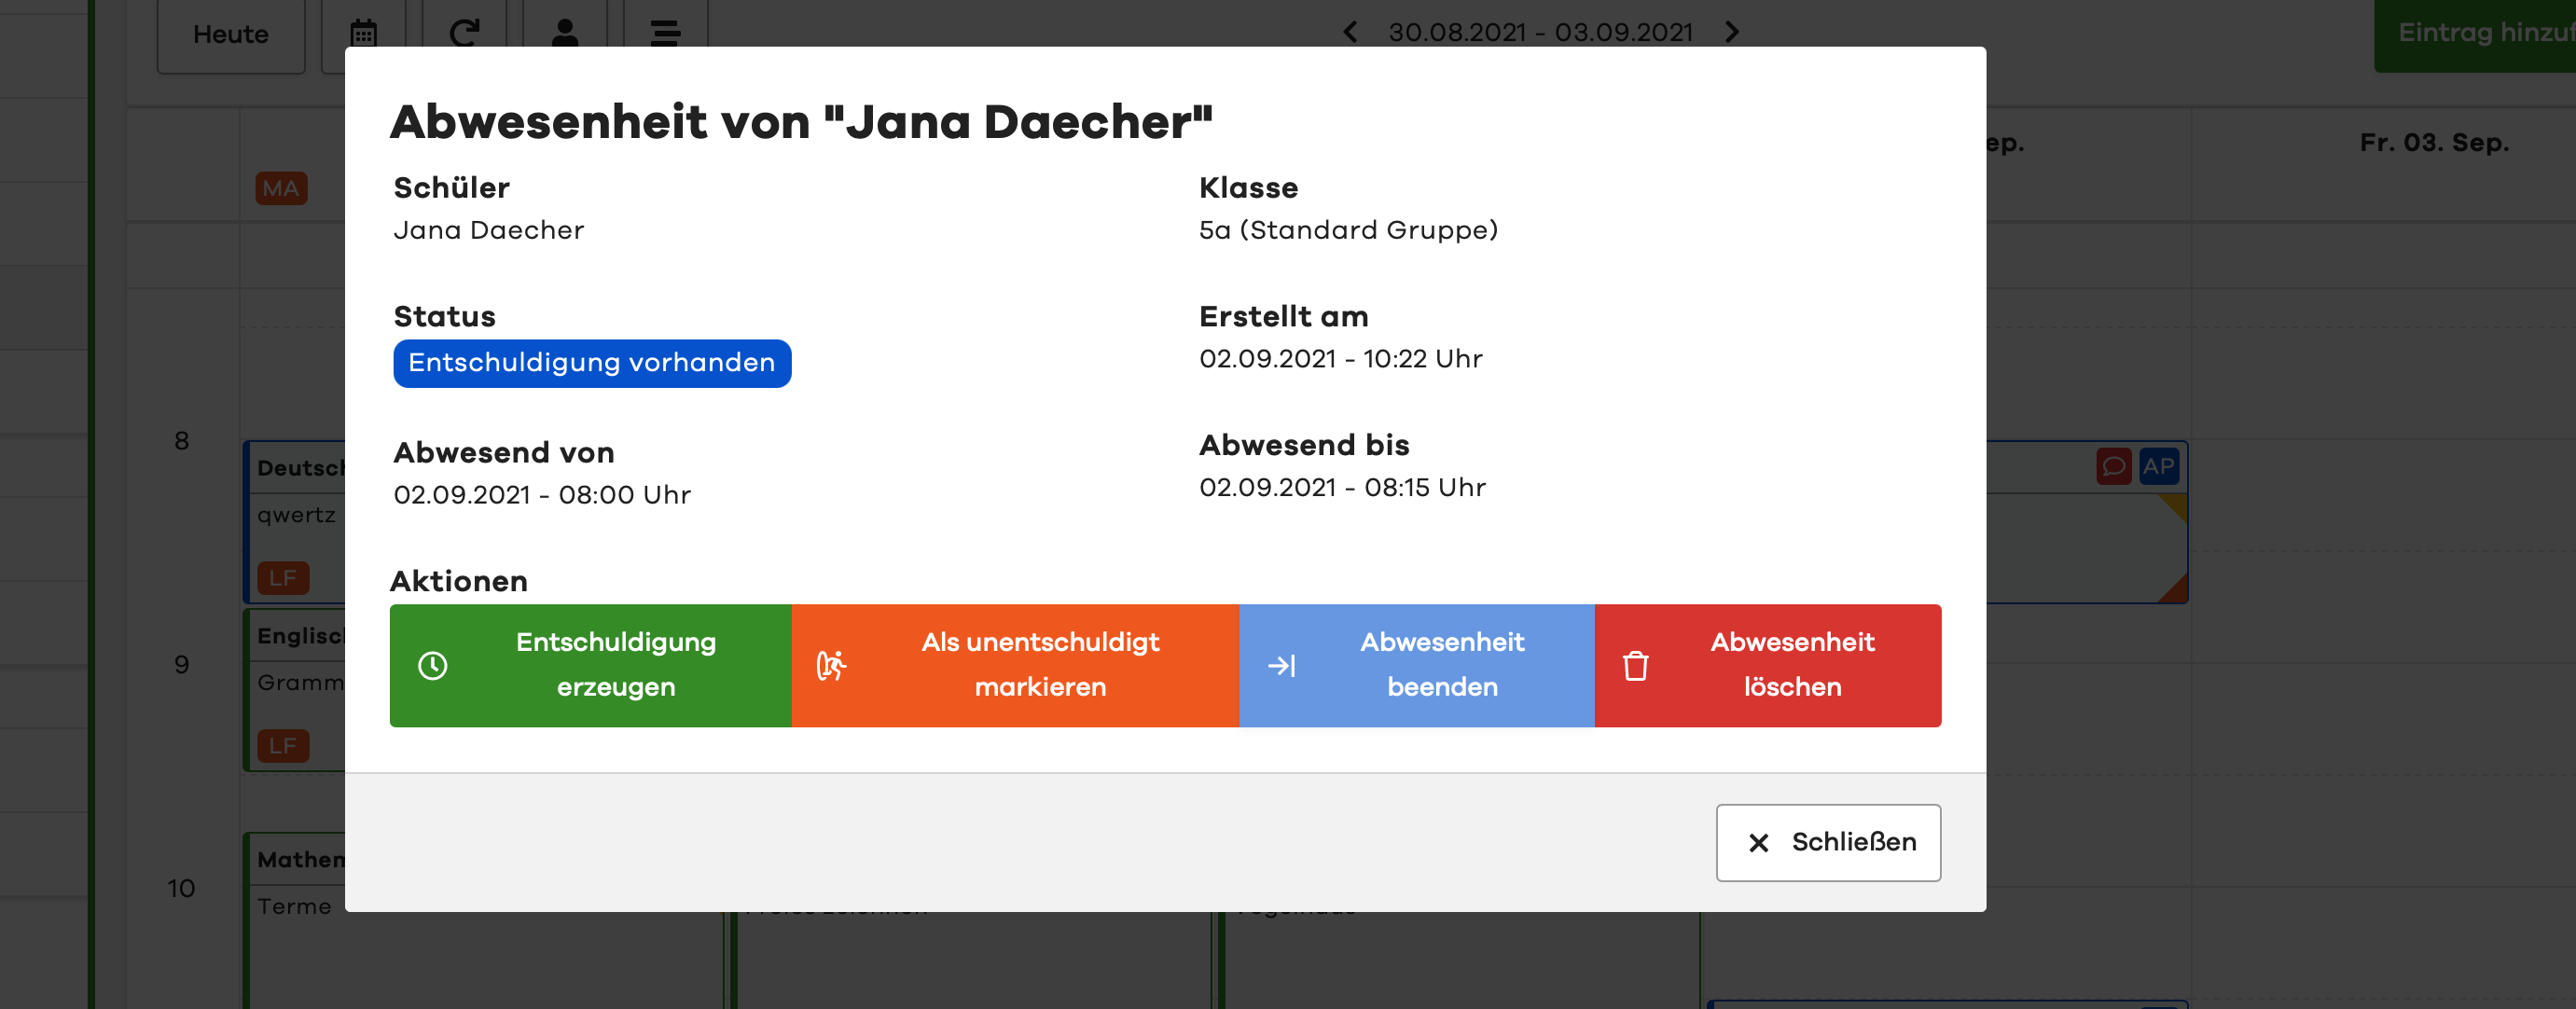
Details via Mouse Click
By clicking on the initials, you access the context menu. Here you can see all information about the absence and perform further interactions.

When is an Absence Considered Active
An absence is considered active as long as it has not been ended (it has no end time). This is the case, for example, when you mark a pupil as absent from the 1st period in the classic way. If a pupil is present for the first 4 periods and you mark them as absent at the beginning of the 5th period, they will also be displayed above under active absences until the absence is ended.
For absences with an end time (e.g., for tardiness), the initials are displayed in the periods in which the pupil was absent.
Please note that all absences are automatically ended by the system at the end of a day.
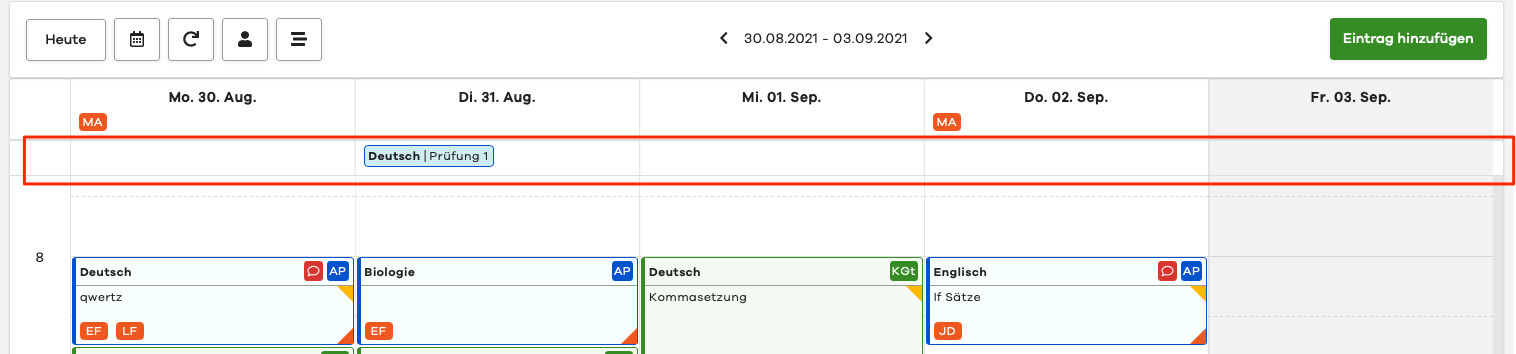
Announced Exam Dates
General
In the second Lesson Log row, the digital Lesson Log shows you all announced exams from the edjufy Exam Calendar. The subject and a short excerpt from the title are displayed in a blue rectangle.
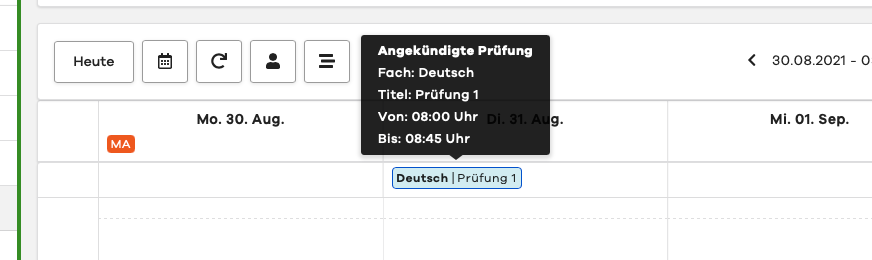
Quick Overview via Mouse Hover
To get a quick overview of the details of an exam, simply move your mouse pointer over the blue box of the exam.
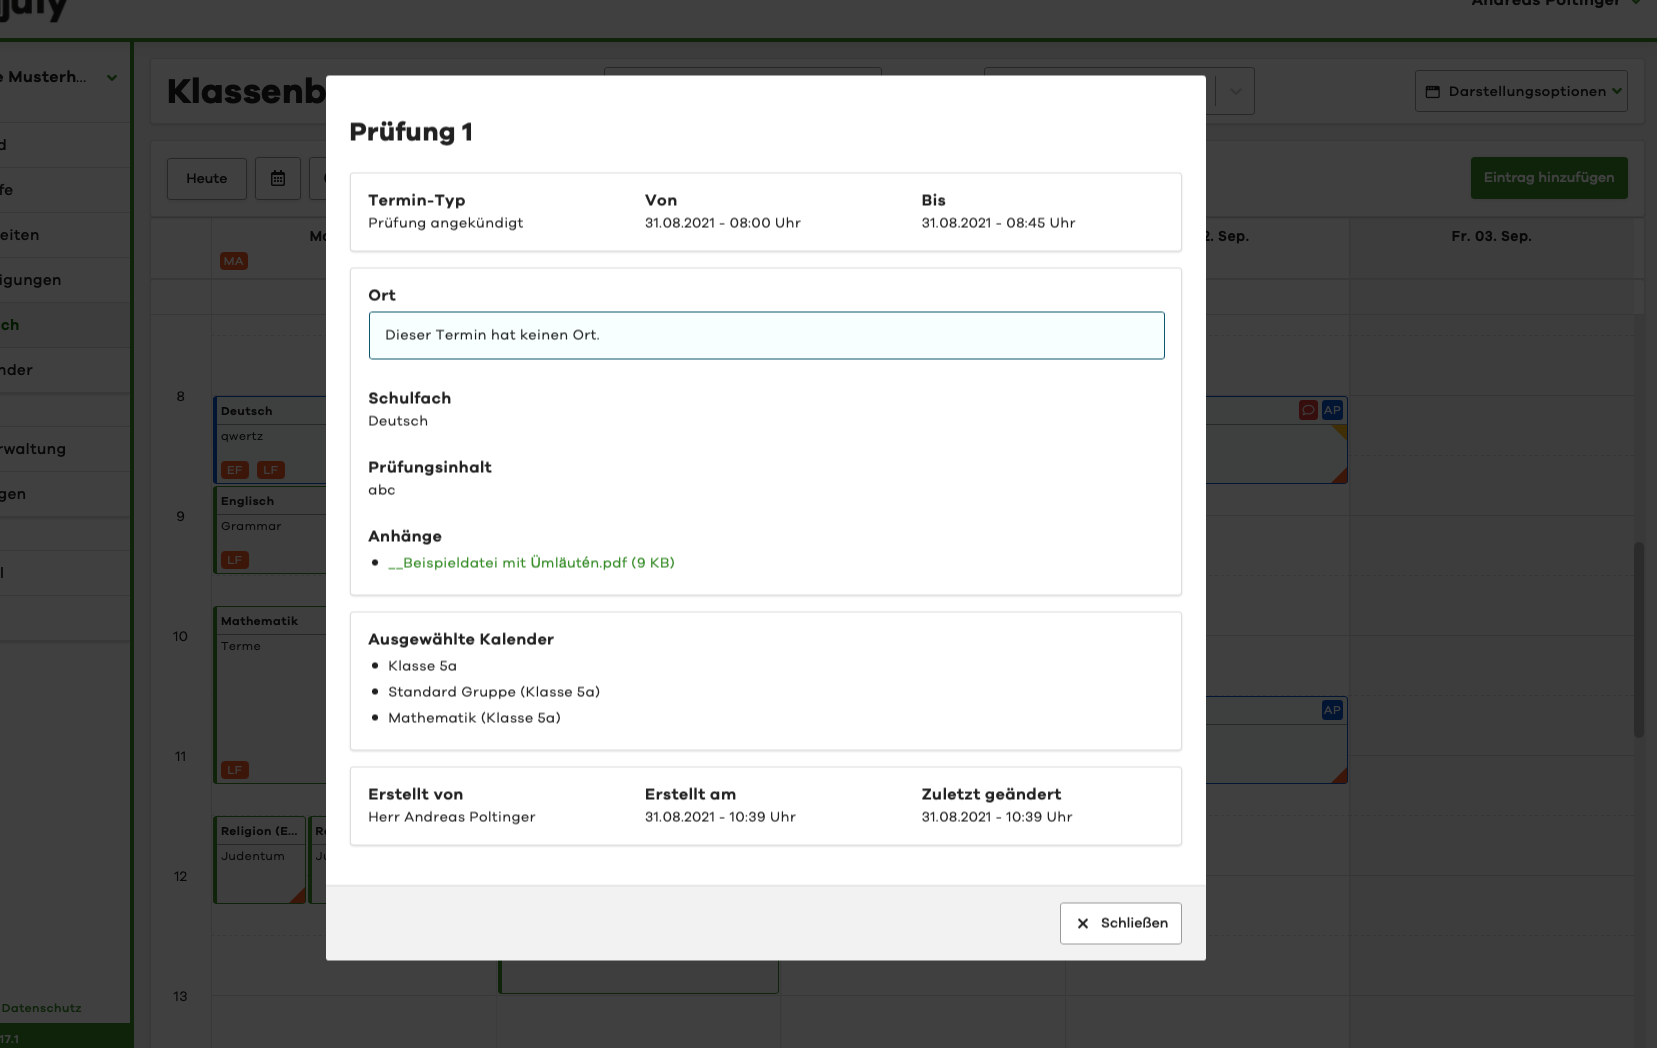
Details via Mouse Click
By clicking on the blue box, you access the context menu. Here you can see all information about the exam.
Day Columns and Times
Days are represented in the Lesson Log via columns and times via rows. This makes the edjufy digital Lesson Log similar to a classic weekly calendar. Similar to the first Lesson Log row (Active Absences), you can also use a mouse hover or click here.
Structure of Lesson Tiles
A lesson tile tells you all important information about the lesson at a glance. To give our users an even quicker overview, we use various symbols and colors.
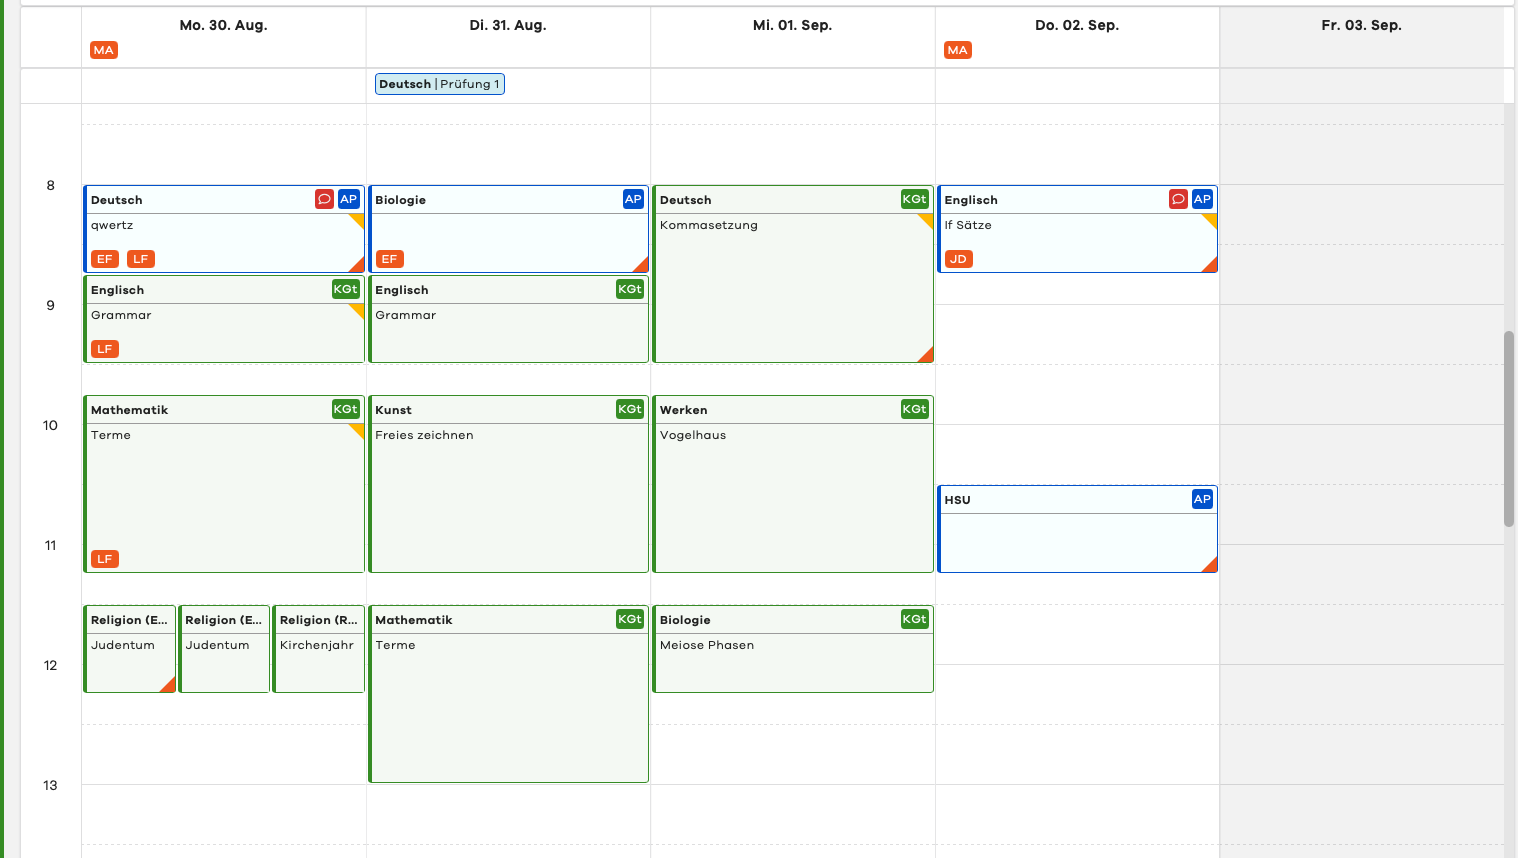
Tile Color / Teacher Abbreviation
In the upper right corner of a lesson tile, you will find the abbreviation of the teacher who created it. To recognize your own entries more quickly, colleague tiles are highlighted in green and your own in blue. In the following example, the entries from Andreas Poltinger are therefore marked in blue. To find out the full name behind an abbreviation, simply open the lesson unit by clicking on the tile, or move your mouse pointer over the box with the initials and the full name will appear.

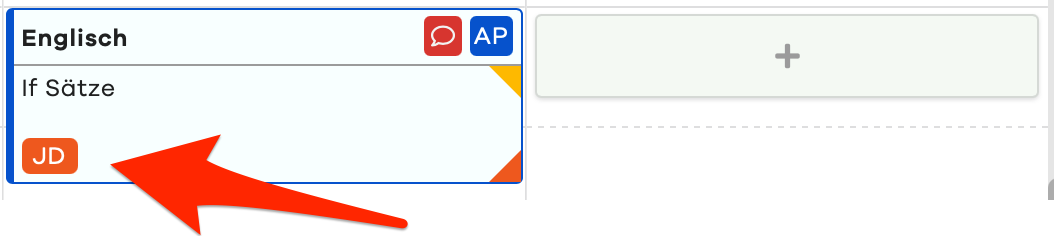
Absent Pupils in a Lesson
General
Similar to the upper absence row, the edjufy Lesson Log shows absences that affect a specific lesson and were not all-day or are currently active in the corresponding lesson tile. For example, if a pupil arrived late in the 1st period or was absent during the 4th period, the initials show this circumstance in the affected lesson tiles.
Quick Overview via Mouse Hover
To get a quick overview of the details of an absence, simply move your mouse pointer over the pupil's initials.

Details via Mouse Click
By clicking on the initials, you access the context menu. Here you can see all information about the absence and perform further interactions.
Attendance Check Completed / Homework Assigned
The two triangles on the right edge of the tile tell you:
- Whether homework was assigned in this lesson
- Whether an attendance check was recorded in this lesson

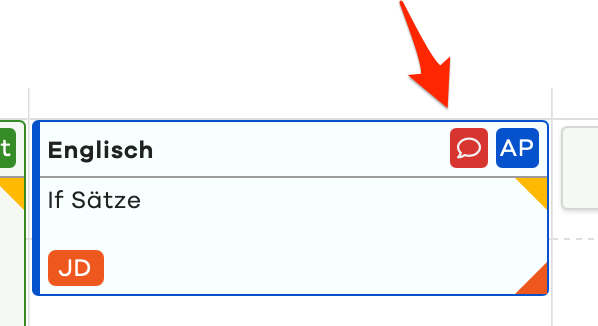
Private Note
Lessons in which a private note has been written by the creator are marked with a red speech bubble. The red speech bubble as well as the note itself are only displayed to the creator of the private note. Neither principals nor edjufy administrators can view the content.
For better readability, private lesson notes are described in more detail in a separate chapter.
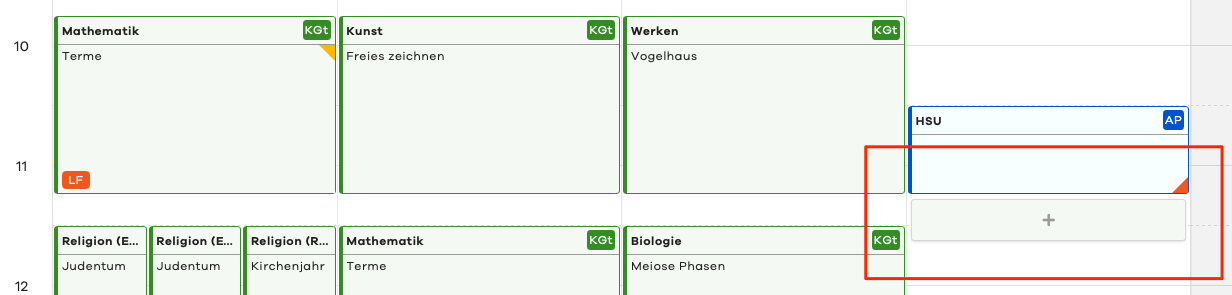
Adding an Entry
To create a new Lesson Log entry, either click on the green button Add Entry in the upper right corner, or press the + in the green button within the day column. This button becomes visible as soon as your mouse pointer is within a day column.

For better readability, creating and editing Lesson Log entries is described in more detail in a separate chapter.