Edit Excuse
Introduction
There are fundamentally two ways to edit an excuse.
Below we will present both methods to you.
Edit Single Excuse
To edit a single excuse, proceed as follows:
- Navigate to the Excuses module.
- Switch to the All tab.
- Select the desired excuse from the list.
- Click on the desired excuse.
You are now in the detail view of the excuse.
Edit Basic Information
To edit the basic information of the excuse, click the Edit button in the top right.
Here you can edit the following data:
- Reason for the excuse
- Date range of the excuse
- Times of the excuse
- Assigned teacher
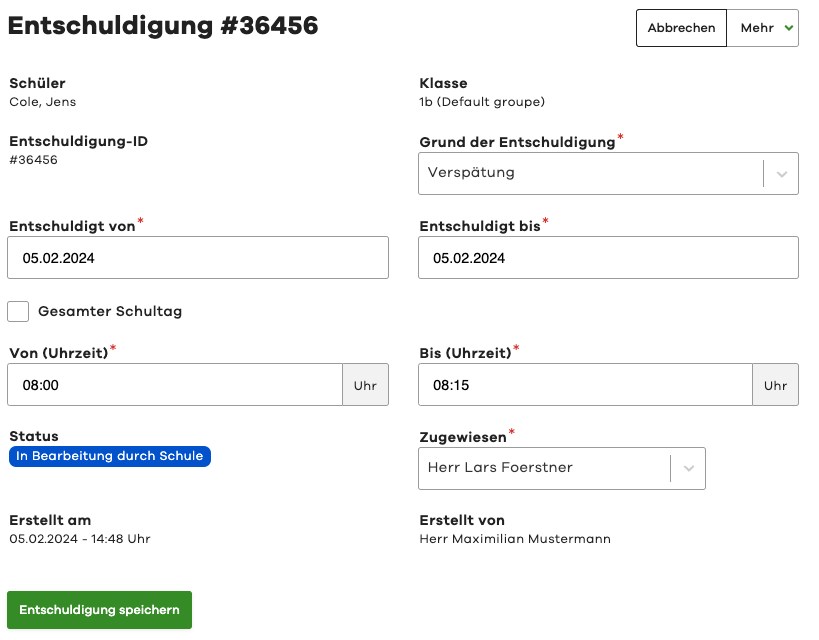
After editing, click the Save Excuse button.
Perform Actions
In the Actions section, you can perform various actions for the excuse.

These include:
Accept
This sets the status of the excuse to Accepted.
The legal guardians are notified of the acceptance.
The excuse is thus considered completed.
An accepted excuse can no longer be edited.
Request Feedback
This sets the status of the excuse to Feedback Required.
The legal guardians are notified and can respond accordingly.
The excuse can then be accepted or rejected.
Reject
This sets the status of the excuse to Rejected.
The legal guardians are notified of the rejection.
The excuse is thus considered completed.
A rejected excuse can still be edited.
You can also subsequently accept it or request feedback.
Delete
This action is only available to administrators.
This sets the status of the excuse to Deleted.
The excuse will then no longer appear in the general list.
For documentation purposes, however, the excuse remains in the system.
Deleted excuses can be viewed via the Deleted tab in the overview.
Legal guardians can also still view deleted excuses.
Deleted excuses cannot be restored.
View History
In the History section, you can view the history of the excuse.
This documents all actions, changes, and comments related to the excuse.
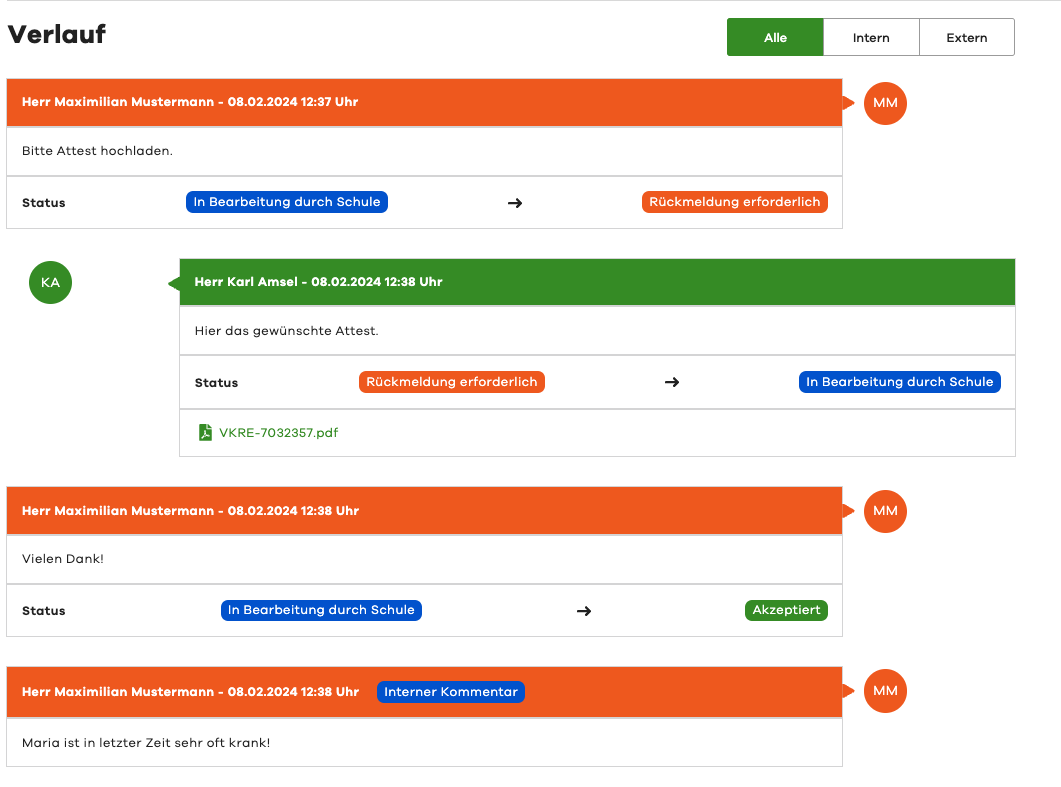
Add Comment
Below the history, you can add a comment to the excuse.
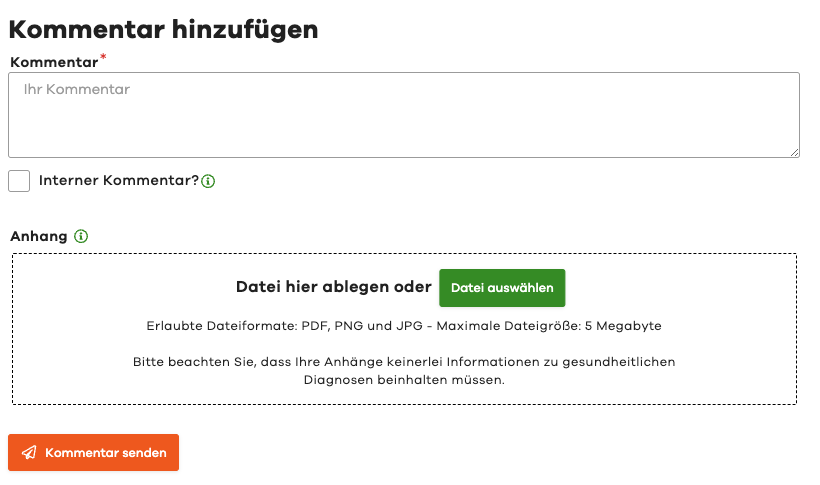
A distinction is made between two types of comments:
- Standard Comment (visible to legal guardians)
- Internal Comment (only visible to teachers)
For an internal comment, please select the Internal Comment option.
An attachment can also optionally be added to a comment.
Edit Multiple Excuses
To quickly edit multiple excuses one after another, proceed as follows:
- Navigate to the Excuses module.
- Switch to the My Open or All Open tab.
There you can select the desired excuses via the list on the side.
The detail view of the excuses is then displayed inline.
This allows you to quickly edit the desired excuse.
Then simply select the next excuse from the list.