Create a new Corona test
Below you will find all the necessary steps described to create a new Corona test in edjufy and record the pupils' results.
Creating a Corona test is divided into two main steps.
- Select classes and pupils for testing
- Record result per pupil
Afterwards, you will receive an evaluation of the recorded test results in the summary.
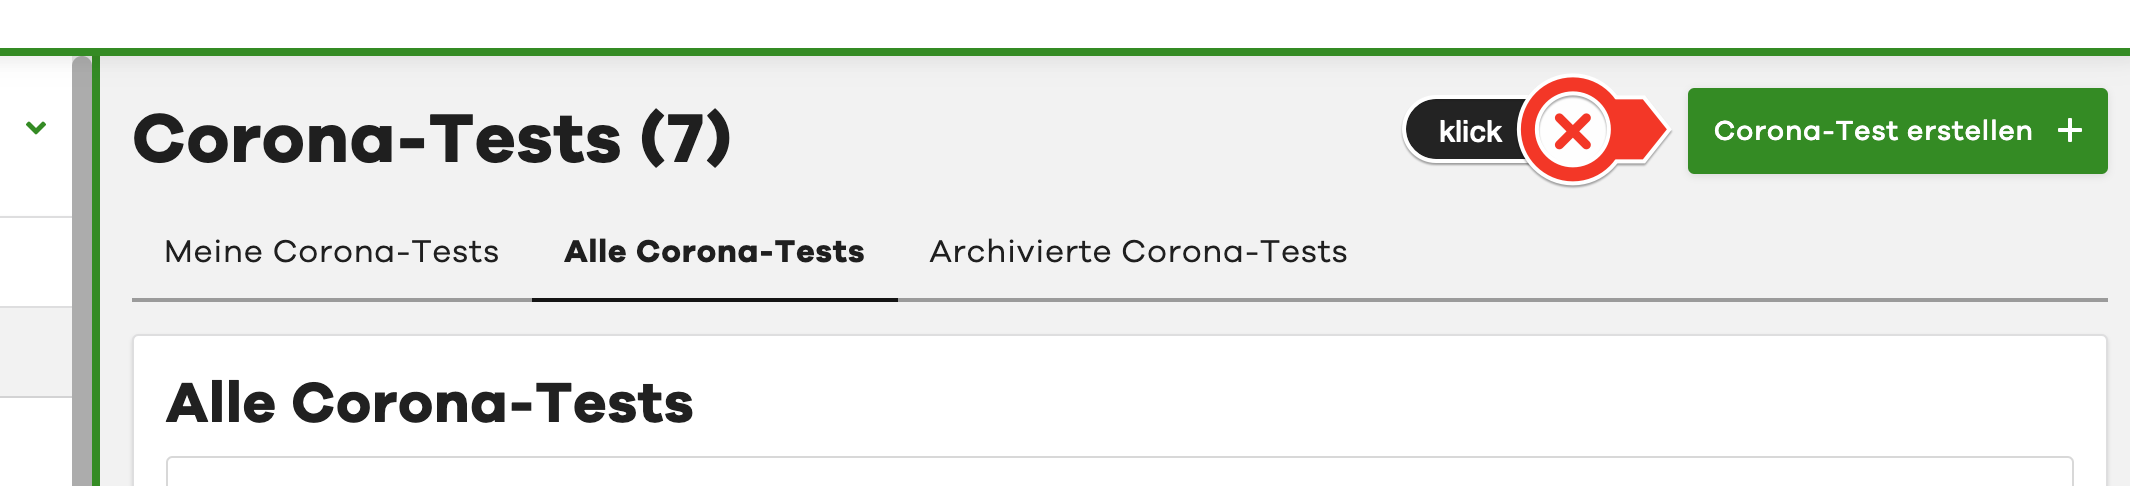
To create a new test, please select the "Create Corona test" button in the upper right corner of the overview:
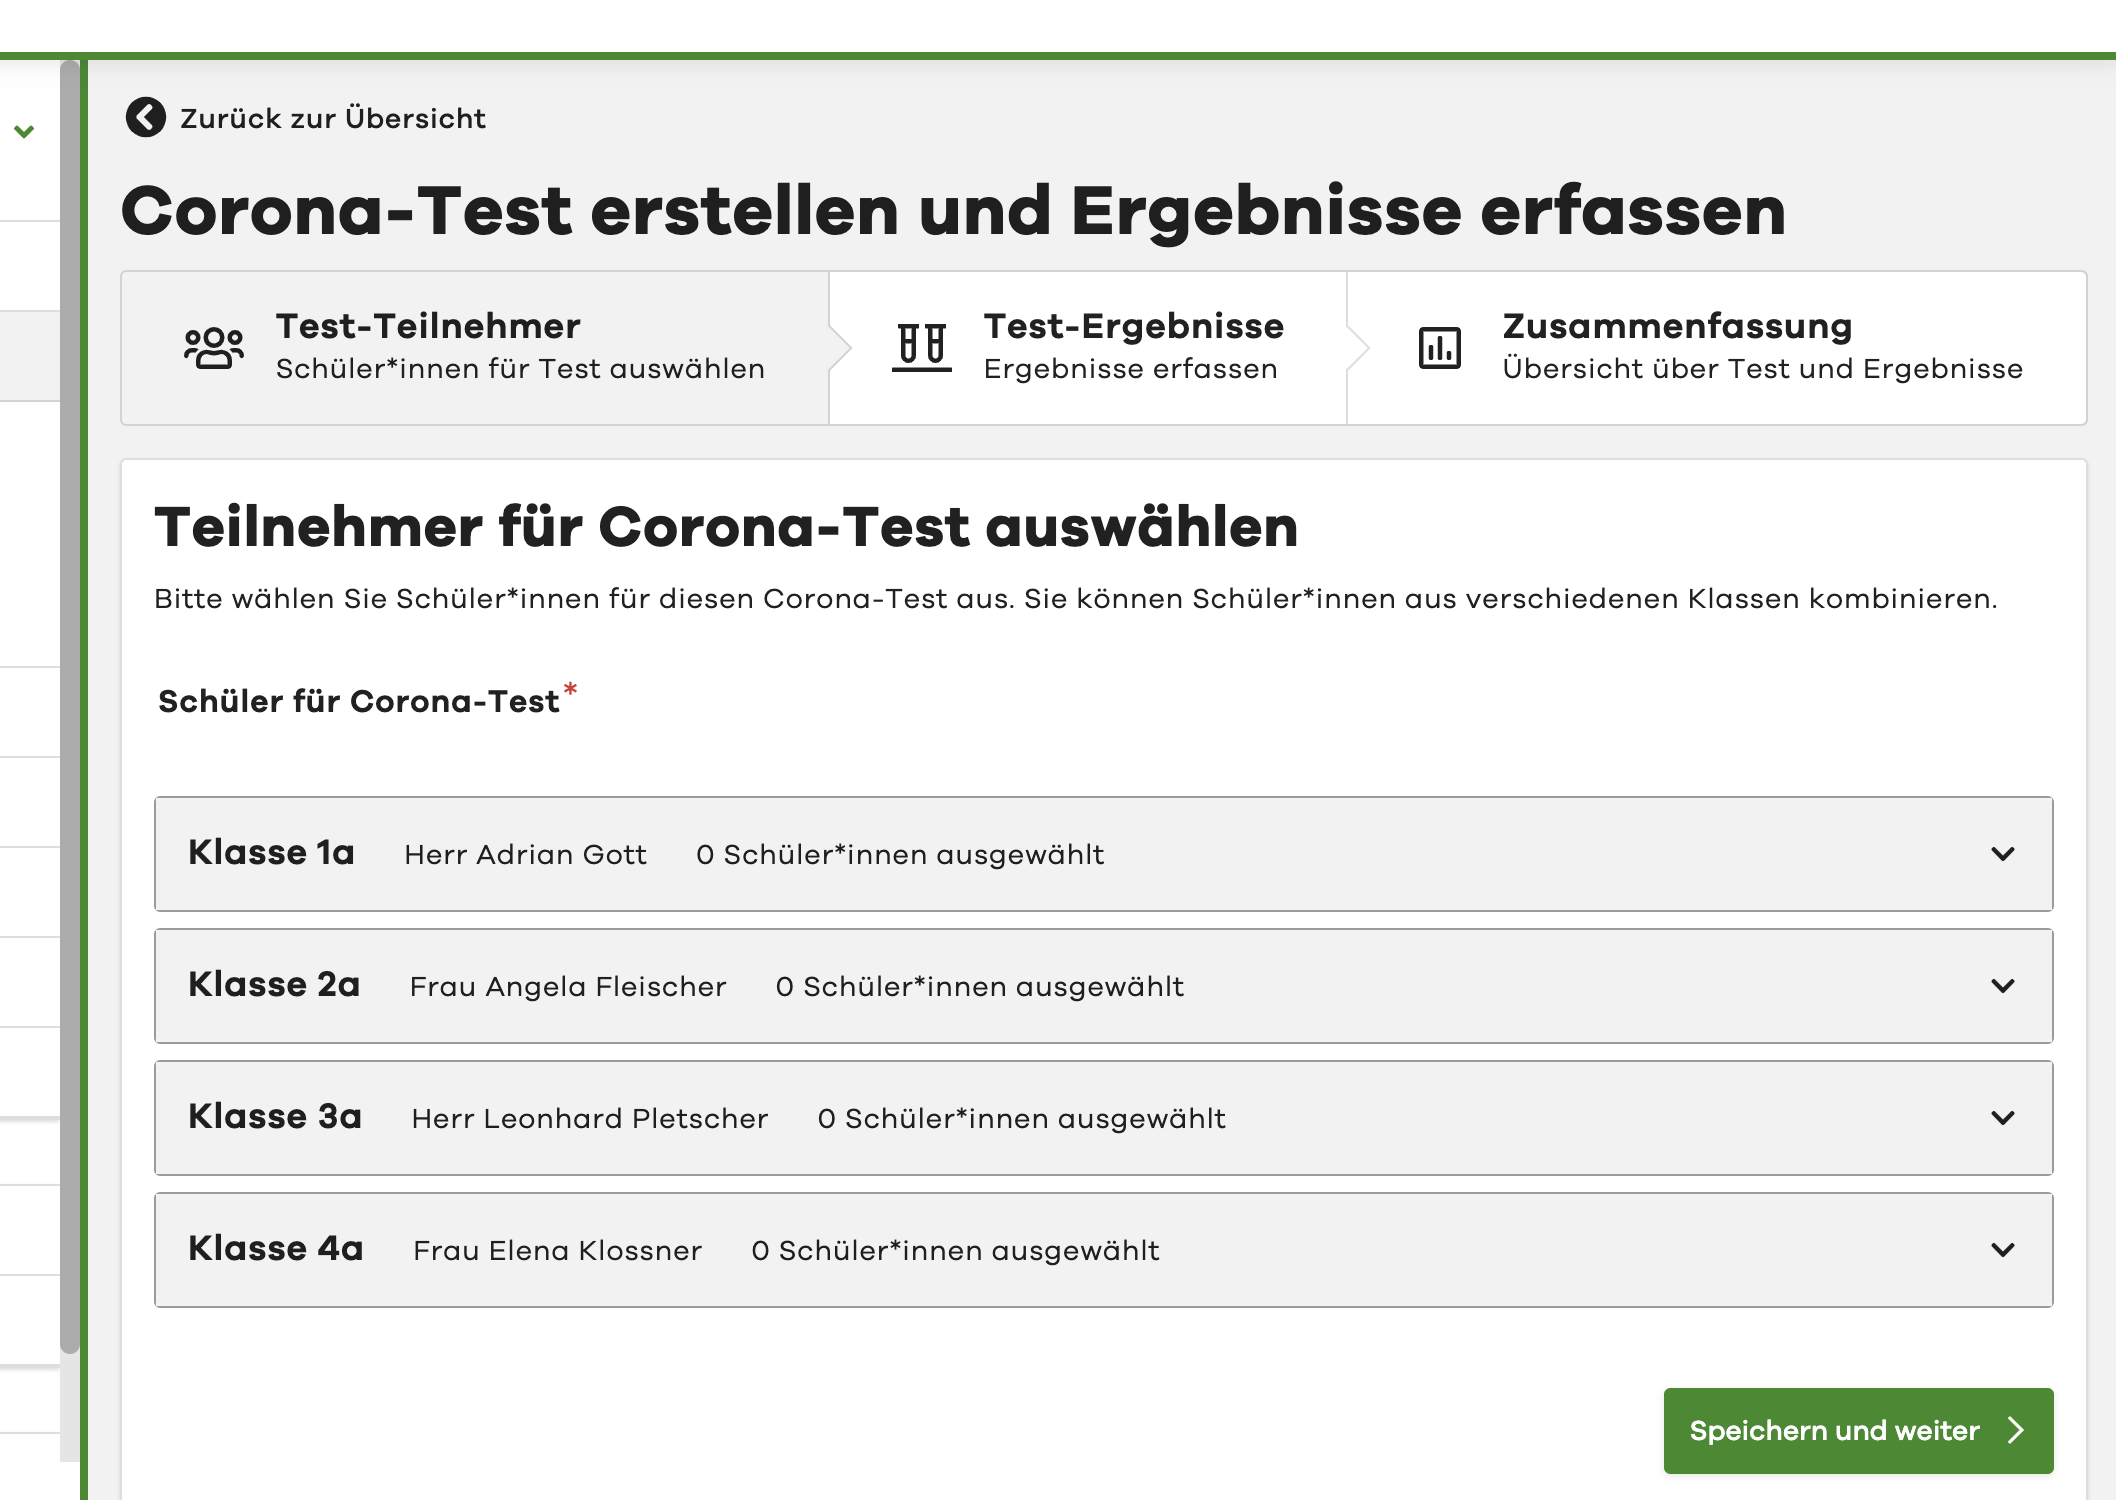
Select participants for test
In the first step for a new Corona test, you must now select the participating pupils for the test.
To do this, first select the desired classes in the list. By clicking on a class, it opens for pupil selection.
You can also open multiple classes and select pupils from different classes for one test.
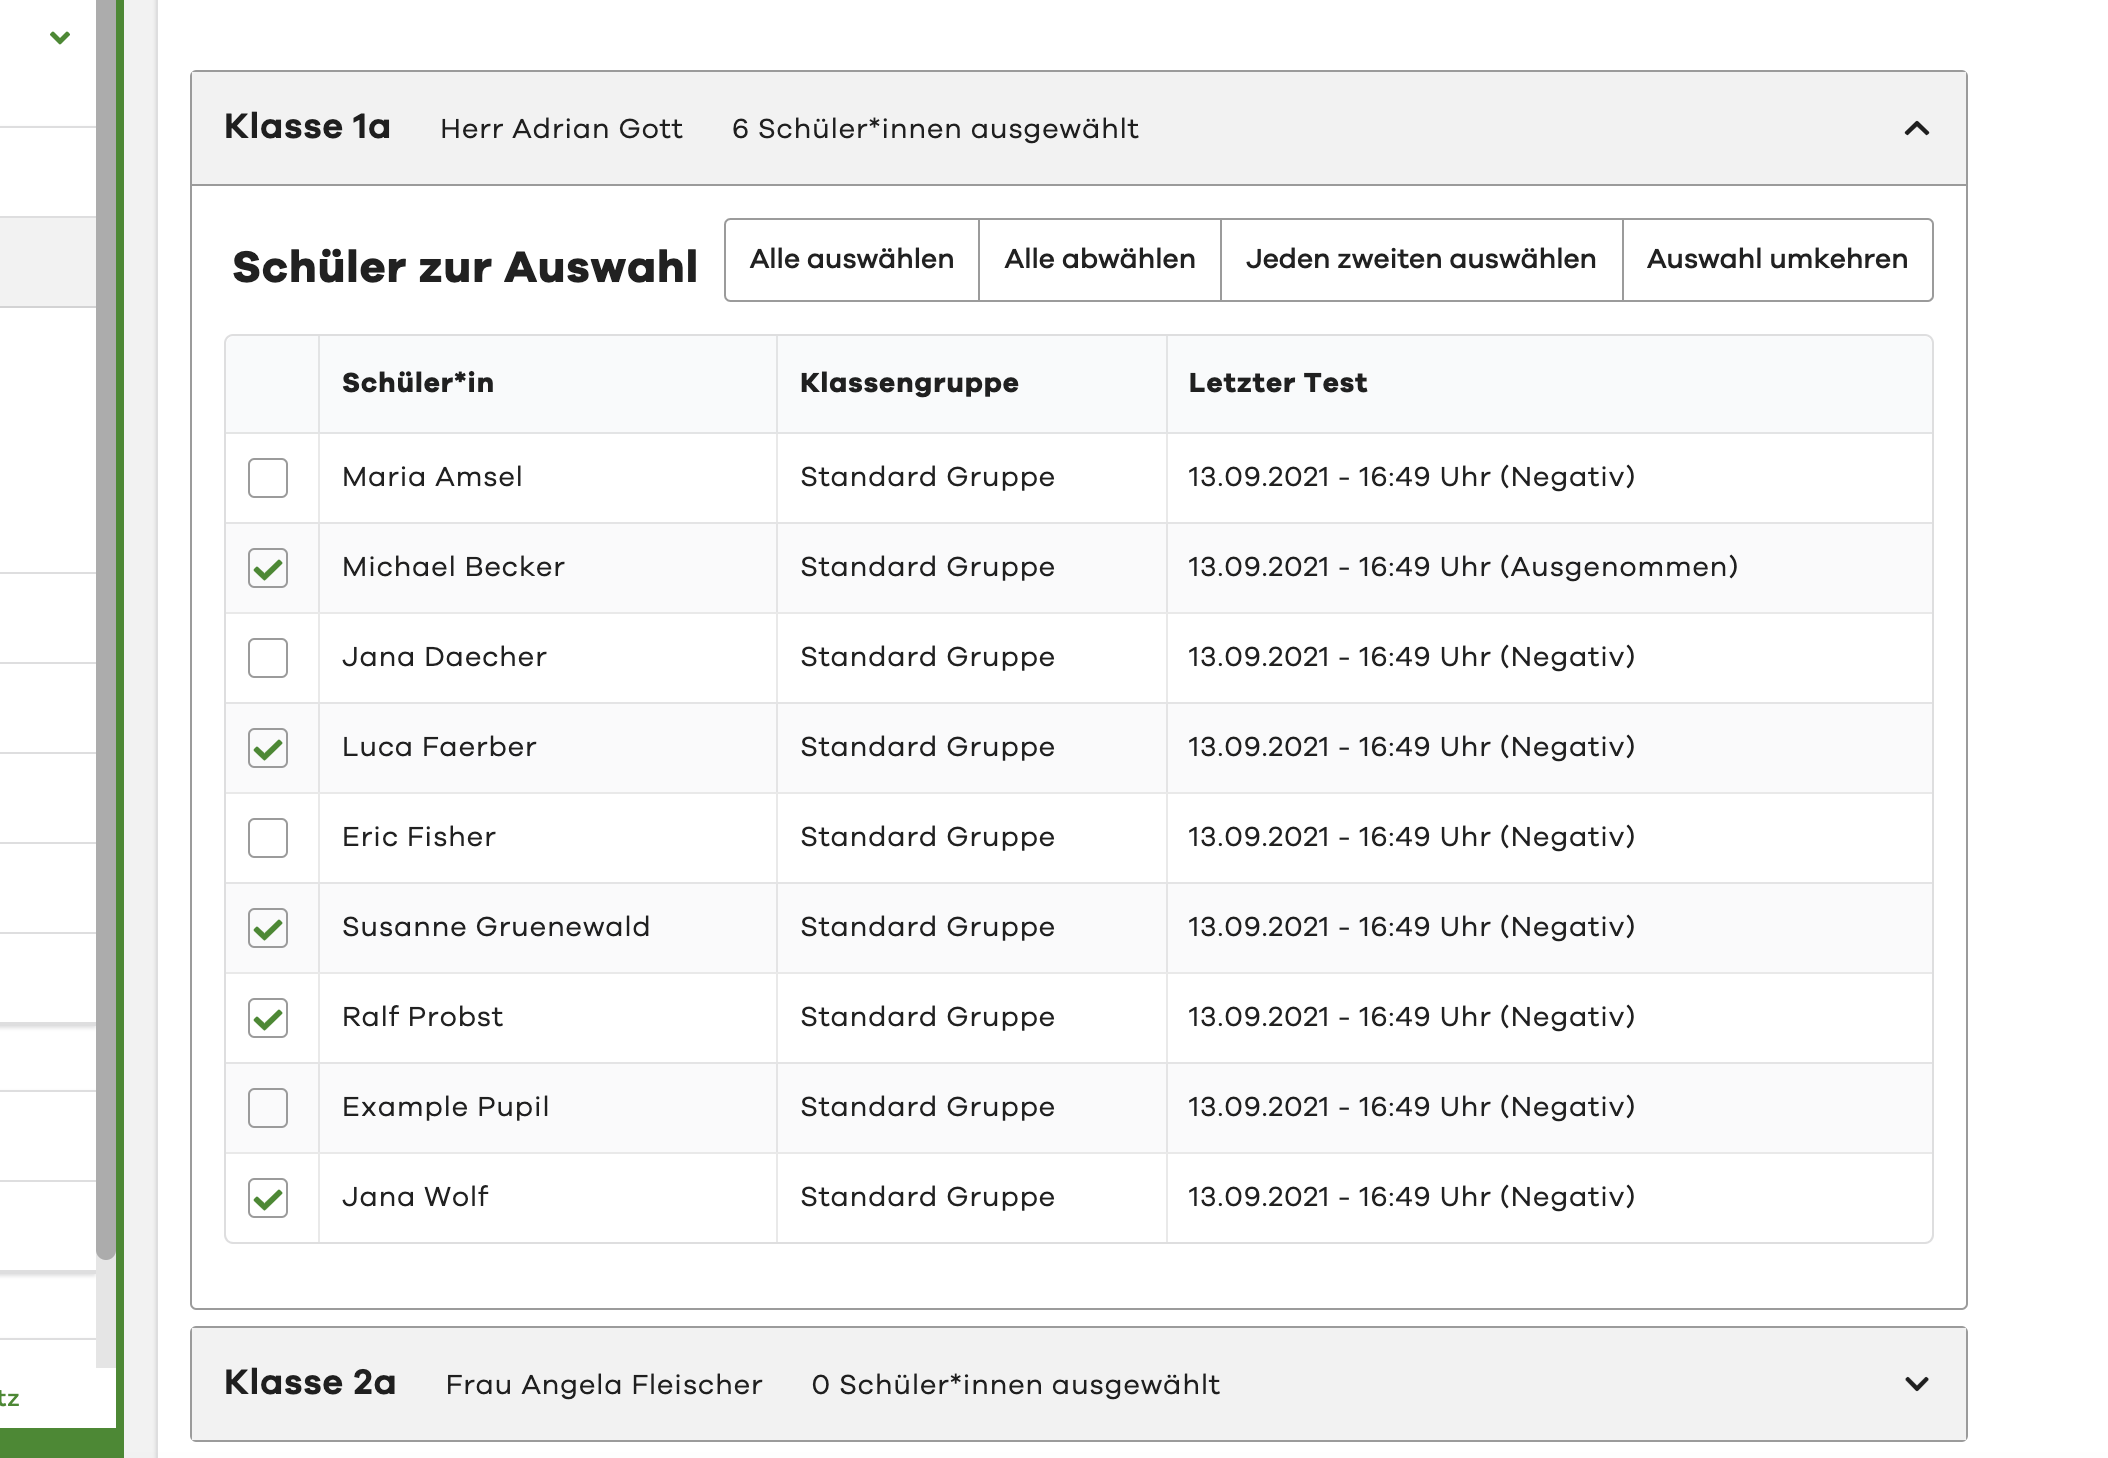
Then select the desired pupils for the test in the opened classes.
In the last column of the table, you can see when the respective pupil was last tested.
Using the "Quick selection" buttons at the top right, you can, for example, select all pupils or every second pupil.
After you have selected all pupils for the test, click "Save and continue" at the bottom of the page to proceed to the next step.
Enter test results
In the second step, you can now record the results for the previously selected pupils. (The pupils are displayed grouped by class.) Please select one of the three possible values per pupil: "negative", "exempt" or "positive".
Per class, you can mark all pupils as negative using the "Quick selection" button at the top right.
You also have the option to leave an individual comment for each pupil. This comment will be displayed later in the evaluation.
With the value "exempt", you can mark a pupil who is exempt from the test. If the school is aware of a corresponding exemption, it can be stored directly with the pupil. If this is the case, the pupil is automatically preselected with the value "exempt". You can find more about this here: Manage exempt pupils
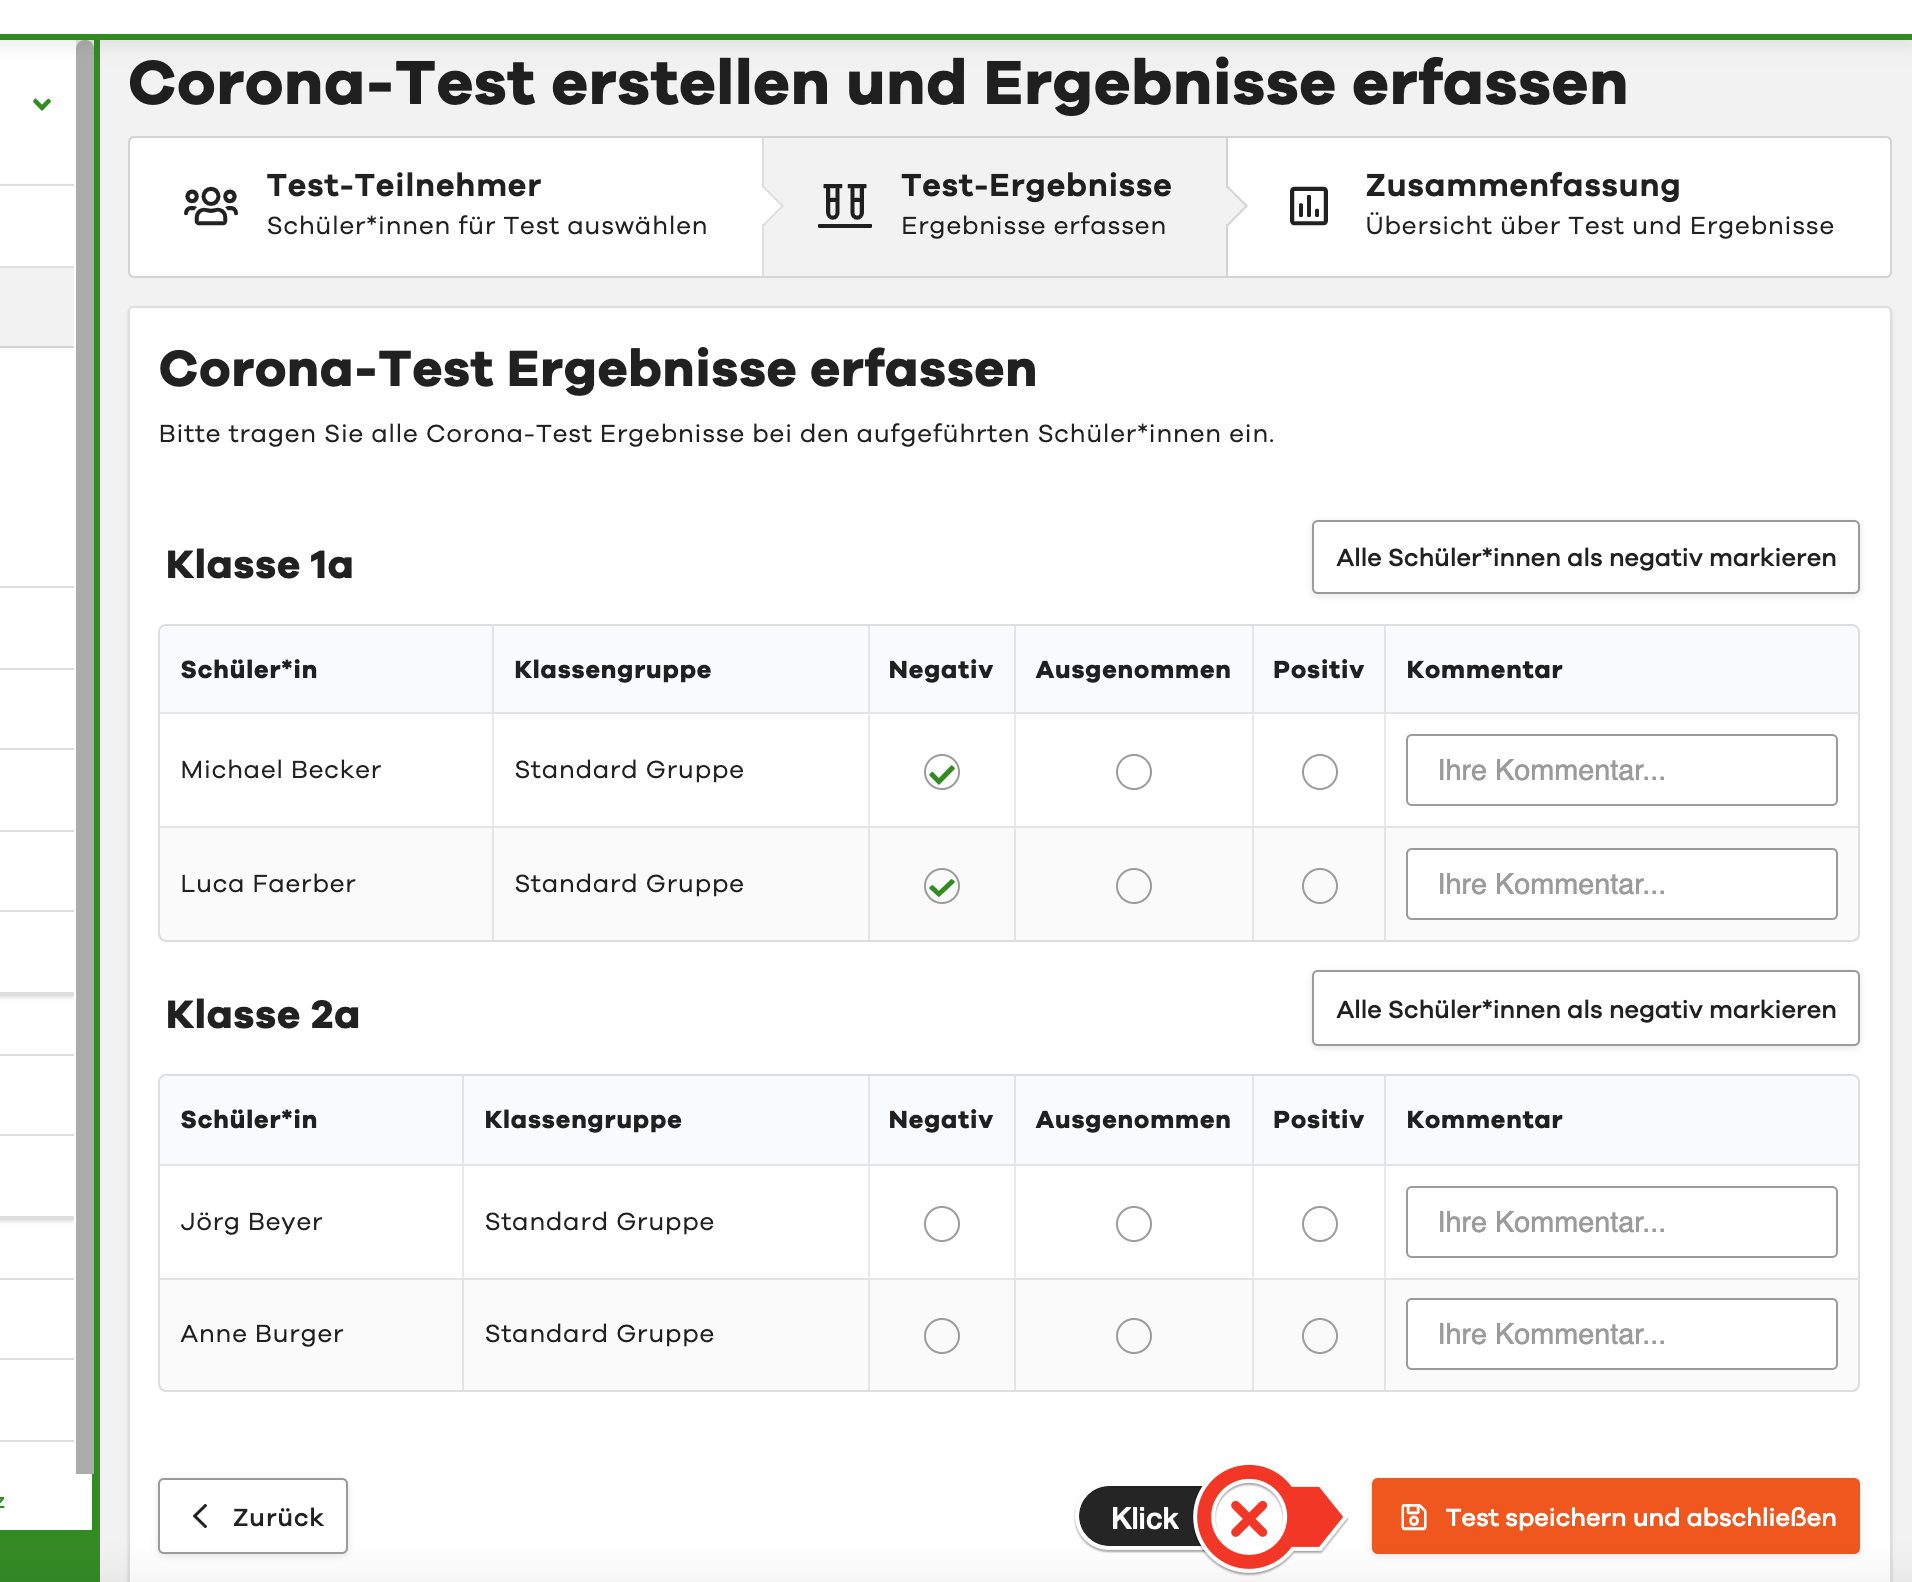
Once you have recorded a test result for all pupils, you can complete the test using the "Save and complete test" button. Once the test is completed, no further results can be entered or changed.
If you would like to adjust the selection of classes and pupils again, you can do this before recording the first results. Simply select the "Back" button at the bottom of the page. This will take you to step 1 where you can adjust your selection.
Test summary
After you have completed the test, you will be automatically redirected to the test summary. Here you can review and evaluate the recorded test results once more.
Everything else about the summary and evaluation can be found here: Evaluate test run