Single Sign-On (SSO) with Microsoft Entra ID (Azure AD) via OpenID Connect
Goal
edjufy should authenticate users via Microsoft Entra ID (Azure AD) using OpenID Connect (OIDC). Users then sign in with their Microsoft account and do not need a separate edjufy password.
Prerequisites
- You have admin rights in Microsoft Entra ID (at least permission to create App Registrations/Enterprise Applications).
- You have access to edjufy as an administrator: Settings → SSO Configuration.
- Optional: edjufy support assists you (recommended, especially if you are activating SSO for the first time or want to make it mandatory).
Important: If SSO is misconfigured while "mandatory SSO login" is active, you may lock yourself out. Initially activate SSO only for one account type on a trial basis and ensure that at least one admin account remains accessible via an alternative method.
Required Values (from Entra ID)
You will enter these values into edjufy later:
- Client ID (Application / client ID)
- Client Secret (Secret "Value")
- Client Secret Expiration Date (the date you selected when creating the secret)
- Authorization URI (OAuth 2.0 authorization endpoint v2)
- Token URI (OAuth 2.0 token endpoint v2)
The Authorization/Token URIs can be derived directly from the Tenant ID (see Step 2).
Step 1: Create App Registration in Microsoft Entra ID
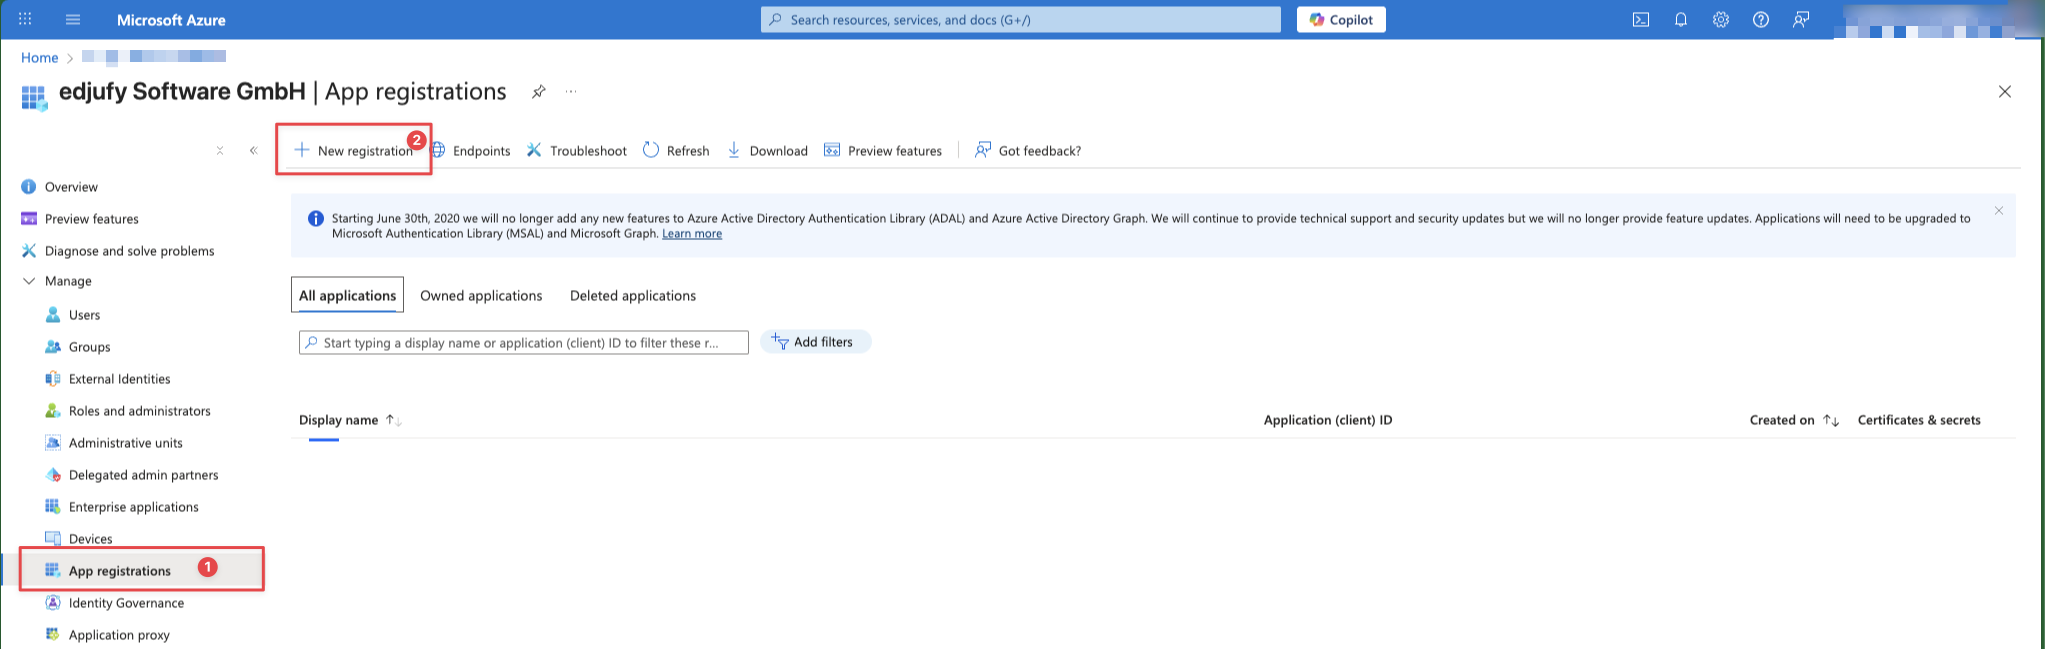
- Open the Azure Portal.
- Navigate to Microsoft Entra ID → App registrations → New registration.
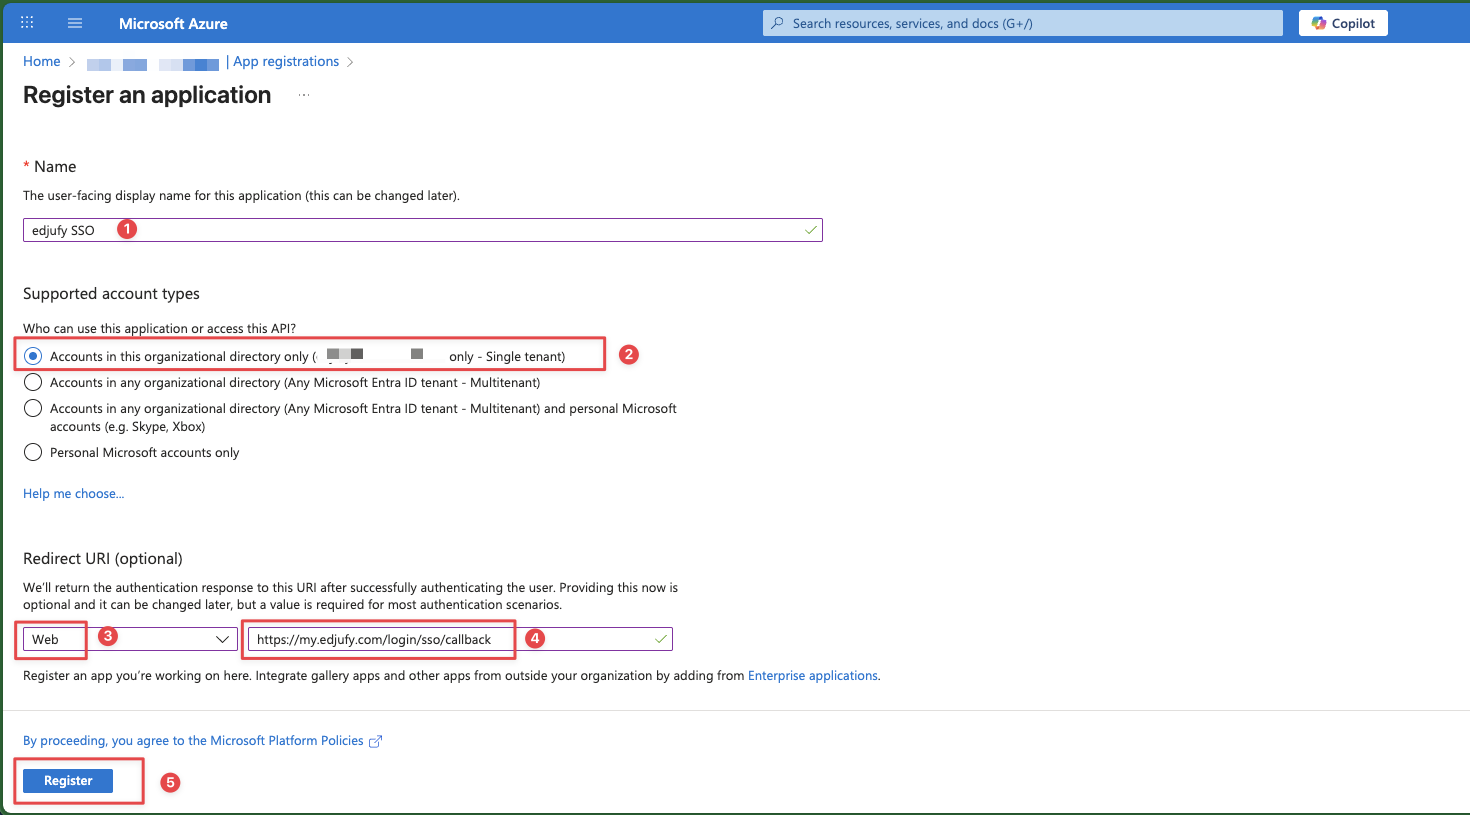
- Enter a name, e.g.,
edjufy SSO. - For Supported account types, select Single tenant.
- Enter the Redirect URI:
- Platform: Web
- URI:
https://my.edjufy.com/login/sso/callback
- Click Register.
Step 2: Note Client ID, Tenant ID and Endpoints
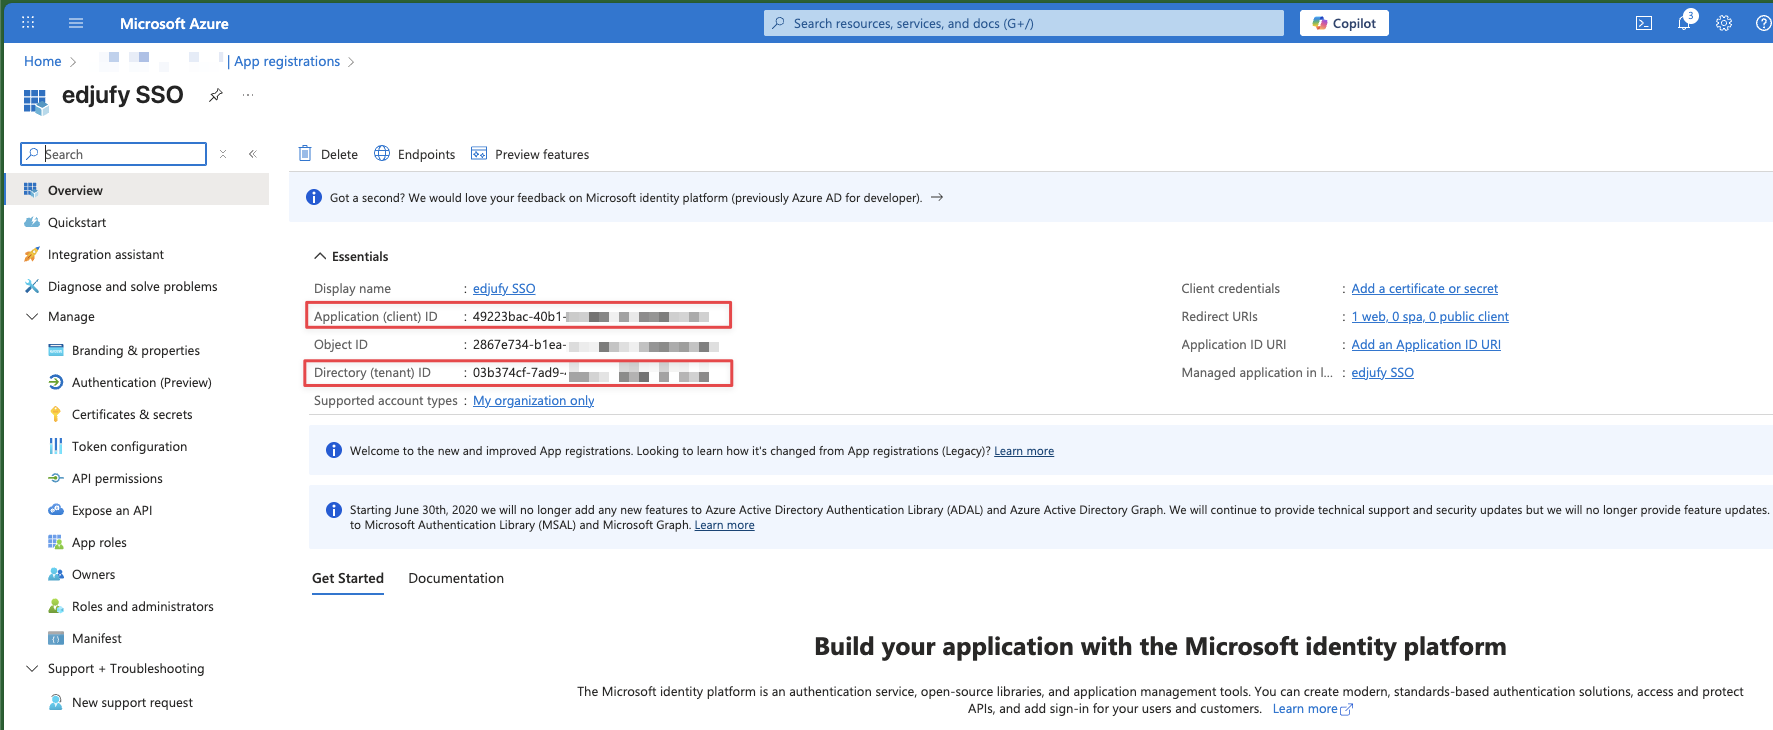
Open the Overview page of the App Registration and note:
- Application (client) ID → this is your Client ID
- Directory (tenant) ID → the URIs are derived from this
Authorization URI (v2):
https://login.microsoftonline.com/{TENANT-ID}/oauth2/v2.0/authorize
Token URI (v2):
https://login.microsoftonline.com/{TENANT-ID}/oauth2/v2.0/token
Step 3: API Permissions / Admin Consent
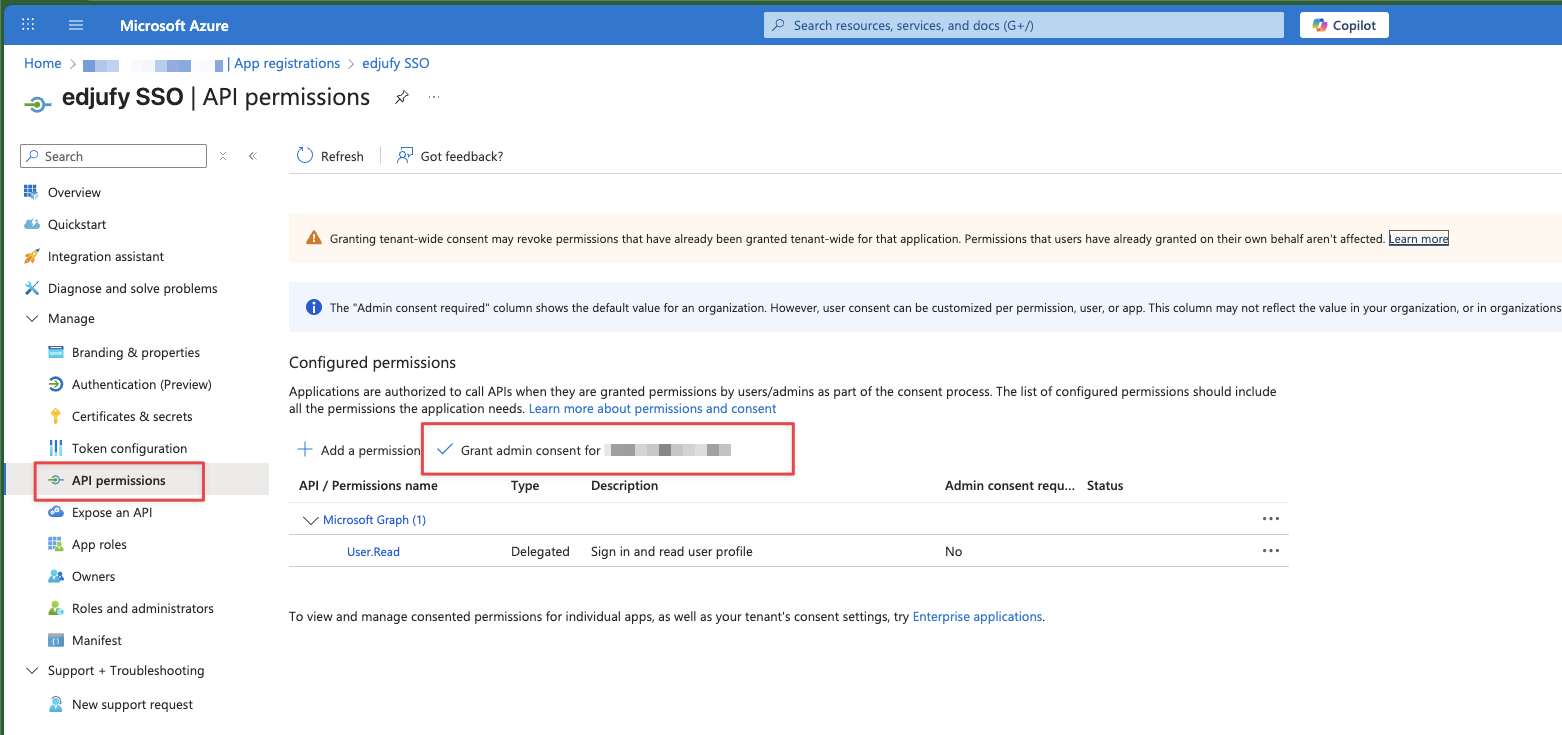
- Open API permissions in the App Registration.
- The default permissions are usually sufficient for sign-in.
- Confirm the necessary permissions under API permissions by clicking Grant admin consent.
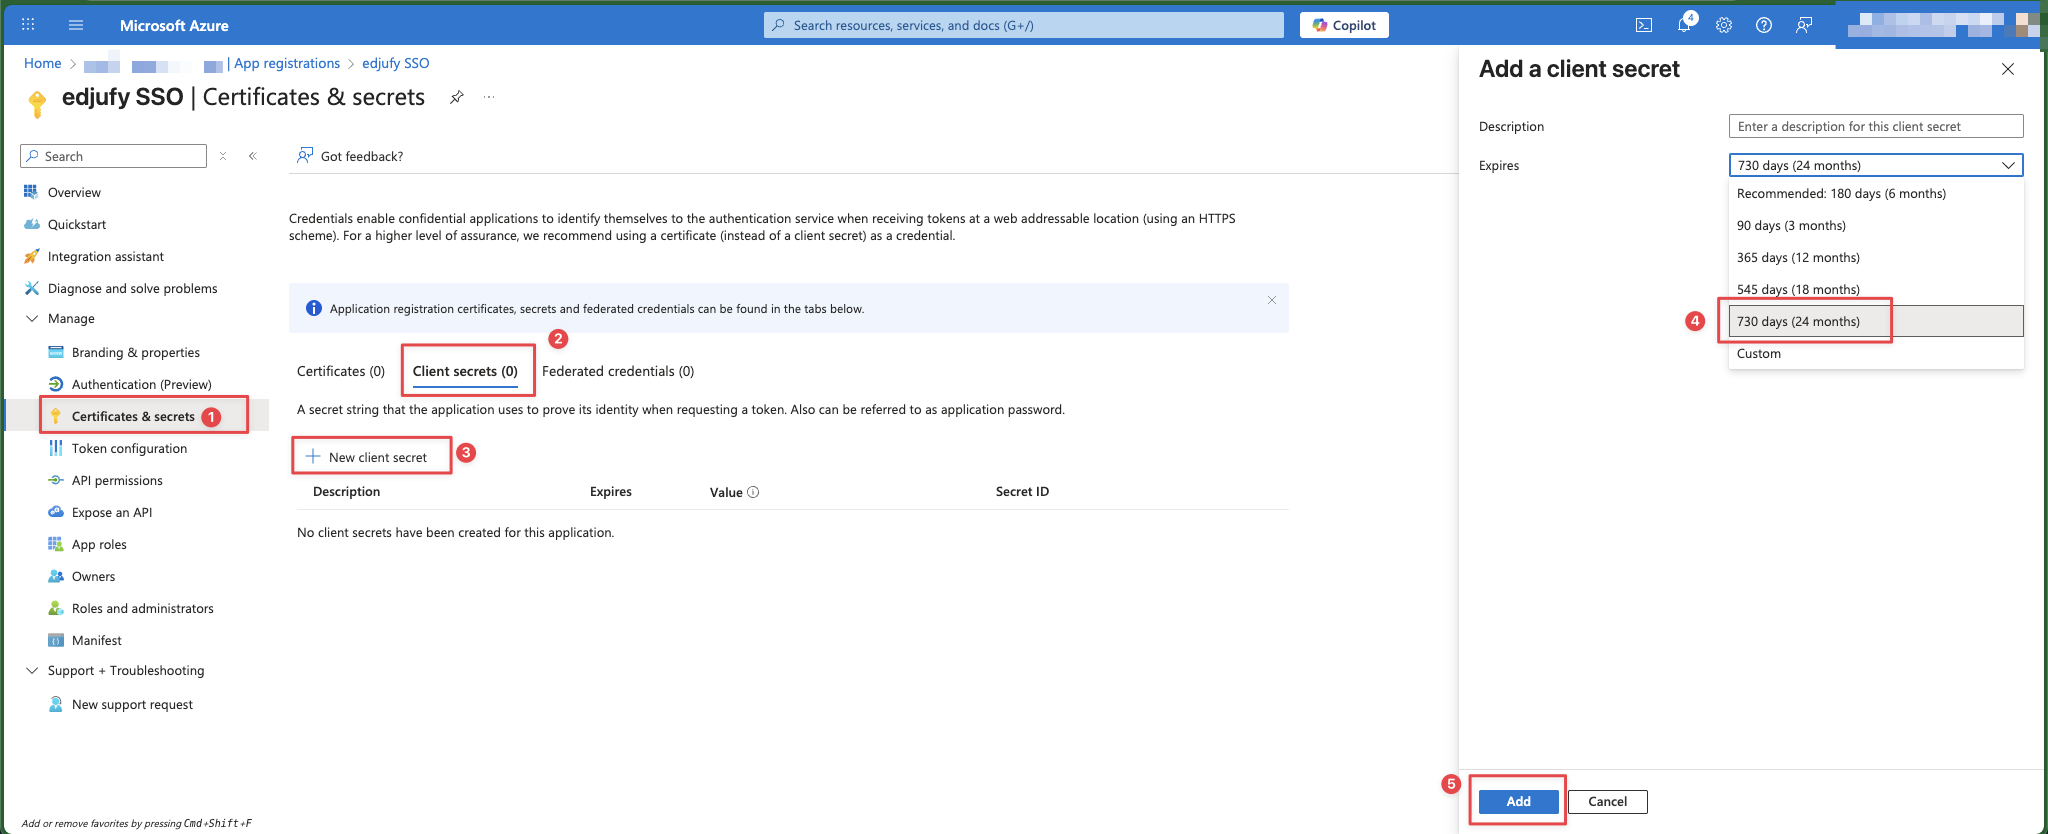
Step 4: Create Client Secret
- Open Certificates & secrets → New client secret.
- Choose an appropriate validity period (e.g., 12 or 24 months – depending on your policy).
- Generate the secret.
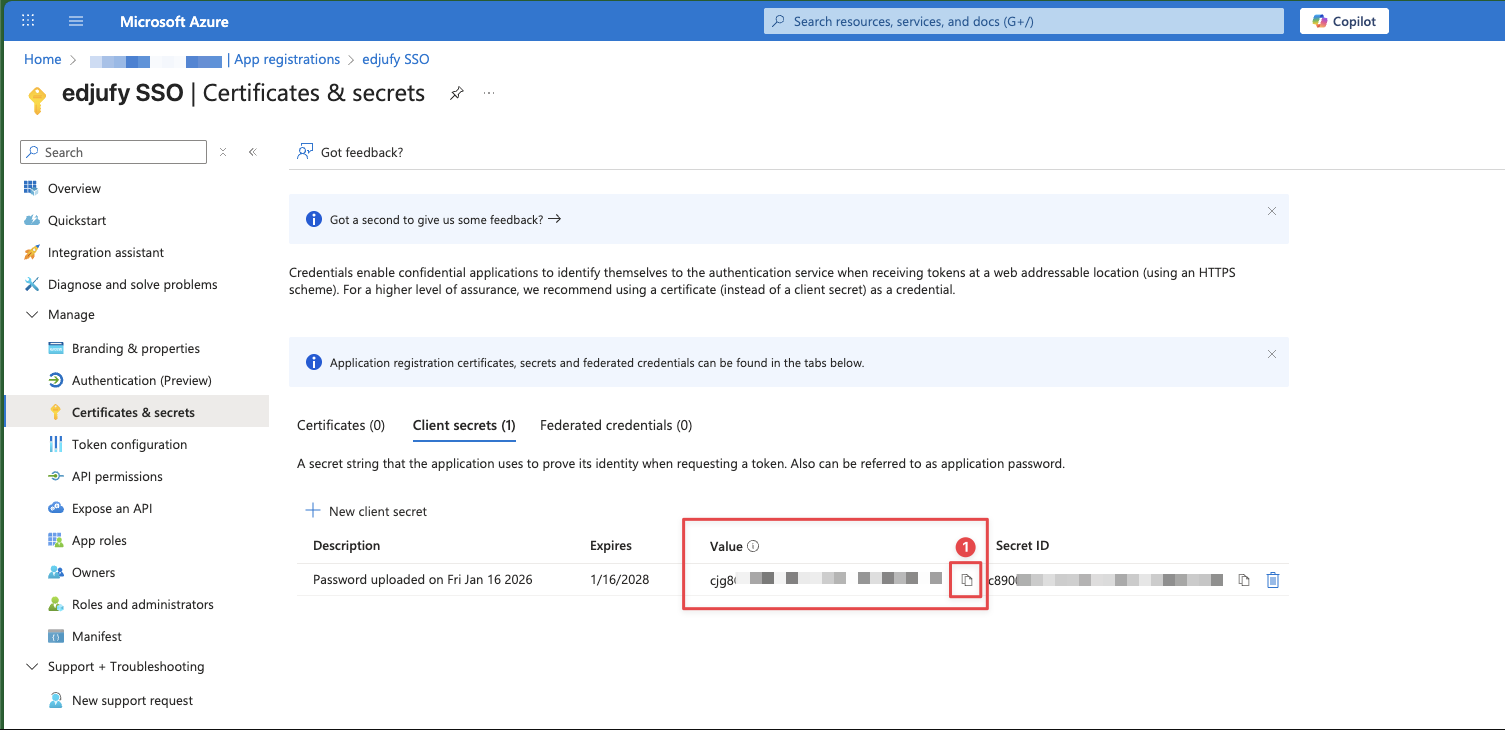
- Copy the Value immediately (it will not be shown again later).
- Note the Expiration date (you will enter this in edjufy later).
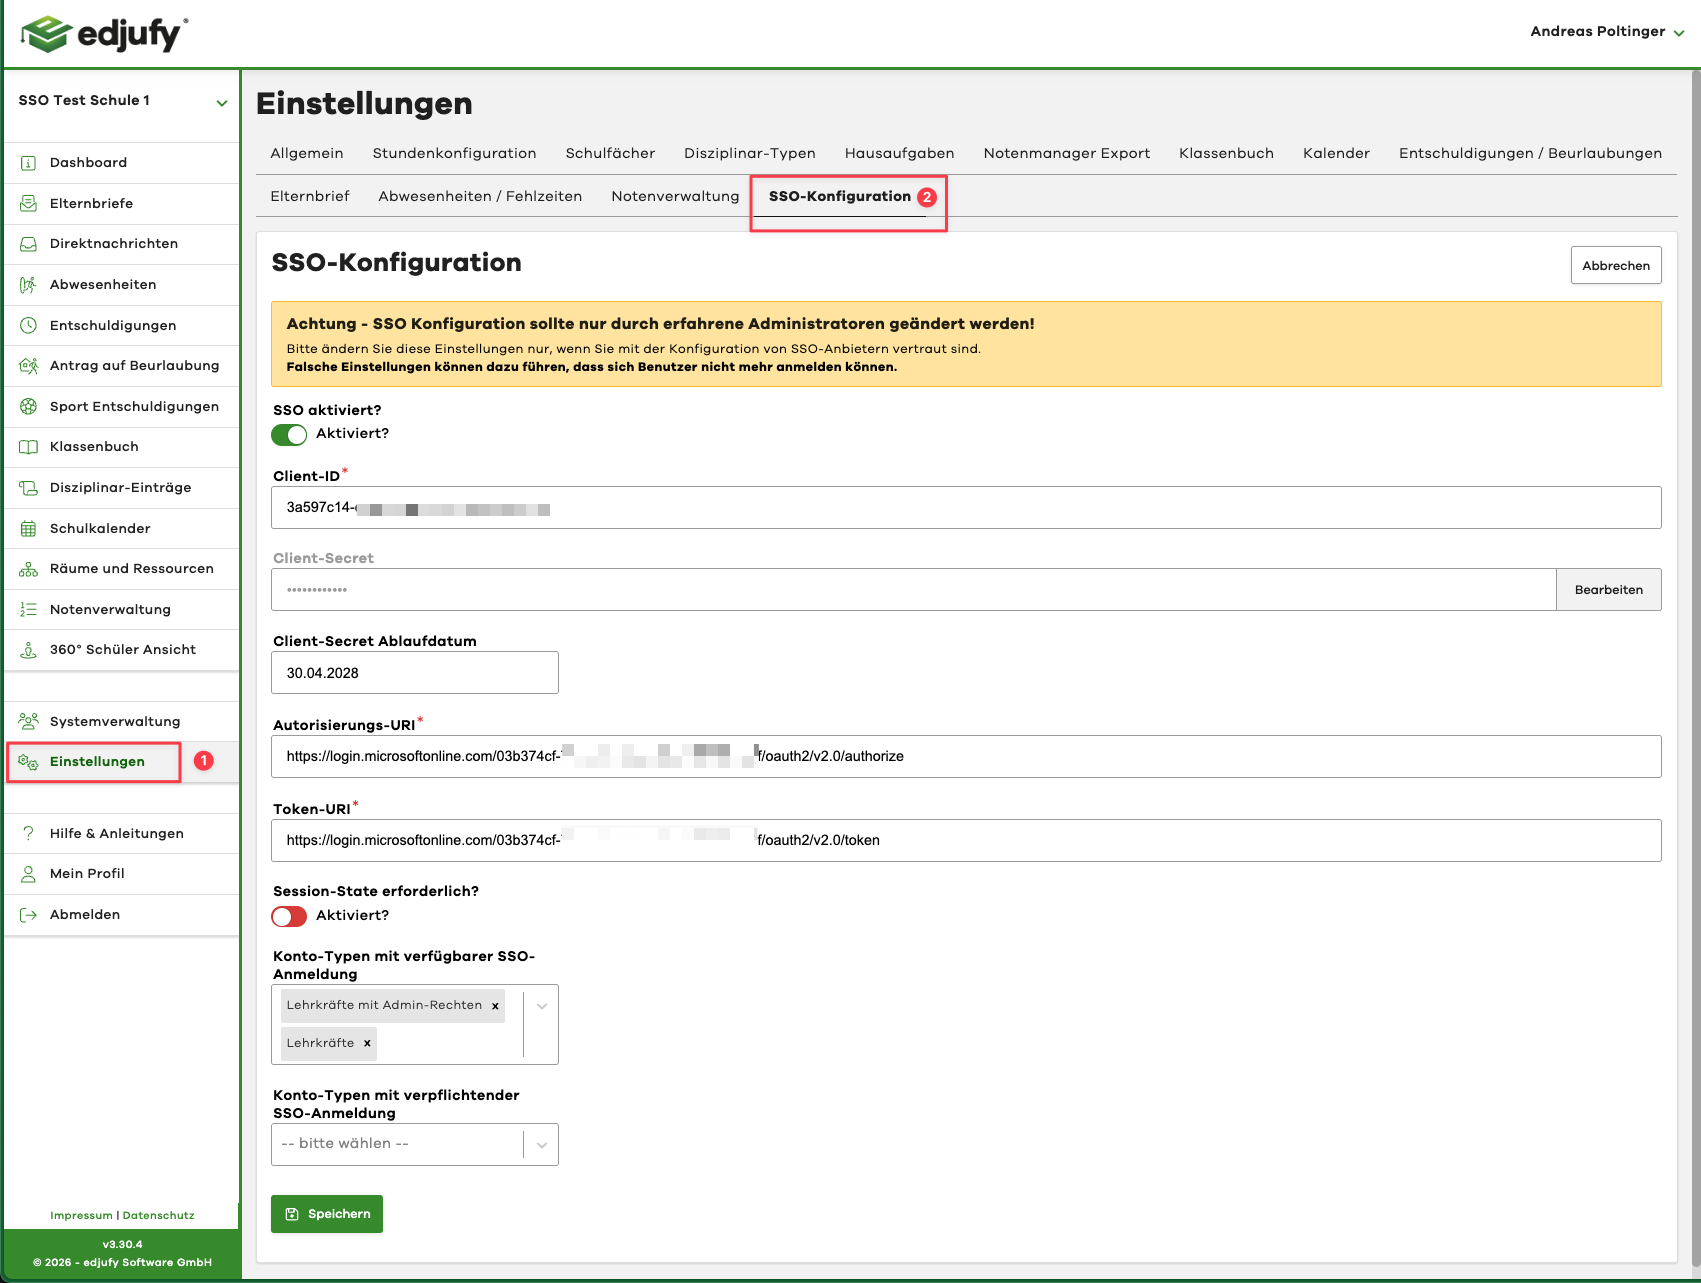
Step 5: Enter SSO Data in edjufy
- In edjufy, open Settings → SSO Configuration.
- Enter the values as follows (direct mapping):
| edjufy Field | Value from Entra ID |
|---|---|
| Client ID | Application (client) ID |
| Client Secret | Client secret Value |
| Client Secret Expiration Date | Expiration date of the secret (format dd.mm.yyyy) |
| Authorization URI | .../oauth2/v2.0/authorize |
| Token URI | .../oauth2/v2.0/token |
-
Session state required?
- Leave this option disabled by default, unless edjufy support provides different instructions.
-
Account types with available SSO login
- Select the account types that may use SSO (recommended: pilot start with one account type).
-
Account types with mandatory SSO login
- Only activate this once testing works reliably.
- Recommendation: Activate gradually after successful pilot.
-
Only enable Activate SSO? when all fields are completely filled in.
-
Click Save.
Optional: Restrict Access in Entra to Specific Users/Groups
If not every tenant user should have access:
- Open Microsoft Entra ID → Enterprise applications → (your edjufy SSO App).
- Under Properties, set Assignment required? = Yes.
- Under Users and groups, assign only the permitted users/groups.
Test
- Open an incognito/private window.
- Go to the edjufy login and select Login via SSO.
- Complete the login.
- Verify:
- The login works without error messages.
- The user is correctly created/assigned.
- Optional: Roles/groups are correctly mapped.
- Only then (if desired) activate mandatory SSO login per account type.
Troubleshooting (Common Errors)
- Redirect URI mismatch: The Redirect URI in Entra must exactly match the edjufy domain.
- Secret wrong or expired: Generate a new secret and update Client Secret and Expiration Date in edjufy.
- Assignment required active, but user not assigned: The user cannot log in.
- Wrong endpoints: Use the v2 endpoints (
/oauth2/v2.0/...). - Lockout due to "mandatory": Only set "mandatory" after successful testing and keep an admin rescue path available.